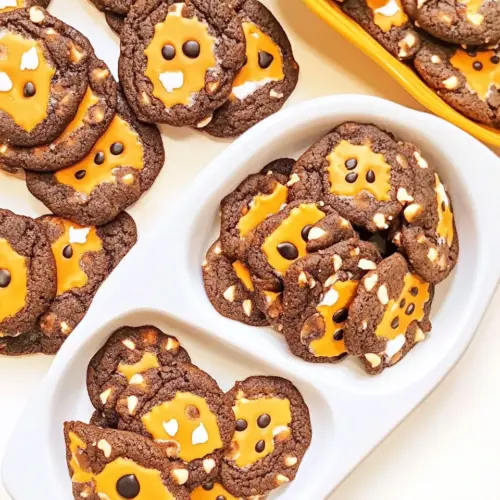
Vegan Halloween Cookies
Vegan Halloween Cookies are rich, chocolatey, and irresistibly festive, combining deep cocoa, brown sugar chew, and colorful candy for a playful bite. These easy to make cookies offer tender centers and slightly crisp edges, perfect for easy weeknight baking or last minute party trays. Make them for seasonal gatherings because they are quick, adaptable, and crowd pleasing.
Equipment
- Scale
- Wooden spatula
- Ice cream scooper with trigger
- Simple hand mixer
Ingredients
- 1/2 cup Vegetable oil Provide moistness and a tender crumb while acting as the primary fat in the dough; helps bind ingredients and contributes to softer texture in vegan cookies.
- 3/4 cup Dark brown sugar Add deep caramel-like sweetness and moisture while enhancing color; balances flavors and contributes chewiness to the cookie structure.
- 1/2 cup Granulated sugar Contribute sweetness and aid in spreading and texture control; help dissolve with other wet ingredients to create a smooth batter.
- 1/3 cup Apple sauce Introduce moisture and light acidity that can tenderize the dough while keeping the recipe vegan; contribute mild fruitiness and help with overall softness.
- 2 tsp Instant coffee Provide a subtle bitter and roasted note that enhances chocolate flavor; dissolve into the wet mixture to deepen the cookie’s overall taste profile.
- 1 tsp Vanilla extract Impart warm aromatic flavor and sweetness while rounding out bitter or roasted notes; blend into the wet mixture for even distribution.
- 2 + 1/4 cups All-purpose flour Create structure and bulk for the cookies by supplying gluten and starch; combine with leavening and wet ingredients to form the dough.
- 1/4 cup Dutch cocoa powder Deliver concentrated chocolate flavor and deepen color while contributing slight dryness; balance sweetness from sugars and intensify the cookie’s chocolate notes.
- 1 tsp Baking soda Act as a chemical leavening agent to help cookies spread and rise slightly; react with acidic components to create lightness in the crumb.
- 1/2 tsp Salt Enhance overall flavor by balancing sweetness and reinforcing other flavors; support dough consistency and preserve taste depth.
- 3/4 cup Dark chocolate chips Add pockets of melted chocolate that boost richness and create gooey texture contrasts; distribute throughout dough for intense chocolate bites.
- 3/4 cup Vegan Halloween M&Ms Provide colorful, crunchy inclusions that add visual festivity and a sweet, candy texture; scattered through the dough to give holiday-themed variation.
Instructions
- In a large bowl, combine oil, sugars, apple sauce, and vanilla. Use a hand mixer to beat together on low speed for 2 minutes until well emulsified.: The air should smell like sweet molasses and fruit as these elements meld, and you will notice the mixture glossy and slightly thick. I always use a bowl large enough to avoid splatter because the next mixing is vigorous, and letting ingredients sit briefly helps the brown sugar bloom into the oil. Why this matters, I tell myself, is that proper emulsification ensures even moisture and prevents sugary pockets. A common mistake is rushing to the mixer at high speed which can create over aeration, so start on low, and if you see separated oil, scrape and continue gently.
- Mix the instant coffee with the same amount of warm water and add it to the bowl.: As you blend, listen for a steady, quiet hum from the mixer, and watch the mixture become homogenous and slightly lighter in texture. This subtle aeration helps the cookie structure without creating cake like airiness. I keep the mixer moving so the sugars fully dissolve into the oil, creating a smoother dough. If you skip this or mix too briefly, the dough can be uneven, leaving sugar grains unincorporated which will affect texture.
- Stir in the flour, Dutch cocoa powder, salt, and baking soda until completely incorporated. The mixture should be very thick but still soft. If too stiff, add 1-2 tablespoons of non-dairy milk.: Dissolving the Instant coffee first prevents gritty flecks and allows the coffee to disperse evenly, lending a rounded chocolate depth. When warm water releases the aroma, it is a good sign the coffee is ready to enrich the dough. I add it slowly while stirring so it integrates without making the batter seam overly wet. Avoid pouring hot water directly into the bowl as it can change the emulsification and lead to a loose dough.
- Fold in both chocolate chips and M&Ms.: As you fold these dry items in, you will see the dough darken into a rich chocolate color and thicken noticeably, shifting from glossy to stiff and malleable. I prefer stirring until no streaks remain because pockets of flour cause uneven baking. The tactile cue is the dough pulling away from the bowl sides while still being pliable. If the dough becomes rock hard, it likely has too much flour, so add a tablespoon of non dairy milk to rescue the texture.
- Cover and allow to chill for at least 30 minutes to prevent spreading.: When you touch the dough lightly, it should hold its shape and stick slightly to your finger, not crumble. This texture ensures the cookies bake up tender yet cohesive. I rely on visual and tactile feedback here, because oven performance varies. If you ignore this and the dough is too soft, the cookies will spread too much; if too firm, they will be dense and dry.
- Preheat oven to 375°F/190 C. Line baking sheets with parchment.: Adding a small amount of liquid brings the dough back to the desired pliability and prevents dry, chalky bites. I incorporate it one tablespoon at a time, folding gently until the dough relaxes, and the warmth of my hands helps redistribute moisture. The why is simple, moisture controls tenderness and spread. A frequent error is adding too much liquid at once, turning the dough into a batter, so measure carefully.
- Scoop 2 tablespoons amounts of dough. Roll into balls and place 2-3 inches apart on a lined baking sheet.: At this point the dough takes on texture and bursts of sweetness, creating a mosaic of dark chocolate and candy colors. I fold slowly to avoid crushing the candies and to ensure chips remain whole, distributing them with visual balance. The dough will feel studded, and the slight resistance as you fold tells you when distribution is complete. Over mixing after this step can cause candy shells to bleed color and the chips to soften too early.
- If you want pillowy, soft cookies, don't flatten them. If you want chewy, thinner ones, flatten them with a small glass, at most 1 inch thick.: Chilling firms the fat and gives the flour time to hydrate, which results in a taller, chewier center after baking. I often press plastic wrap directly to the dough surface to avoid a skin forming, and chilling also deepens the flavors. If you skip chilling, the cookies will likely spread excessively and become thin and flat, so resist the urge to bake immediately.
- Bake for 8-12 minutes until just barely golden brown around the edges. I need 12 minutes in my non-fan oven to get them perfect.: A fully preheated oven creates immediate edge setting, giving the cookies those slightly crisp ridges. I always check the temperature with an oven thermometer because many ovens run hot or cold, and parchment prevents sticking while promoting even bottoms. A common oversight is placing trays in a still warming oven which leads to uneven spread and texture.
- Remove from the oven and cool them on the baking sheet for at least 10 minutes before moving to a cooling rack. Cookies will puff up more in the oven and collapse slightly as they cool.: Using a scoop creates uniform cookies that bake evenly and look consistent on a platter, and you will hear a faint thud as you release dough from the scoop. I prefer an ice cream scooper because it gives tidy, round mounds and reduces handling, which warms the dough. If you eyeball the sizes, expect differences in baking time and texture between larger and smaller cookies.
- Roll into balls and place 2 to 3 inches apart on a lined baking sheet: The spacing allows the cookies room to spread without colliding, and as they warm the edges will soften and gently expand. I arrange them methodically so each cookie gets the same heat exposure, and the visual cue to watch for in the oven is a slight doming followed by edge set. Crowding the sheet is a frequent mistake that causes merging and inconsistent browning.
- If you want pillowy, soft cookies, do not flatten them: Leaving the mounds intact traps more interior steam, which leads to a softer, cakier middle. I love this texture when I want plush cookies fresh from the oven. For a chewier, thinner result, gently press each mound with a glass to about 1 inch thick, which encourages more even browning. Avoid pressing too hard or the cookie will become wafer like and lose its tender center.
- If you want chewy, thinner ones, flatten them with a small glass, at most 1 inch thick: Pressing increases surface area and caramelization, creating a pleasing chew and crisp edges. I press once and try not to overwork the surface so the texture stays balanced. The key is restraint, flattening just enough to influence the final consistency. Excessive flattening results in overly crisp cookies that lack interior softness.
- Bake for 8 to 12 minutes until just barely golden brown around the edges: The aroma of chocolate will intensify and the edges will gain a delicate golden rim while the centers remain noticeably darker and slightly soft. I watch closely during the final minutes because small changes in time make a big difference; my non fan oven needs the full 12 minutes for perfect doneness. If you leave them too long they will harden, so pull them when edges are set and centers still look a touch underdone.
- Remove from the oven and cool them on the baking sheet for at least 10 minutes before moving to a cooling rack: The cookies continue to set as they cool, and the resting period prevents them from breaking apart when transferred. I enjoy watching them relax, the centers sinking slightly as the steam escapes, and that moment often reveals the ideal chew. Rushing this step is a common error and can lead to misshapen or crumbly cookies.
- Cookies will puff up more in the oven and collapse slightly as they cool: Expect this natural transformation, it signals proper leavening and moisture balance, producing a tender center with a lightly crisp edge. I use this visual change as my cue for doneness and slicing confidence. Trying to force structure before cooling will ruin the delicate balance you worked to achieve.
Notes
- Measure flour correctly by spooning into the cup and leveling with a knife to prevent overdense dough and dry cookies.
- Chill the dough for at least 30 minutes to control spread and let flavors meld, especially in warm kitchens.
- Dissolve instant coffee first in warm water to avoid gritty bits and to amplify the chocolate without tasting like coffee.
- Use an ice cream scooper for consistent portions so cookies bake evenly and look uniform on a platter.
- Sift cocoa if clumpy to prevent streaks and ensure even color and texture throughout the dough.
- Cool on the baking sheet for at least 10 minutes so cookies set and transfer cleanly to a rack.