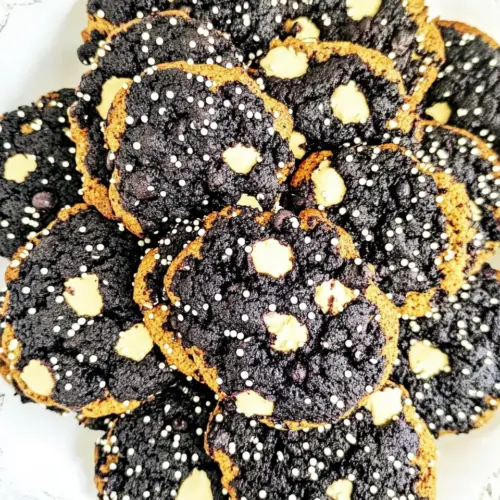
Vegan Blueberry Cookies
Vegan Blueberry Cookies are soft, tender cookies studded with bright blueberries and creamy white chocolate chips. They have a subtle lemon lift and a chewy edge that makes them perfect for easy weeknight baking or baking for a crowd. Simple pantry items and a quick chill produce consistently delicious results, making them worth a try whenever you crave a comforting, plant based bake.
Equipment
- Scale
- Wooden spatula
- Ice cream scooper with trigger
- Simple hand mixer
Ingredients
- 1/2 cup Vegetable oil Provide neutral, long-lasting fat that creates a tender crumb and helps cookies spread; use at room temperature for even mixing and a soft texture. Vegetable oil keeps cookies moist and contributes to a chewy mouthfeel without affecting flavor significantly.
- 3/4 cup Dark brown sugar Add deep, caramel-like sweetness and moisture while lending a rich color and slight molasses aroma to the dough. Dark brown sugar also helps retain softness and a chewy center during baking due to its higher moisture content.
- 1/2 cup Granulated sugar Contribute clean, granular sweetness and help balance the deeper flavors from brown sugar while aiding in light browning. Granulated sugar also helps create a crisp edge when creamed with fat and dissolves into the dough for proper texture.
- 1/3 cup Blueberries frozen, thaw, without liquid Provide bursts of fruity flavor and slight tartness while contributing moisture and visual interest; thaw and drain well to avoid excess liquid. Frozen blueberries add seasonal availability and intense blueberry notes without altering the dough structure when gently folded in.
- 1 tsp Vanilla extract Give floral, sweet aromatic notes that brighten and enhance the overall flavor profile of the cookies. Vanilla extract rounds out the sugars and fruit, adding complexity and a familiar dessert aroma when mixed into the dough.
- 2 + 1/2 cups All-purpose flour or GF flour blend Form the structural base of the cookies, supplying gluten (or equivalent structure in GF blends) to give chew and shape. All-purpose flour or a GF flour blend determines texture and stability, so choose the appropriate blend for desired density and bite.
- 1 tbsp Lemon zest (grated) Impart concentrated citrus brightness and aromatic oils that cut through the sweetness and complement the blueberries. Lemon zest adds a fresh, zesty lift and enhances overall flavor without adding extra liquid.
- 1 tsp Baking soda Act as a chemical leavening agent that reacts with acids to produce carbon dioxide, promoting rise and lightness in the cookie. Baking soda also aids browning and helps neutralize acidity from brown sugar and blueberries for balanced flavor.
- 1/2 tsp Salt Enhance overall flavor by balancing sweetness and rounding other ingredients while slightly strengthening gluten development. Salt also improves aroma and depth, ensuring the cookie flavors are well-defined rather than flat.
- 1 + 1/2 cups White chocolate chips Introduce pockets of sweet, creamy morsels that contrast the fruity blueberries and chewy cookie matrix for texture and richness. White chocolate chips add concentrated sweetness and melt into creamy bits that elevate each bite.
Instructions
- In a large bowl, combine oil, sugars, frozen but thawed blueberries, and vanilla. Use a hand mixer to beat together on low speed for 2 minutes until well emulsified.: You should hear the gentle whir of the mixer and see the sugars dissolve into the vegetable oil , creating a glossy, slightly thick mixture. The aroma will be a soft meld of brown sugar and vanilla, with hints of the thawed blueberries . This emulsification helps distribute fat evenly, so the dough bakes consistently; if you rush on high speed you risk over aerating and creating a cakier cookie. A common mistake is leaving large pockets of oil, which leads to uneven texture, so scrape the bowl sides and ensure everything looks homogeneous before moving on.
- Stir in the flour, lemon zest, salt, and baking soda until completely incorporated. The mixture should be very thick but still soft. If too stiff, add 1-2 Tablespoons of non-dairy milk.: As you fold in the all purpose flour , the dough will change from glossy to a thicker, dense mass speckled with bright lemon bits. The sound becomes quieter as the mixture loses moisture, and you should see no streaks of flour. The zest will perfume the dough with citrus oil, lifting the sweetness. This step builds the structure, so avoid overmixing which can develop gluten and make the cookies tough. If your dough flattens or tears while stirring, you may have added too much liquid earlier, so chill briefly to firm it up before shaping.
- Fold in the white chocolate chips.: The act of folding prevents breakage of the blueberries while evenly distributing the white chocolate chips . You want to feel the chips tuck into the dough, and visually the dough should be studded throughout. Folding maintains a gentle texture and stops the dough from becoming overworked. A frequent error here is applying high speed mixing which can crush berries and turn the dough purple, so always fold by hand or on the lowest mixer speed.
- Cover and allow to chill for at least 30 minutes to prevent spreading.: Chilling solidifies the vegetable oil and allows the flour to hydrate, which yields cookies that bake up thicker with a tender interior. You will notice the dough firming and colors deepening slightly. Chilling also helps flavors meld, especially the lemon zest and vanilla. If you skip chilling, expect flatter cookies that spread more; if the dough is too cold and hard to scoop, let it sit for a few minutes at room temperature.
- Preheat oven to 375°F/190 C. Line baking sheets with parchment.: The oven will hiss as it reaches temperature and the parchment will create a nonstick layer that prevents bottoms from browning too quickly. The specified temperature encourages a quick set at the edges while keeping the center soft. Make sure the oven rack is centered for even heat, and avoid opening the door repeatedly which causes temperature fluctuations. A common misstep is baking on a dark pan without compensating with slightly lower temperature, which can overbrown the bottoms.
- Scoop 2 Tbsp amounts of dough. Roll into balls and place 2-3 inches apart on a lined baking sheet.: Using an ice cream scooper with trigger ensures uniform sizes, so cookies bake evenly and finish at the same time. As you roll, you should feel a soft, slightly tacky dough with chips peeking out. The distance on the sheet gives them room to spread without merging. If you crowd the pan, cookies may fuse together; if they are inconsistent in size, some will overbake while others remain underdone.
- If you want pillowy, soft cookies, don't flatten them. If you want chewy, thinner ones, flatten them with a small glass, at most 1 inch thick.: Leaving the dough mounded produces a dome that will bake into a soft, pillowy center with gently craggy edges. Flattening increases surface area and yields more chew and crisp at the edges. Listen for small crackles as the surface sets in the oven, which indicates good edge development. Avoid pressing so thin that the centers dry out, that is a common mistake when aiming for chewy texture.
- Bake for 8-12 minutes until just barely golden brown around the edges. I need 12 minutes in my non-fan oven to get them perfect.: In the oven the aroma will shift to a more toasty, caramelized scent as the sugars brown. Look for a very light golden rim forming and a slightly glossy center which indicates they are set but still soft. The variance in time reflects different ovens, so start checking near the lower end. Overbaking is the most frequent error, which results in dry cookies, so remove them when edges are colored and centers still look slightly underdone.
- Remove from the oven and cool them on the baking sheet for at least 10 minutes before moving to a cooling rack. Cookies will puff up more in the oven and collapse slightly as they cool.: Cooling on the sheet lets the cookies finish setting gently while retaining moisture. You will feel the warmth rising off them and notice a slight deflation as steam escapes, signaling that the interior is tender. Transferring too early can cause them to break, while leaving too long may lead to steam collecting underneath and softening the bottoms. If cookies seem gummy after the recommended time, give them a few extra minutes; patience here preserves texture and shape.
Notes
- Swap chips thoughtfully: Replace some or all of the white chocolate chips with vegan dark chips for a more pronounced contrast to the blueberries, keeping chip quantity the same so the dough balance is maintained.
- Adjust berry amount: If you prefer more fruit, gently fold in an extra two tablespoons of thawed blueberries, but blot them dry first to prevent extra moisture from loosening the dough.
- Flour choices: Use a 1 to 1 gluten free flour blend in place of all purpose flour if needed, and expect a slightly different crumb; chill time helps keep the texture consistent.
- Lemon lift: Increase the lemon zest by a half teaspoon for a brighter citrus note, but avoid adding white pith which brings bitterness.
- Firming liquids: If your dough is stiff from absorbent ingredients, add non dairy milk one tablespoon at a time until the feel is soft but not slack, testing by scooping a small ball to see if it holds.
- Make ahead: Shape dough balls and freeze them on a sheet pan, then transfer to a container; bake from frozen adding a couple of minutes to the bake time for fresh baked results anytime.