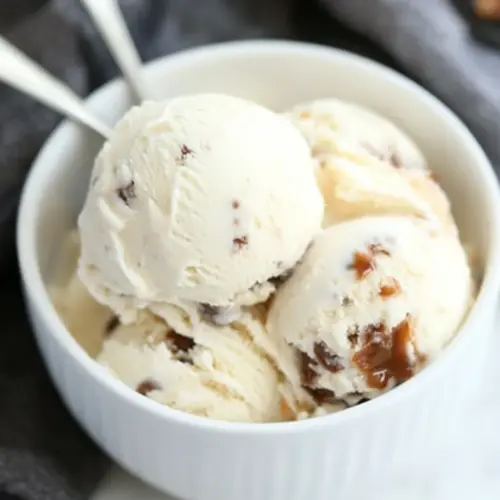
Vanilla Caramel Swirl Ice Cream
Vanilla Caramel Swirl Ice Cream is a creamy, custardy frozen treat with ribbons of homemade caramel weaving through a rich vanilla base. This easy to love dessert delivers silky texture, deep toasted sugar notes, and a balanced sweetness that feels indulgent yet approachable, perfect for summer gatherings and weeknight celebrations.
Equipment
- Saucepan
- Whisk
- Fine-mesh strainer
- Ice Cream Maker
- Heatproof Bowl
Ingredients
- 5 egg yolks Richly emulsify and add body to the custard base, creating a silky, creamy texture while contributing natural richness and structure through proteins and fats; temper carefully with warm dairy to avoid scrambling and cook to a thick, ribbon-like consistency for proper freezing stability.
- 1/2 cup packed dark brown sugar, divided Deeply sweeten and provide a complex molasses note when divided between custard and caramel swirl; dissolve the majority into the custard for flavor and browning while reserving some to create a dark, glossy caramel for ribbons that contrast the vanilla base.
- 1 3/4 cup heavy cream Luxuriously enrich and impart a high-fat creaminess that yields a smooth, scoopable ice cream; heat gently with milk to infuse flavors, then chill the mixture thoroughly before churning to ensure small ice crystals and a decadent mouthfeel.
- 3/4 cup whole milk Lightly thin and balance the dairy ratio for optimal freezing and texture, contributing lactose sugars that support browning and sweetness perception; combine with cream and heat to dissolve sugars and meld flavors prior to tempering into yolks.
- 1/4 teaspoon kosher salt Subtly enhance flavor by balancing sweetness and amplifying other components, while also slightly raising the freezing point which softens the final texture; stir in during heating to distribute evenly without drawing attention away from vanilla and caramel notes.
- 2 teaspoon vanilla bean paste (may use vanilla extract if desired) Intensely flavor the base with concentrated vanilla aroma, delivering fragrant, floral, and sweet notes that define the profile; add near the end of cooking or after cooling to preserve volatile aromatics and ensure a pronounced vanilla character throughout.
Instructions
- In a large Pyrex measuring cup or heatproof bowl, whisk the yolks with 1/4 cup of the brown sugar. Set aside.: The aroma of whisked **egg yolks** and **brown sugar** is lightly sweet and comforting, and whisking until the mixture is smooth ensures even incorporation when the hot dairy is tempered in. This matters because it prevents the yolks from cooking into curds when hot liquid is added, giving you a silky custard. A common mistake is rushing and adding hot liquid too quickly, which causes scrambled bits. If that happens, strain and try to salvage it, but temper slowly and keep whisking to avoid this issue.
- In a heavy saucepan, stir together the cream, milk, salt, and the remaining 1/4 cup of brown sugar and put the pan over medium-high heat.: As the **heavy cream**, **whole milk**, **salt**, and **brown sugar** warm, you will notice a sweet steam rising and small bubbles forming at the edges. Heating gently is important to dissolve the sugar fully and extract flavor into the dairy. Stirring helps prevent the milk proteins from sticking and scorching on the pan bottom. A frequent error is overheating too fast, which can scorch the mixture and produce off flavors. Use medium-high then reduce as needed to maintain control.
- When the mixture starts to simmer, decrease the heat.: You will see tiny bubbles around the edges and a thin film may form on the surface, signs that the dairy is hot enough for tempering. Lowering the heat slows the rise and gives you control when adding hot cream to the yolks. This step matters because rapid boiling can denature proteins and change texture. Avoid a rolling boil, which risks uneven heating and a broken custard.
- Remove about 1/2 cup of the hot cream mixture while constantly whisking the eggs, and slowly drizzle the cream into the egg yolks.: As you whisk and add the hot **cream**, you will feel the mixture warm and thicken slightly, becoming glossy. This controlled tempering warms the yolks gradually to prevent curdling, and the visual cue is a smooth, homogeneous mixture. A common mistake is adding the hot cream too fast, which cooks the yolks and leaves lumps. Keep a steady hand and whisk vigorously to disperse heat evenly.
- Repeat with another 1/2 cup of hot cream, then pour the egg-cream mixture back into the saucepan, whisking as you pour.: The texture will transition to a cohesive, warm custard that flows smoothly off the whisk. Pouring back into the pan while whisking helps blend everything without forming bits, and it sets you up for the final thickening on the stovetop. If you skip whisking here, you risk uneven cooking and textural defects, so stay attentive.
- Cook the mixture carefully over medium heat, stirring constantly, until it is thickened, about 1-2 more minutes.: The custard will change from runny to coating the back of a spoon, leaving a clean line when you run your finger through it. You will hear a gentle, low simmer and smell richer, toasted dairy. Constant stirring prevents hot spots and ensures a smooth finish. A common pitfall is undercooking, which yields a thin base, or overcooking, which makes a grainy texture. Remove from heat at the coating stage.
- Strain the custard mixture through a fine-mesh strainer into a clean container. Set the container into an ice-water bath (I fill my sink with ice cubes, then adds some water). Stir occasionally, till cool.: As the custard passes through the strainer, any tiny cooked bits are removed, leaving a satiny mixture. The ice bath stops residual cooking and cools it rapidly so bacteria growth is minimized and texture improves. You will notice the steam fading and the surface smoothing as it chills. Don't skip straining, because small curdled pieces can ruin the texture.
- Stir in the vanilla bean paste.: When you add the **vanilla bean paste**, it releases aromatic flecks and a floral, warm scent that brightens the custard. Stirring distributes the vanilla evenly and integrates flavor. If the custard is still warm, the aroma will intensify; if chilled, the scent will be subtler, so adjust amounts to taste. Overdoing vanilla can overpower the caramel, so use the recommended quantity.
- Remove the container from the ice-water bath, cover it with plastic wrap, and refrigerate for at least 2 hours or overnight.: Refrigeration lets the custard firm slightly and lets flavors meld, producing a smoother churn. The cool base also shortens churning time and improves overrun, resulting in denser ice cream. Overnight resting deepens the flavor, so if you can plan ahead, you will be rewarded. A common mistake is churning warm base, which creates icy texture and underdeveloped flavor.
- While the ice cream base cools, make the caramel.: As you begin the caramel, you'll notice a nutty, fragrant scent as sugar melts and then deepens as color develops. Caramel requires attention, since the visual cue of color is your safety net. Keep your cream ready, because adding it while the sugar is hot causes vigorous bubbling. If the caramel gets too dark, it becomes bitter, so pull it off the heat at the right hue and proceed carefully to tame the bubbling when cream is added.
- Set the warm cream by the stove so it's at hand when you need it. Put 2 tablespoons of the sugar in a heavy saucepan over medium-high heat. When the sugar is melted around the edges and starts to turn golden, stir the mixture gently and add another 2 tablespoons of sugar to the pan.: Melting small amounts helps the sugar melt evenly and prevents clumping. As the sugar liquefies, you will hear a soft sizzle and watch it transition from clear to pale gold. Adding sugar gradually controls heat distribution so the caramel darkens uniformly. A common error is dumping all the sugar in at once, causing crystals and uneven browning. Work steadily and with patience.
- Continue to add the remaining sugar 2 tablespoons at a time, stirring frequently and allowing most of the sugar to melt before you add more. Watch carefully as the sugar darkens, stirring gently to help it melt evenly.: The sugar will progress through stages from clear to amber, releasing an increasingly toasty, toasted aroma. Gentle stirring keeps the mass uniform and prevents scorching on the pan sides. This matters because even color development yields balanced caramel flavors. If sugar crystals form on the pan sides, brush them down with a wet pastry brush to avoid recrystallization.
- When all the sugar has caramelized, slowly add the cream. It will bubble furiously.: Expect an aggressive bubbling and a burst of steam as the hot caramel contacts the warm **cream**. The sound is loud and the color will momentarily lighten as the sugar dissolves into the dairy. Stirring will smooth the sauce into a glossy, pourable caramel. Wear an oven mitt and pour cautiously to avoid splatters. If lumps persist, keep the heat low and stir until they dissolve.
- When the bubbling slows down, gently stir in the cream to blend. If you have any hard sugar lumps, just keep the burner on low and cook till the sugar melts. Stir in salt and vanilla and allow to cool to room temperature.: After the furious bubbles subside, the caramel becomes silky and thick, with a deep amber color and a complex toasted aroma. Adding **salt** heightens the sweetness and rounds the flavor, while **vanilla** deepens aroma. Cooling to room temperature is key so the caramel doesn't melt the churned ice cream when layered. If you heat too aggressively to remove lumps, you may darken the flavor too much.
- Freeze the ice cream as directed by your ice cream maker.: Churning transforms the chilled custard into a thick, creamy ice cream with aeration that feels smooth on the tongue. You will hear the machine quiet as overrun decreases and the mixture thickens to soft serve consistency, with a faint, sweet dairy scent. Properly chilled base and correct churn time prevent iciness. A common mistake is underchurning short of the right texture, producing a loose, slushy result.
- When the ice cream is frozen, layer about a third of it into your container. Drizzle 2 tablespoons of caramel on top of the ice cream, then repeat again two more times. You will have leftover caramel.: The act of layering creates beautiful marbling and varied bites. The cold ice cream and viscous caramel contrast in temperature and mouthfeel, producing a delightful interplay. Leaving some caramel aside gives you flexibility for serving. Avoid stirring too vigorously when layering, or you will lose the defined ribbons that make each scoop interesting.
- Use a knife or a chopstick to swirl the caramel. If you prefer softer ice cream, eat it right away or else freeze for about 4 hours before serving.: Swirling creates ribbons of glossy caramel that show up in scoops as sticky pockets of flavor. Use long, gentle strokes to avoid overmixing the layers; the visual cue is a marbled pattern rather than uniform blending. Eating immediately yields a softer texture, while additional freezing firms the ice cream for clean scoops. Do not over-swirl, because the caramel can become fully incorporated and lose its distinct pockets.
Notes
- Chill the base thoroughly before churning to ensure your ice cream churns faster and ends up smooth rather than icy, which is crucial for achieving that dense, creamy texture.
- Control caramel color carefully, pulling the sugar off the heat when it reaches a deep amber, to avoid bitterness and to secure a rich, toasty flavor without overcooking.
- Temper the yolks slowly by drizzling hot cream in gradually while whisking, to prevent scrambled eggs and to maintain a velvety custard base.
- Reserve some caramel for serving, because the sauce intensifies in flavor as it cools and makes a lovely topping beyond the swirl inside the ice cream.
- Do not over-swirl when layering caramel, a few gentle passes will create those beautiful ribbons that give textural contrast in each scoop.