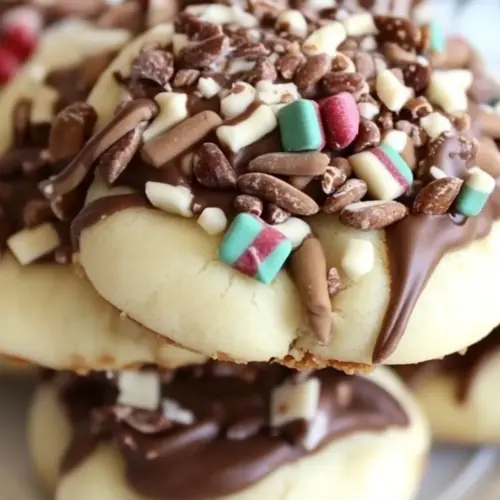
Turtle Cookies
Turtle Cookies are rich, chewy chocolate sandwich cookies filled with a creamy caramel buttercream and dipped in glossy chocolate chips with crunchy toasted pecans. These easy to assemble treats offer a luxurious combination of textures and flavors, perfect for holiday gifting or cozy gatherings. Make them for a festive crowd and watch them disappear.
Equipment
- Oven
- Baking Sheet
- Parchment Paper
- Hand Mixer
- Mixing Bowls
- Rolling Pin
- Wax paper
Ingredients
- 10 tablespoons butter Soften and cream to provide rich fat that enriches the cookie dough, contributes tenderness, and helps with leavening when beaten with sugar. Ensure room temperature to allow even mixing and a smooth, cohesive batter for proper texture.
- 3/4 cups sugar Sweeten and aerate the dough by creaming with butter, creating structure and lightness while balancing flavors; adjust slightly if using very sweet mix-ins. Measure accurately to maintain cookie spread and chewiness.
- 1 egg Bind and add moisture while contributing slight richness and structure through protein that helps set the cookie as it bakes. Beat until incorporated to ensure even texture and to help with leavening interaction.
- 1/2 teaspoon vanilla Flavor and enhance sweetness with a warm aromatic note that complements chocolate and caramel; add to batter for depth. Use pure extract for best flavor clarity and stir in with wet ingredients to distribute evenly.
- 1/2 teaspoon salt Season and enhance other flavors while controlling sweetness; also strengthens gluten slightly which can affect texture. Dissolve well into wet ingredients to ensure even seasoning throughout the dough.
- 1/2 + 1/8 teaspoon baking powder Leaven and lighten the dough using a specific combined amount that provides lift without over-expansion; the split measurement balances rise precisely. Mix thoroughly into dry ingredients to ensure even distribution and consistent rise.
- 1/3 cup cocoa Color and intensify chocolate flavor while adding slight dryness that affects crumb; sift or whisk into flour to prevent lumps. Balance cocoa with sugar and fat to avoid a dry or overly bitter cookie.
- 1 3/4 cups flour Structure and bulk the cookies by supplying gluten-forming proteins and starches that determine texture and chewiness. Spoon and level when measuring to avoid packing, ensuring accurate dough consistency.
- 1/4 cup unsalted butter, softened Cream and blend into the caramel layer to create a smoother, richer topping with added fat that helps melding with powdered sugar and chocolate. Soften to room temperature so it incorporates easily without lumps.
- 1/2 cup caramel sauce (I love Trader Joe’s Salted Caramel) Sweeten and add a gooey, chewy center component that pairs with pecans and chocolate; use a high-quality sauce for best flavor and texture. Warm slightly if very thick to make dolloping or spreading easier.
- 1 1/2 cups powdered sugar Stiffen and form the caramel topping into a smooth, pipeable or spreadable mixture when combined with softened butter and vanilla. Sift if necessary to remove lumps and achieve a silky finish for the cookies.
- 1/2 teaspoon vanilla Flavor and enhance the topping with a second boost of warm aromatic character that complements both caramel and chocolate. Add with powdered sugar and butter to create a cohesive, flavorful icing or filling.
- 1/2 cup pecans, chopped and toasted Toast and provide crunchy texture along with nutty, aromatic flavor that contrasts the sweet caramel and chocolate; chop to distribute evenly. Toast lightly to deepen flavor but avoid burning to preserve pleasant bitterness.
- 1 cup chocolate chips Melt and add pockets of intense chocolate that create melty, rich bites throughout the cookie; choose quality chips for best melt and taste. Fold in near the end of mixing to prevent overworking the dough and to keep chip shape.
Instructions
- Preheat oven to 375°. Line baking sheets with parchment paper. Beat butter and sugar together until creamy. Add eggs and vanilla and mix well. Mix in baking powder, salt, and cocoa. Beat until well blended. Add flour 1/2 cup at a time. The dough will seem sticky, but it will come together just right. Roll out the dough on a lightly floured surface (no need to refrigerate first) and cut your cookies into whatever shape/size you want. I used small circles, because let’s be honest…it’s a sandwich cookie and we’ll be eating two cookies for every one treat we eat. Bake about 5-6 minutes depending on size and let cool before filling.: You will notice a warm, dry smell from the oven as it approaches temperature, which ensures the cookies bake quickly and keep a tender interior. For even baking use a middle rack, and avoid opening the door frequently since temperature fluctuations can lead to uneven rise. A common mistake is not preheating long enough, which produces dense, underbaked cookies.
- Cream butter and caramel sauce with a hand-held mixer until well combined. Slowly beat in powdered sugar and vanilla. Mix until smooth. Line up your cookies and frost half of them with the buttercream. Close your sandwiches with the other cookie.: The parchment gives a subtle barrier that prevents sticking while allowing the bottoms to brown evenly, and it also makes cleanup effortless. When sliding the pan in, listen for the faint clink of pan meeting rack, then walk away until the visual cues appear. If you skip parchment, cookies can spread too much or stick, making removal messy.
- Melt chocolate chips (using a microwave or double boiler, whatever floats your boat). Place your pecans in a shallow bowl. Dip half of each cookie into the melted chocolate and then the pecans. Place on a wax-paper lined cookie sheet and chill until firm.: As you cream cold and room temperature butter with sugar , you should see the mixture lighten in color and become glossy, which indicates air incorporation for structure. The sound changes from heavy thuds to a smoother, faster beating. Overbeating can make the dough too soft, so stop when it looks pale and fluffy.
- Add eggs and vanilla and mix well: When you blend in the egg and vanilla , the mixture will momentarily look slightly curdled before smoothing out; steady mixing yields a uniform, satiny texture. This step hydrates the dough and helps emulsify the fats. If you add cold egg straight from the fridge, the batter may seize, so bring ingredients to room temperature.
- Mix in baking powder, salt, and cocoa: Adding the dry leavening and cocoa now distributes lift and chocolate flavor evenly, and the batter will darken and smell chocolaty. Sift if you want an extra-smooth blend, which avoids lumps. Forgetting to mix these well can leave pockets of baking powder, causing uneven rise.
- Beat until well blended: Continue mixing until the texture is homogeneous and the cocoa shows no streaks, resulting in a consistent chocolate hue and aroma. Smoothness at this stage sets the baseline for a uniform cookie crumb. Under mixing leaves streaks and inconsistent taste.
- Add flour 1/2 cup at a time: As you fold in the flour in increments, the dough will transition from sticky to pliable, and you will feel it gather on the paddle or spatula. This staged addition avoids overworking gluten. If you dump all the flour at once you risk a tough, overdeveloped dough.
- The dough will seem sticky, but it will come together just right: Touching the dough reveals a tacky surface that becomes smoother as the flour is fully incorporated; trust the process rather than adding extra flour , which would dry it out. The correct tackiness yields tender cookies after baking. A common error is adding extra flour too soon, creating a dry texture.
- Roll out the dough on a lightly floured surface: Rolling gives you control over thickness; you should see a uniform sheet with a soft, matte sheen and feel slight resistance under the rolling pin. Light dusting prevents sticking without drying edges. Pressing too hard will make the cookies dense, so aim for gentle, even pressure.
- Cut your cookies into whatever shape or size you want: Visual cues are key here, smaller circles will bake faster and produce dainty sandwiches, while larger shapes yield more substantial treats. Arrange cut pieces with spacing to allow gentle spread. Overcrowding the pan causes cookies to merge and lose their defined edges.
- I used small circles, because let’s be honest…it’s a sandwich cookie and we’ll be eating two cookies for every one treat we eat: Small rounds lead to perfect sandwich proportions and a delightful bite to crumb ratio, and they tend to bake quicker, giving edges a delicate crisp while keeping centers tender. This results in neat filling distribution when you assemble. Choosing very irregular sizes causes uneven baking and unpredictable assembly results.
- Bake about 5 to 6 minutes depending on size and let cool before filling: In the oven you will watch the edges set and the centers appear slightly soft, and a gentle spring back when touched means they are done; overbaking dries them out. Cooling allows crumb to firm so the sandwich filling does not melt through. Removing too early leads to collapsing or tearing when you fill.
- Cream butter and caramel sauce with a hand held mixer until well combined: The filling will turn glossy and smooth as the butter and caramel emulsify, releasing a sweet, warm aroma; this texture is essential for spreadability. Use room temperature butter for an even blend. If the mix looks grainy, it likely needs more beating or slightly warmer butter .
- Slowly beat in powdered sugar and vanilla: Adding the powdered sugar gradually ensures a silky filling rather than a gritty one, and the mixture will thicken to a pipeable consistency while smelling sweet and fragrant from the vanilla . If you add the powdered sugar too quickly, you risk a cloud of sugar and an uneven texture.
- Mix until smooth: A well mixed filling will hold its shape but still be soft enough to spread, and it should taste balanced between buttery richness and caramel sweetness. Scrape the bowl to ensure no pockets of powdered sugar remain. Under mixing leaves gritty spots that are noticeable when biting.
- Line up your cookies and frost half of them with the buttercream: Use a small spatula or piping bag to apply a consistent amount of filling, aiming for an even ring or dollop that will distribute when you sandwich. Consistency here keeps every cookie predictable in bite. Too little filling makes the sandwich feel dry, too much will squeeze out on assembly.
- Close your sandwiches with the other cookie: Press gently until the filling reaches the edges but does not spill out; you should hear a soft kiss of cookie meeting cookie. The sandwich should feel snug but not squashed. Pressing too firmly will cause the filling to seep out and attract unwanted crumbs.
- Melt chocolate chips using a microwave or double boiler: Melted chocolate chips should be glossy and smooth, and you will see a shiny liquid that flows easily when stirred, offering a rich chocolate aroma. Microwaving in short bursts prevents scorching, while a double boiler gives gentle, even heat. Overheating will seize the chocolate into a grainy paste.
- Place your pecans in a shallow bowl: Having pecans ready makes the dipping process quick, and you will notice their warm, nutty scent if they were toasted beforehand, which enhances flavor. Small pieces adhere better to the chocolate. Using very large chunks can prevent even coating.
- Dip half of each cookie into the melted chocolate and then the pecans: As you dip, the chocolate should coat smoothly and the pecans should cling to the wet surface, creating a textured edge and a pleasing crunch. Place them on wax paper to set, and chill briefly until firm. Rushing this step risks smudged presentation and loose nuts.
- Place on a wax paper lined cookie sheet and chill until firm: The chill sets the chocolate quickly, giving it a clean snap and locking the pecans in place, while the cookie interior remains tender. Once firm, store in an airtight tin. Leaving them at room temperature too long before the chocolate sets invites smudging and sticking.
Notes
- Adjust chocolate intensity Swap the cocoa amount slightly for a deeper or milder chocolate flavor, tasting the dough as you go so it matches your preference.
- Control caramel thickness Choose a thicker caramel for a chewier center or a slightly thinner sauce if you prefer the filling to meld more with the buttercream.
- Vary nut size Chop the pecans finer for a more even coating that clings to the chocolate, or leave them chunkier for pronounced crunch.
- Cookie size matters Make smaller circles for delicate bite sized sandwiches, or larger ones for a more indulgent treat, and adjust bake time accordingly.
- Chocolate finish technique Temper or gently melt your chocolate chips for a glossier finish that snaps cleanly when bitten.