Turkey Gravy Recipe
Turkey Gravy Recipe delivers a creamy, savory sauce made from real turkey drippings and a quick roux. This easy, elegant gravy adds deep roasted flavor to mashed potatoes and carved turkey, perfect for easy weeknight dinners or a holiday feast. Make it from pan juices for a rich, homemade finish that brings the whole meal together.
Equipment
- Fine mesh sieve
- Measuring Cup
- Medium Saucepan
- Whisk
Ingredients
- 3 tablespoons all-purpose flour Thicken the gravy by forming a smooth roux that cooks until slightly bubbly and nutty, removing any raw flour taste; whisk constantly to prevent lumps and ensure a glossy finish.
- 3 tablespoons fat drippings from roasted turkey Render flavor and richness by combining with flour to create the fat base for the roux, imparting savory depth and an appealing mouthfeel to the finished gravy.
- 2 cups turkey drippings skimmed of fat Provide the primary liquid component that carries concentrated turkey flavor; skimmed of excess fat to balance richness while retaining savory pan juices for deglazing and simmering.
- 1/4 cup milk or stock as needed Adjust consistency and add creaminess or additional stock depth as needed; incorporate gradually while whisking to reach the desired pourable texture without diluting flavor.
- Salt and pepper, to taste Season to taste, enhancing and balancing savory, salty, and peppery notes; add incrementally and taste frequently to achieve a well-rounded gravy profile.
Instructions
- Strain the turkey drippings from the roasting pan through a fine mesh sieve into a large measuring cup. Allow the drippings to settle so the fat rises to the top.: You will notice the rich, meaty aroma as the warm juices pour through the sieve, and then a layer of pale fat will collect on the surface as it cools. This separation is crucial because the clear liquid beneath is what gives gravy a clean, concentrated turkey flavor, while the fat is used separately to make the roux. A common error here is trying to whisk the entire mixture without skimming, which can lead to greasy gravy. Be patient while it settles, use a tall measuring cup so you can see the layers, and tilt the cup slightly when pouring later to avoid disturbing the fat layer.
- Skim off 3 tablespoons of the fat and transfer it to a medium saucepan. Heat over medium heat.: As the fat melts in the pan, it will shimmer and produce a light, savory scent that tells you the pan is ready. The goal is to have enough hot fat to coat the bottom of the pan and evenly cook the flour . If the fat bubbles vigorously, reduce the heat slightly, because overly high temperatures will brown the fat too fast and make the roux dark. A frequent mistake is overheating, which creates spots of burnt flavor. Keep the flame moderate and give the pan a gentle swirl so the fat spreads uniformly.
- Whisk in the flour and cook, stirring constantly, until the mixture turns a light golden brown, about 2 minutes.: When you add the flour , it will form a paste with the hot fat that initially clumps, then smooths out with continuous whisking. Listen for a faint popping or sizzling as moisture leaves and the flour toasts; you should smell a warm, slightly nutty aroma when it is ready. This brief cook time eliminates raw starchiness and builds the foundation for a glossy finish. Avoid walking away, because even a minute too long will deepen the color and change the flavor toward bitter. Keep whisking in a steady motion for consistency.
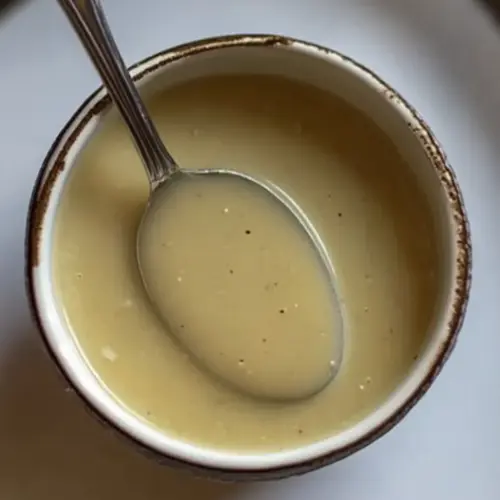
- Gradually add the skimmed drippings while whisking constantly. Bring the mixture to a light boil to thicken.: As you pour the clear turkey drippings in a thin stream, the mixture will loosen, steam, and thicken. The sound becomes a soft bubbling, and the surface will gloss over as the starches swell. Whisking constantly prevents lumps and ensures a smooth emulsion. When the gravy reaches a gentle boil, it will visibly thicken and coat the back of a spoon. Mistakes here include adding the liquid too quickly, which creates a lumpy texture, or not whisking vigorously enough, which allows pockets of dry flour to persist. If lumps form, strain the gravy through the sieve or use a whisk to briskly break them up.
- Adjust the consistency with milk or stock if needed. Season with salt and pepper to taste. Serve warm.: After the initial thickening, the gravy may feel too thick for pouring, especially as it cools. Adding up to 1/4 cup of milk or extra stock gradually will thin it to your preferred body. As you add liquid, the sauce will relax and the aroma will open, becoming milder and more integrated. Make adjustments in small increments, stirring and tasting between additions. A frequent misstep is over thinning, which dilutes the turkey flavor; if that happens, simmer briefly to concentrate, or whisk in a small pinch more flour melted in warm fat to rethicken.
- Season with salt and pepper to taste. Serve warm.: Seasoning is best done last because the reduced drippings already carry salt. Sprinkle in a little at a time and taste when the gravy is hot, because heat unlocks savory nuances. Freshly ground black pepper brightens the overall profile, and serving warm ensures the gravy pours smoothly over slices and sides. The most common mistake is oversalting, so I always err on the lighter side and let guests add more at the table. Keep the gravy warm over low heat, stirring occasionally, to maintain texture before serving.
Notes
- Measure your fat precisely: Use a tablespoon measure so the ratio of fat to flour is consistent, preventing a greasy or overly thin roux.
- Reserve drippings properly: Pour pan juices into a tall container and chill briefly if necessary to make skimming easier and cleaner.
- Toast the flour gently: Cook the roux only until it smells warm and turns pale golden, this removes the raw taste without adding bitterness.
- Add liquid slowly: Introduce the skimmed drippings in a steady stream while whisking to maintain a lump free, silky texture.
- Adjust with small amounts: Thin or thicken in small increments so you do not overshoot the ideal consistency.