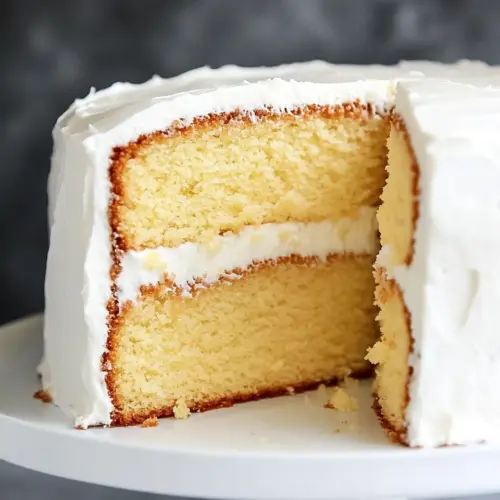
The Best Vanilla Cake Recipe
The Best Vanilla Cake Recipe is a tender, moist layer cake with a rich buttery crumb and warm vanilla aroma. This easy, classic dessert delivers a soft, airy texture and pairs beautifully with chocolate buttercream or simple glazes, making it perfect for celebrations or an easy weeknight treat. Try it once and you will see why it becomes a go to for gatherings and special moments.
Equipment
- Electric Mixer
- Three 8 or 9 inch cake pans
- Parchment Paper
- Wire cooling racks
- Measuring Cups and Spoons
- Mixing Bowls
Ingredients
- 3 cups (360 g) all-purpose flour, or cake flour Provide structure and tenderness to the cake by developing gluten when mixed; sifts ensure even texture and prevent lumps, and cake flour can be used for a lighter crumb.
- 2 teaspoons (8 g) baking powder Leaven the batter by releasing carbon dioxide when activated, helping the cake rise evenly; measure accurately to avoid an overly coarse or collapsed crumb.
- 1 teaspoon (6 g) baking soda React with acidic components to produce additional leavening and create a fine, tender crumb; balance baking powder to prevent metallic or soapy flavors.
- 1 pinch (0.3 g) kosher salt Season and enhance the other flavors while stabilizing the dough; using kosher salt ensures a clean, controlled saltiness that brightens the cake.
- 1 cup (226 g) butter, softened to room temperature Cream with sugar to incorporate air for lift and provide rich flavor and tender mouthfeel; softened butter blends smoothly for consistent batter emulsion.
- 2 cups (396 g) sugar Sweeten and aid in moisture retention while contributing to tenderness and browning during baking; properly creamed sugar helps create a fine, uniform crumb.
- 4 large (200 g) eggs, at room temperature Bind and emulsify the batter while adding moisture and structure; room-temperature eggs create a stable emulsion that improves rise and texture.
- 1 cup (227 g) buttermilk, at room temperature Add moisture and acidity to tenderize the crumb and react with baking soda for leavening; using room-temperature buttermilk promotes even mixing and aeration.
- 2 1/2 teaspoons (11.6 g) vanilla extract Impart characteristic aromatic vanilla flavor and enhance overall sweetness; measuring precisely ensures balanced flavor without overpowering the cake.
- Chocolate Buttercream Frosting Provide a rich, complementary finishing touch as the frosting choice; chocolate buttercream balances vanilla cake with creamy, sweet, and slightly bitter notes.
Instructions
- Preheat oven to 350º F.: The kitchen should warm and you may sense a faint hum as the oven cycles. Achieving the correct oven temperature is essential because it sets how quickly the cake's exterior sets and the interior can rise properly. A consistent heat gives even browning and predictable lift, reducing the chance of a sunken center. A common mistake is relying on the oven dial alone, so I recommend using an oven thermometer for accuracy. You'll notice a gentle warmth on your face when you open the oven and the smell of warming metal as it reaches temperature.
- Prepare three 8 or 9-inch cake pans for baking by coating them with softened butter, lining with a piece of parchment fitted to the cake pan, brushing the top of the parchment with more softened butter and then lightly flouring the pans and parchment. You can also use my homemade cake goop if you like.: The pans should look evenly coated with butter and dusted with flour, creating a thin, matte layer that prevents sticking. This careful preparation ensures the cakes release cleanly and preserves their edges. If parchment slips, press it firmly into the pan so batter does not creep under it. A frequent error is skipping flour after buttering, which can lead to tearing when unmolding. As you work, you might hear the soft scrape of parchment and feel the slight tack of butter under your fingers.
- Whisk together the flour, baking powder, baking soda and salt in a large bowl. Set aside.: As you whisk, you will see a uniform pale mixture and smell the faint, neutral aroma of dry ingredients. Sifting or whisking distributes the leaveners so the rise is consistent across the batter, preventing pockets of uneven lift. Mixing these dry elements thoroughly avoids bitter spots from concentrated baking soda or dense pockets of undissolved flour . A common oversight is shallow mixing, which can create uneven texture in the baked layer.
- Cream the butter with an electric mixer. Then add the sugar. Cream together for about 8 more minutes.: As you beat butter and sugar , you will notice the mixture becoming paler and aerated, like soft clouds. This trapped air helps the cake rise and gives a softer crumb. The sound of the mixer will shift to a steady whir as the texture smooths. Under creaming leaves the cake heavy, while over creaming can cause the batter to break down; the goal is a light, billowy texture. Stop when the mixture appears fluffy and you can see fine ribbons when the beaters lift.
- Add the eggs, one at a time, and mix until just combined.: As each egg goes in, the batter will momentarily look glossy and then smooth again, integrating oils and proteins that lend structure. Adding eggs slowly prevents the batter from curdling and helps maintain aeration. If you add them too quickly, you risk a separated mixture that will not trap air well. A sign of proper mixing is a smooth, homogenous batter without streaks of yolk.
- Add one-third of the flour mixture and mix until well combined. Add half of the buttermilk and mix until well combined. Repeat with another one-third of the flour mixture followed by the buttermilk and then ending with the remaining flour mixture, making sure to mix each addition until well combined.: Alternating flour and buttermilk allows the batter to stay smooth, preventing overworking the gluten. You'll see the batter thicken as you add flour , then loosen when buttermilk is incorporated. This rhythm preserves tenderness while ensuring even hydration. Over mixing at this stage can create a tight crumb, so stop as soon as ingredients are integrated. The visual cue is a uniform texture that flows slowly off the spatula.
- Mix in vanilla until well combined.: The batter will take on a warm, inviting aroma as the vanilla disperses. This small addition lifts the entire flavor profile, rounding sweetness and adding depth. Stirring gently ensures the vanilla spreads evenly without overworking the batter. A mistake to avoid is using poor quality flavoring, which can yield a flat aroma. The nose should register a fragrant, sweet note once mixed.
- Divide cake batter among the cake pans and bake for 25-30 minutes, until the edges of the cake turn loose from the pans and a toothpick inserted into the middle of the cake comes out clean.: As the cakes bake, you'll notice a golden hue forming at the top edges and the kitchen fills with a warm, toasty scent. The center should spring back slightly when touched, indicating set structure. Removing too early yields a gooey center, while leaving it too long dries the crumb. I avoid opening the oven in the first 20 minutes to maintain steady rise. The sound of a light crackle as the cakes cool is normal as steam escapes.
- Remove from the oven and allow to cool for about 10 minutes in the pan. Then, carefully turn out the cake onto wire cooling racks and allow to cool completely.: Letting the pans rest allows structure to stabilize so the layers release cleanly. When you invert, the cakes should slip out with a soft thump, revealing an even surface. Cooling on a rack prevents trapped steam from making the bottom soggy. A common error is attempting to frost while warm, causing the frosting to melt and slide. Wait until the layers are room temperature for best results.
- Frost cake with Chocolate Buttercream Frosting, or your desired frosting.: The final step brings texture contrast and a flavor partner to the tender vanilla crumb, creating a visually appealing cake. When applying frosting , you should feel smooth resistance and see clean strokes from your spatula. If the frosting is too warm it will slump, while too cold it will tear the cake; aim for a spreadable, slightly cool consistency. Take care to press layers gently together to avoid squeezing out crumbs , and chill briefly to set the finish before serving.
Notes
- Room Temperature Ingredients Make sure the butter, eggs, and buttermilk are at room temperature before you begin. They blend more smoothly, trap air efficiently when creamed, and produce a more uniform batter.
- Accurate Measuring Weighing or properly spooning and leveling the flour prevents dense results. If you pack the flour into a cup you can add too much, which dries the cake.
- Don’t Overmix When combining the wet and dry components, fold until the streaks disappear. Overmixing activates gluten and can create a tough, chewy crumb.
- Oven Thermometer Use an oven thermometer to confirm the true temperature. Ovens can vary from their dials, and a few degrees makes a big difference in rise and color.
- Cooling Time Allow the layers to cool in their pans briefly before releasing, then cool completely on a wire rack. Frosting a warm layer causes sliding and a melty finish.