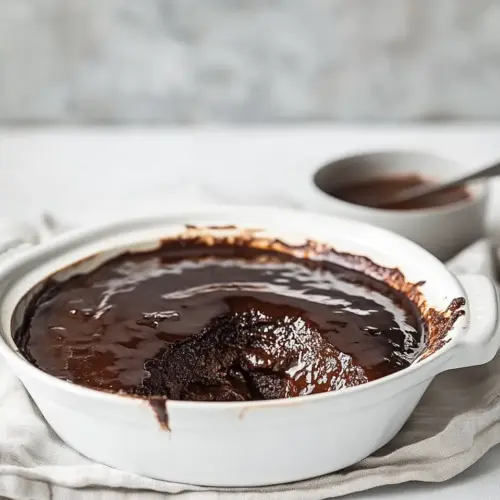
The Best Chocolate Malva Pudding
The Best Chocolate Malva Pudding is a rich and gooey chocolate dessert with a tender sponge soaked in warm, glossy chocolate sauce. Creamy, indulgent, and easy enough for a weeknight treat, it blends quality dark chocolate with real butter and cream for deep flavor. Make it for dinner guests or a cozy family night, it’s reliably comforting and sure to please.
Equipment
- Electric Mixer
- Medium ceramic or glass baking dish
- Double boiler or heatproof bowl and pot
- Mixing Bowls
Ingredients
- 200 g white sugar Provides sweetness and structure to the batter while helping achieve a tender crumb; creaming with butter or egg incorporates air for lift. Balances the chocolate bitterness and contributes to caramelization during baking for color and flavor complexity.
- 1 large free-range egg Adds richness, moisture, and binding to the pudding while contributing to a tender, custardy texture; beaten lightly it helps incorporate air for a lighter crumb. Supplies proteins that set during baking to provide structure and help emulsify the batter.
- 140 g flour Serves as the primary dry structure component, supplying gluten and starch to form the pudding’s body; sifted flour prevents lumps and ensures even mixing. Works with leavening agents to create lightness while absorbing liquids for a cohesive batter.
- 6 Tb cocoa powder Delivers concentrated chocolate flavor and deep color while intensifying the dessert’s cocoa notes; unsweetened powder lets you control overall sweetness. Affects batter viscosity and interacts with baking soda for subtle flavor and color changes through pH-sensitive reactions.
- 50 g melted Lurpak butter Contributes melted fat that enriches flavor and improves mouthfeel while promoting a tender, moist crumb; butter adds a creamy richness distinct from oil. Adds subtle dairy notes and helps carry flavors such as cocoa throughout the pudding.
- 1 tsp baking soda Acts as a chemical leavening agent that reacts with acidic ingredients to produce carbon dioxide, helping the pudding rise and lighten. Also influences texture by creating small air pockets and contributes to crumb tenderness when correctly balanced.
- 1 tsp white vinegar Provides acidity that reacts with baking soda to produce lift and a light, tender texture; the mild tang also brightens the overall flavor balance. Helps develop a fine crumb and can subtly enhance chocolate notes through acid-base interaction.
- 250 ml milk Supplies liquid to hydrate dry ingredients and dissolve sugars, aiding batter cohesion and mouthfeel; milk contributes lactose and proteins for browning and richness. Adjusts batter consistency and supports steam formation during baking for lift.
- 250 ml cream Adds luxurious richness and extra fat to create a creamy, velvety mouthfeel in the sauce or pudding base; cream increases silkiness and depth of flavor. Enhances the finished dessert’s decadence and helps create a smooth sauce when combined with butter and chocolate.
- 100 g Lurpak salted butter Offers salted fat that enriches flavor, improves texture, and enhances sweetness perception while contributing to sauce silkiness. When melted into the hot sauce or batter, salted butter helps bind and amplify chocolate and caramel notes.
- 90 g sugar Supplies additional sweetness for the sauce or soak, balancing bitterness from cocoa and dark chocolate while aiding caramelization. Granulated sugar also affects texture by contributing to glossy sauces and stabilizing moisture in the pudding.
- 100 g Good quality dark chocolate such as Lindt 70% Provides intense, high-quality chocolate flavor and a smooth melting quality for a rich sauce or ganache; dark chocolate contributes complexity and bitterness to balance sweetness. When melted into cream and butter, it creates a glossy, deeply flavored topping for the pudding.
Instructions
- Preheat the oven to 180 C (350 F) and butter a medium sized ceramic oven dish with butter.: Warmth fills the kitchen as the oven comes up to temperature, a gentle hum that signals the start. You want the oven steady at 180 C 350 F so the pudding rises evenly, creating a tender crumb with a thin crust on top that traps moisture. Buttering the dish prevents sticking and adds a hint of toasted butter flavor to the edges. A common mistake is putting a cold oven dish in a hot oven, which can alter bake time and texture, so preheat first. Visually, look for a consistently warm interior once it reaches temp, not just hot air exiting the door.
- Using an electric mixer, beat the egg and sugar on high for about 5 minutes until pale and fluffy.: You will hear the mixer change pitch as air is incorporated and see the egg and sugar lighten to a pale ribbon stage, which is crucial for lift. The mixture should be thick enough that when you lift the beaters the batter falls slowly, leaving a trail. This aeration creates the sponge structure, and if you underbeat it, the pudding will be dense. Overbeating once other ingredients are added can collapse the air, so stop at the right tactile cue, not a timer alone.
- In a separate bowl sift or whisk the flour, cocoa and bicarb of soda together.: The dry mix should smell faintly of chocolate and have an even, powdery texture. Sifting removes lumps from the flour and cocoa , which ensures a uniform crumb. The bicarb of soda will distribute evenly to give predictable rise. If you skip this step, pockets of baking soda can create uneven flavor and texture, so take a moment to whisk thoroughly.
- Melt the butter in the microwave and then add the vinegar and add that to the batter.: The melted Lurpak butter will radiate a toasted aroma, and when you whisk in the white vinegar , you are setting up a chemical reaction with the baking soda that helps tenderize the sponge. Add the warm butter slowly to the pale batter to preserve the air you just whipped in. If the butter is too hot it can cook the egg , so allow cooling to warm, not hot. The batter should feel smooth and glossy after incorporation.
- whilst the mixer is still going alternate between adding the flour/cocoa and the milk in parts until it’s well combined: You will sense the batter transition from airy to a cohesive, pourable texture as you alternate additions. Adding the dry mix and milk in parts preserves aeration and avoids lumping. The bowl will warm slightly from mixing and develop a gentle chocolate aroma. The batter should be smooth and homogenous; if you see streaks, keep folding gently. A typical error is dumping everything at once which can deflate the batter and produce a heavy result.
- Pour the batter into a greased baking dish approx. 20 cm in diameter (glass Pyrex or ceramic works well).: The batter should settle with a glossy top and small air bubbles visible. A 20 cm dish gives the pudding the right depth to bake through without drying out. Using glass or ceramic helps maintain even heat distribution and a gentle rise. If you pour into a dish that is too shallow, the pudding can overbrown before the center sets, so choose the correct size.
- Spray the one side of a piece of foil well with baking spray, cover the pudding properly and bake for 45 minutes.: Covering the dish traps steam and protects the top while the interior cooks, keeping it moist. The foil should be spray coated so it does not stick to the pudding surface. Baking for 45 minutes produces a set yet tender center; you will notice the aroma of chocolate intensify in the kitchen. Avoid opening the oven frequently, which can drop the temperature and affect rise.
- The pudding is ready when it has risen and is springy to the touch.: Press gently in the center and feel a resilient spring, with the surface returning slowly. Visual cues include a slight pull away from the dish edges and a uniformly set top. The smell should be a concentrated chocolate butter aroma. If it feels too soft, give it a few more minutes, but avoid overbaking which dries the sponge; a little wobble is preferable to dryness.
- While the Malva pudding is baking, make the chocolate sauce. Place all the ingredients into a double boiler or in a bowl over a small pot of boiling water and stir until the sugar has dissolved and the chocolate melted. You should have a smooth warm sauce.: Warm steam and a gentle bubbling sound will accompany the transformation as the cream , sugar , and dark chocolate meld into a glossy sauce. Stir continuously so the chocolate melts evenly and the sugar dissolves, producing a smooth texture. Using a double boiler avoids scorching and preserves a silky mouthfeel. If the sauce appears grainy, keep stirring over low heat until smooth; overheating can separate the fats and ruin the texture.
- As soon as the malva pudding comes out the oven, pour over 3/4 of the sauce. It will seem like a lot but it does soak in. Reserve the rest to serve warm with the pudding.: The pudding should be hot and steaming when you pour the warm sauce so it soaks in, creating a molten interior and glossy top. You will hear a soft sizzle as the warm sauce hits the hot pudding, and that steam brings out the chocolate aroma. Reserve some sauce to serve for added richness. A common oversight is waiting for the pudding to cool, which prevents proper absorption and leaves the top dry instead of indulgently moist.
- Serve chocolate Malva with vanilla ice cream or fresh whipped cream.: Serve while still warm so the contrast between the spoonable pudding and cold accompaniment is at its best. The cream or ice cream provides a cooling counterpoint to the rich chocolate sauce, enhancing the overall experience. Plate portions with a bit of reserved sauce for shine. If you let the pudding sit too long, the sauce will firm up and the contrast will be lost, so time serving to enjoy it while it is at peak warmth.
Notes
- Make it extra chocolatey by using a higher percentage dark chocolate in the sauce and a touch more cocoa in the batter to deepen the flavor profile.
- Serve with cream instead of ice cream to let the sauce shine and provide a silkier, less icy contrast to the warm pudding.
- Bake ahead and rewarm by covering the pudding and reheating in a medium oven for about 15 minutes to restore warmth without drying it out.
- Adjust sweetness by reducing the sauce sugar slightly if you prefer a more bitter chocolate finish.
- Texture tweak by using slightly less milk for a denser sponge or a touch more for an even moister center, keeping the overall balance in mind.