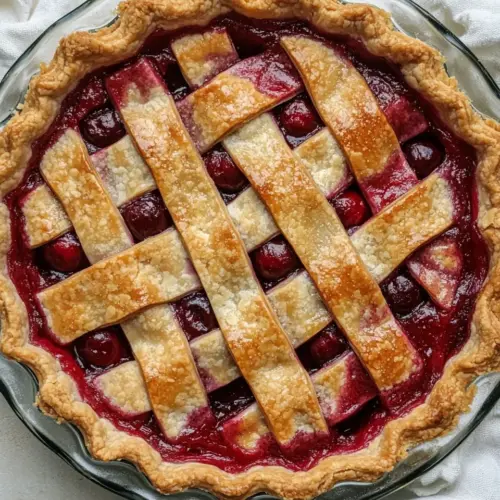
Tart Cherry Pie
Tart Cherry Pie is a bright, slightly tangy dessert with a flaky crust and jewel like cherry filling, an easy crowd pleaser for summer gatherings or weeknight celebrations. The filling uses canned tart cherries and minute tapioca for a reliable set, while a lattice top adds beautiful presentation. Make it for simple entertaining or anytime you want a classic fruit pie that slices neatly and tastes homemade.
Equipment
- 9-inch pie dish
- Large Bowl
- Oven
- Knife
- Fork
- Cooling rack
Ingredients
- 2 pie crusts one for the bottom and top Provide a flaky, sturdy base and top to hold the cherry filling; rolling and chilling the crust ensures even baking. Use as both bottom and lattice or full top for classic presentation, and crimp edges to seal juices inside.
- 29 oz tart cherries drained well (two 14.5 oz cans) Offer bright tart flavor and body to the filling when well drained; canned cherries are convenient and consistent in sweetness and texture. Drain thoroughly to avoid excess liquid and layer evenly in the pie shell for balanced distribution.
- 2/3 cup granulated sugar Sweeten the tart cherries to balance acidity while dissolving into the filling as it bakes; gradual tasting helps adjust sweetness to preference. Combine thoroughly with fruit and thickener so the sugar integrates and caramelizes slightly during baking.
- 1/2 teaspoon almond extract Enhance the filling with a subtle nutty, aromatic note that complements cherries; a small amount gives depth without overpowering. Add sparingly and mix into the filling to distribute the flavor evenly throughout the pie.
- 1/4 teaspoon vanilla extract Contribute a warm, familiar aroma that rounds out the other flavors; vanilla deepens sweetness perception and melds with almond extract. Stir into the filling mixture so the scent infuses the cherries as the pie bakes.
- 1/4 cup minute tapioca I used Kraft brand Thicken the cherry juices into a gel while keeping a clean, slightly translucent appearance; minute tapioca works quickly and handles canned fruit well. Scatter evenly over the fruit and allow it to hydrate briefly before baking to prevent a runny filling.
- 2 drops liquid red food coloring Intensify the pie's red color for an appealing visual finish without altering flavor; a couple drops are sufficient for vibrant hue. Stir into the filling gradually until the desired color is achieved, avoiding overuse.
Instructions
- Preheat the oven to 425 degrees F. Line the bottom of a 9-inch pie dish with pie crust. Refrigerate.: As you preheat, notice the warm, dry air beginning to circulate in the oven cavity, which is essential for initiating a crisping reaction on the crust. A very hot start helps set the bottom crust quickly so it does not become soggy under the filling, this initial blast creates steam that puffs the dough slightly and gives a flakier texture. One common mistake is not fully preheating, which leads to a pale, dense crust; wait until the oven reaches the full temperature. If your oven runs hot or cold, use an oven thermometer to confirm the temperature. Also, line the bottom of a 9 inch pie dish with the chilled bottom pie crust while the oven heats, pressing it gently to the dish so it molds without tears. Refrigerate the crust briefly after fitting it to ensure the fats stay solid, which improves flakiness during baking.
- In a large bowl, stir together drained tart cherries, sugar, almond and vanilla extracts, tapioca, and food coloring. Let stand for 15 minutes then stir again.: When you press the pie crust into the dish, feel for an even thickness across the base and up the sides, the dough should be cold and pliable but not sticky. Even contact prevents air pockets that can cause uneven baking. Use your fingertips to gently press and avoid stretching the dough, stretching causes shrinkage while baking. If the dough tears, patch it with a small piece of extra crust and chill before filling. Chilling after lining ensures the crust firms up, which helps it hold its shape when the filling is added; a collapsed or misshapen shell is a sign the dough was too warm.
- Pour into the prepared pie crust.: Chilling the assembled bottom crust in the pie dish for a short period helps the fats solidify so they melt slowly in the oven creating flaky layers. The cold crust will resist slumping when the filling is poured in, preserving the dish’s shape and producing a crisper edge. A common oversight is skipping this rest, which can lead to a soggy base and misshapen rim. Pop the lined dish in the refrigerator until the filling is ready, but do not leave it so long that condensation forms on the dough, which would interfere with browning.
- With the other pie crust, cut into 1 1/2 inch strips. Create a lattice on top of pie filling then crimp the edges with a fork.: Right away you will notice the cherries glistening as the granulated sugar begins to draw out juices, creating a glossy mixture. The aroma of almond extract will lift and the hint of vanilla extract will add roundness, while the minute tapioca absorbs and thickens the liquid as it hydrates. This stage is where balance matters, because sugar controls sweetness and tapioca controls the filling’s final texture. A common pitfall is stirring too vigorously which can break cherries and make the filling overly mushy, so fold gently to maintain some whole fruit. Allowing the mixture to stand for 15 minutes helps the tapioca swell and gives a clearer sense of how thick the filling will be once baked.
- Bake for 20 minutes then reduce the oven temperature to 350 degrees F. Bake for another 35-40 minutes.: During this resting period the minute tapioca swells, transforming thin juice into a gelatinous binder, and the aroma of the extracts will become more pronounced. You should see the mixture thicken and the juices become slightly less fluid, which is what helps the pie slice neatly. One common mistake is not waiting long enough, resulting in a runny filling; conversely leaving it too long can over hydrate tapioca and make it gummy. After standing, stir gently to incorporate any tapioca that sat on the bottom, and check the consistency; it should be noticeably thicker than when you began.
- Cool completely before cutting and serving.: As you pour the filling, watch the glossy, ruby colored cherries settle into the chilled shell, and the pooled juices should cling to the fruit rather than running freely. The visual cue of a cohesive filling that does not slosh indicates good tapioca hydration and proper drain. Avoid overfilling, which leads to bubbling over in the oven and a sticky mess to clean; leave a little room below the rim for expansion. If you see large air gaps, gently tap the dish on the counter to settle the filling, but do not overwork it or you may break up cherries.
- With the other pie crust, cut into 1 1/2 inch strips: Cutting the second pie crust into strips for a lattice gives you that classic look and allows steam to escape while the filling bubbles. Use a bench scraper or a sharp knife for clean edges, and keep the strips cold so they lie neatly on top. Warm dough will droop and tear, so if the strips become soft, return them to the fridge briefly. A common error is cutting uneven strips which makes weaving harder, so aim for uniform widths for an even bake and consistent browning.
- Create a lattice on top of pie filling then crimp the edges with a fork: As you weave the lattice, you will see the filling peek through in neat windows which will bubble and thicken during baking, creating an appealing contrast of glossy filling and golden crust. Crimping the edges with a fork seals the top and bottom crusts, preventing leakage and creating a decorative rim. Press too hard when crimping and you may seal all steam paths, risking overflow; press just enough to bind the layers. If any seams look thin, patch them with a small piece of dough and chill briefly before baking.
- Bake for 20 minutes then reduce the oven temperature to 350 degrees F: Starting at a high temperature encourages oven spring and initial browning, giving the crust a head start. After the first 20 minutes you will likely hear a gentle bubbling as the filling begins to thicken, and the lattice will take on a pale gold. Reducing the heat to 350 degrees F finishes the bake more gently, allowing the interior to set without burning the crust. A frequent mistake is leaving the oven at the initial high temperature for the whole bake, which can over brown the top before the filling is cooked through. Use visual cues rather than time alone; if the edges brown too quickly, shield them with foil.
- Bake for another 35-40 minutes: In this stage you will watch the filling become glossy and slightly syrupy, with visible bubbling through the lattice; the crust should deepen to an even golden brown. The bubbling indicates the fruit juices are hot enough to activate the tapioca and thicken, so resist opening the oven repeatedly because heat loss can prolong baking. A common issue is underbaking, which leaves the center runny; ensure the filling is actively bubbling and the crust is well colored. If the edges darken too soon, tent them with foil while the center finishes.
- Cool completely before cutting and serving: Cooling may test your patience, but it is the critical final step as the filling firms while losing heat, turning from syrupy to sliceable. You will notice the aroma mellow and the surface set; cutting too soon causes slumped slices and a glossy puddle on the plate. A typical mistake is slicing while the pie is still warm, which ruins presentation; wait until it is nearly room temperature or fully cool. Cooling on a rack helps air circulate under the dish and prevents condensation from soggy crust bottoms. Once cooled, slices should hold clean edges and reveal a jewel like filling framed by golden crust.
Notes
- Boost almond note Add an extra 1 4 teaspoon of almond extract if you want a more pronounced nutty fruit pairing, but add cautiously as extracts concentrate quickly.
- Adjust sweetness If your tart cherries are very sour, increase the granulated sugar by a tablespoon at a time, tasting between additions to avoid oversweetening.
- Thicken gently If you prefer a firmer set, let the filling rest an extra 5 to 10 minutes after mixing so the minute tapioca hydrates more fully before baking.
- Presentation tweak For a glossy finish, brush the lattice with a light egg wash before baking, this helps achieve deeper color and sheen but is optional based on preference.
- Color control Use food coloring sparingly to intensify the filling hue, just a drop or two is enough for a richer red without affecting flavor.