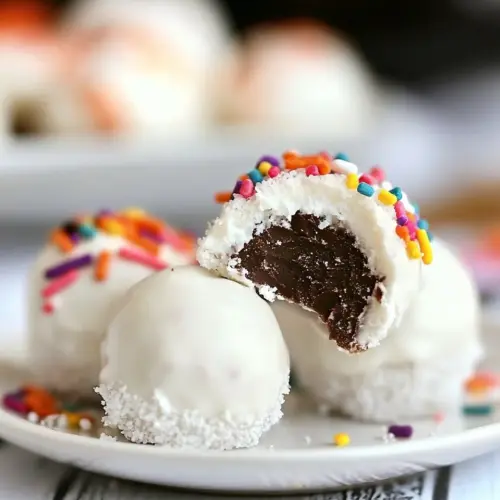
Taffy Truffles
Taffy Truffles blend crumbly candy cookies with creamy cream cheese and a glossy candy coating for a quick, playful dessert. These easy to make bites are creamy inside and crisp outside, perfect for parties or a sweet snack. They offer a nostalgic flavor with modern presentation and are a fantastic choice for an easy party treat you will want to make again and again.
Equipment
- Food Processor
- Measuring Spoon
- Cookie Sheet
- Wax paper
- Microwave Safe Bowl or Double Boiler
Ingredients
- 8 Taffy Cookies Mother’s brand Crush to provide the sweet, chewy cookie base that gives taffy truffles their signature texture and nostalgic flavor; finely crushing ensures even mixing and bite-sized pieces throughout the filling.
- 2 ounces cream cheese regular or low-fat Soften to bind the crushed cookies into a smooth, creamy center while adding slight tang and richness; room-temperature cream cheese blends easily and helps the truffles hold their shape.
- 6 -8 ounces Candiquik vanilla or chocolate or similar product (you can also use baking chocolate) Melt to coat or incorporate as the exterior shell or chocolate component, contributing glossy finish and snap or creamy chocolate flavor; choose vanilla or chocolate Candiquik or baking chocolate depending on desired sweetness and coating thickness.
- Sprinkles or toasted coconut for topping Garnish to add visual appeal and complementary texture, offering a colorful or nutty finish that contrasts the smooth chocolate coating; sprinkle immediately after coating for best adhesion.
Instructions
- Grind the cookies and cream cheese in a food processor until a ball forms. Scoop 1 tablespoon sized scoops of the mixture and roll into balls. Place on a wax paper lined cookie sheet and chill for 30 minutes.: The aroma as you pulse the mixture becomes noticeably sweet and slightly tangy, and you should smell the candy notes from the cookies mixing with the dairy scent of the cream cheese . This step creates the right consistency for rolling, and it matters because if the mixture is too dry the truffles will crumble, while too wet and they will be sticky. A common misstep is overprocessing until the mixture becomes paste like, which makes rolling messy. To avoid that, pulse in short bursts and stop when crumbs clump together into a cohesive mass that holds when squeezed. The texture should be moist but not shiny, and you will feel a slight resistance when you press it between your fingers.
- When ready to dip, melt your candy according to package directions. Dip each truffle, tapping off the excess and place back on your wax paper lined cookie sheet. Top with sprinkles or toasted coconut for topping. Chill until set.: As you scoop and roll, the center becomes smooth and compact, and the surface takes on a matte finish. Work quickly enough that the mixture does not warm up and soften too much under your hands, or else the rounds will lose their shape. If the mix feels too sticky, pop it back in the fridge for a few minutes to firm up, that chill will make rolling easier. A typical issue is inconsistent sizing, which affects chilling and coating times, so I use a measuring spoon to keep the balls uniform. When rolling, press gently, then smooth the surface with light fingertips to avoid cracks that will show after dipping.
- Place on a wax paper lined cookie sheet and chill for 30 minutes.: The cold sheet helps the truffles set and firm up, and the smell of chilled crumbs is faint but reassuring. Chilling solidifies the shape so the coating adheres evenly without causing the interior to collapse. If you skip this step, the centers may shift when dipped, leading to misshapen truffles. A mistake I have seen is crowding the tray; leave space so the cold air circulates and every truffle chills evenly. After chilling, the balls should feel firm to the touch and no longer squishy.
- When ready to dip, melt your candy according to package directions.: As the candy melts, its scent will shift from powdery to warm and sweet, and you will see it transform into a glossy, fluid coating. The temperature is important, because if the coating is too cool it will thicken and clump, while too hot it can become thin and runny, making application tricky. Always follow the package guidance, stirring gently to keep the texture uniform. A common error is overheating, which can cause the coating to scorch or separate. Use a gentle heat and remove from the heat source as soon as it reaches a smooth, pourable consistency.
- Dip each truffle, tapping off the excess and place back on your wax paper lined cookie sheet.: When you dip, the sound is a quiet splash followed by a soft tapping rhythm as you remove the excess coating. The visual cue to look for is a smooth, even shell that glistens without heavy drips. Tap lightly to release extra coating and rotate the truffle to ensure even coverage. Rushing this causes uneven shells or pooled coating underneath, which can create lumps. If the coating begins to thicken on the tray, refresh the candy by stirring or gently reheating to maintain a glossy finish.
- Top with sprinkles or toasted coconut for topping.: The toppings add contrast both in flavor and texture; sprinkles bring a sugary snap and bright color while toasted coconut contributes nuttiness and chew. Apply toppings immediately after dipping so they adhere to the wet coating, and press gently if needed so they stay put. A frequent slip up is waiting too long to decorate, which results in toppings not sticking. Keep your toppings nearby in shallow dishes for a smooth workflow, and vary them to create a pretty assortment on your tray.
- Chill until set.: The final chill is when everything comes together, and you will notice the coating go from tacky to firm, with a pleasant snap when bitten. This resting time seals flavors and firms the truffles so they handle well. Avoid stacking the pieces while they set, as contact points can mar the surface. If you move them too soon, the coating can crack or stick to the paper. The set is complete when the surface no longer gives to a light touch and the coating sounds firm when tapped.
Notes
- Chill the centers: After rolling, chill the truffles until firm to ensure the coating adheres without melting the interior, this prevents misshapen pieces and helps the shell set evenly.
- Uniform scoops: Use a tablespoon scoop for consistent size, which ensures even chilling and predictable coating behavior so every truffle finishes at the same time.
- Choose your coating wisely: Pick a candy coating or baking chocolate that melts smoothly and sets with a sheen, as some low quality coatings can bloom or become dull after setting.
- Keep toppings ready: Place sprinkles or toasted coconut in shallow dishes so you can quickly decorate while the coating is still wet, avoiding fallout and uneven coverage.
- Work with room temperature hands: If your hands get too warm, wear food safe gloves or chill your palms briefly to prevent the truffles from softening during rolling.
- Store properly: Keep finished truffles in a single layer in an airtight container in the fridge to maintain texture and prevent sweating from temperature shifts.