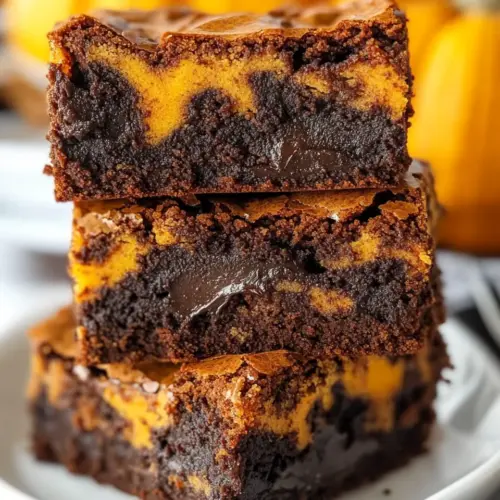
Swirled Pumpkin Brownies
Swirled Pumpkin Brownies are a cozy fusion of fudgy chocolate and spiced pumpkin, offering a tender, moist bite with melty pockets of chocolate. This easy to follow treat uses pantry staples for an approachable fall dessert, ideal for holiday gatherings or weeknight baking. Make these for a crowd pleasing bar that balances rich cocoa and warm spice in every square.
Equipment
- 9 inch square pan
- Mixing Bowls
- Whisk
Ingredients
- 3/4 cup (170 g) unsalted butter, melted Melted to provide rich fat and sheen, helps create a fudgy brownie texture while carrying flavor; incorporate warm melted butter into batter to blend smoothly with sugar and eggs for proper emulsion.
- 2 cups (400 g) granulated sugar Granulated to sweeten the batter uniformly and assist with structure through creaming with butter and eggs; measure precisely and stir until dissolved to avoid grainy texture in finished brownies.
- 4 large eggs at room temperature Beaten at room temperature to add moisture, richness, and lift while binding ingredients; ensure eggs are fully mixed into the batter so they incorporate evenly and contribute to a tender crumb.
- 1 teaspoon pure vanilla extract Added to enhance and balance flavor with warm, aromatic notes; stir in with wet ingredients to distribute its scent throughout the brownies without overpowering pumpkin or chocolate.
- 1 1/2 cups (180 g) all-purpose flour Sifted or whisked to provide the base structure and bulk, contributing gluten for chew and stability; combine gently with wet ingredients to avoid overmixing and keep brownies tender.
- 1/2 teaspoon salt Measured to control seasoning and balance sweetness, ensuring the chocolate and pumpkin flavors are highlighted; dissolve thoroughly into the dry mix to prevent salty pockets and uneven taste.
- 1 cup (240 g) pumpkin puree, not pumpkin pie filling Folded in as a smooth, moist component that adds pumpkin flavor and moisture without extra sugar; use pure pumpkin puree, not pie filling, to avoid altering sweetness and spice levels.
- 2 teaspoons pumpkin pie spice Sprinkled to introduce warm, autumnal spice complexity and complement pumpkin; mix into the pumpkin portion or dry ingredients to distribute the blend of cinnamon, nutmeg, and cloves evenly.
- 1/2 cup (40 g) unsweetened cocoa powder Cocoa-based to deliver deep chocolate flavor and color while contributing to the batter's structure; whisk with dry ingredients to remove lumps and intensify the chocolate profile of the brownies.
- 1/2 cup (100 g) semisweet chocolate chips Scattered to add pockets of melty chocolate and texture contrast throughout the brownies; fold in at the end to prevent sinkage and to preserve distinct chocolate bites after baking.
Instructions
- Preheat the oven to 350°F (180°C), or 160°C for a fan oven. Line a 9×9 inch (23×23 cm) baking pan with parchment paper and set aside.: Warm air will surround the batter immediately, and you should smell a faint, neutral oven scent once it reaches temperature. Proper preheating ensures even rise and consistent set across the pan, so don’t skip waiting until the oven is fully up to temp. A common mistake is rushing this step, which can lead to uneven bake where edges are done but the center remains undercooked; always verify with an oven thermometer if your oven runs hot or cool.
- In a large bowl, whisk together the melted butter and granulated sugar until smooth. Add the eggs and vanilla and whisk well.: You will feel the mixture thicken and see it change from glossy to slightly more aerated as eggs are incorporated. The aroma becomes buttery and sweet, and the surface gains a smooth sheen. This step creates the base structure and sweetness, so whisk until homogenous but avoid vigorous beating after the flour goes in to keep a fudgy texture. Overwhipping here can trap too much air and produce a cake like crumb instead of classic brownie density.
- Add the flour and salt and mix until no dry streaks remain.: As you fold in all purpose flour and salt , the batter will shift from glossy to slightly thicker and more satiny. Stop when you can no longer see dry patches, because overmixing develops gluten and makes the brownies tougher. A common pitfall is mixing until perfectly smooth; a few small streaks are fine as they will disappear during gentle subsequent mixing. Use a spatula and fold rather than aggressive stirring for the tenderest result.
- Divide the mixture in half. Add the pumpkin puree and pumpkin spice to one half and mix. Add the cocoa powder to the other half and mix well.: When you split the batter, note the differences: the pumpkin side will smell warmly spiced and become silky and slightly looser, while the cocoa side will take on a deep, chocolatey aroma and dark color. Mixing the pumpkin in gives moisture and lift, whereas incorporating cocoa powder will thicken the other half. A typical error is adding too much pumpkin or overmixing the cocoa side, which can upset the balance; measure carefully and fold gently until uniform.
- Alternate adding scoops of the two batters to the prepared pan and swirl with a knife to make a pretty swirled design.: As you dollop batter, you will see a mosaic of orange and chocolate build up. Use a knife to make sweeping motions across the surface, creating visible ribbons of each batter. The sound is silent but the visual change is immediate; stop swirling once you have a pleasing pattern because excessive swirling blends the batters and erases contrast. A common mistake is over swirling, which yields a single toned bar rather than distinct swirls.
- Sprinkle the chocolate chips on top and bake in the preheated oven for 25-30 minutes, until a toothpick inserted into the center comes out clean.: As the pan bakes the kitchen will begin to smell of warm spice and chocolate, and the top will develop a slight sheen with tiny cracks. The edges will set first, and you will notice a gentle pull away from the sides of the parchment when they are ready. Check at 25 minutes and look for a set center that still has a faintly soft spring; that ensures a fudgy interior. Baking too long dries the squares, so watch carefully near the end of the time window.
- Allow to cool completely before slicing and serving.: Cooling is when the structure solidifies and slices cleanly, and the aroma mellows into a balanced scent of chocolate and spice. If you attempt to cut while warm the squares will crumble or smear, losing that neat presentation. Patience here pays off, and using the parchment "handles" helps lift the whole slab from the pan for precise trimming. A typical error is rushing to serve warm, which creates a messy plate and a disappointed baker; wait until cooled for the best results.
Notes
- Measure ingredients accurately Using a kitchen scale for flour and sugar yields consistent texture, especially important for brownies where a little extra flour can make them cakier.
- Cool fully before slicing Allow the pan to reach room temperature then chill briefly if you want ultra clean slices; this firms up the crumb for tidy squares.
- Use quality cocoa A good unsweetened cocoa powder makes the chocolate half taste richer and prevents flat, one dimensional flavor.
- Don’t over swirl Stop after two or three passes with the knife so the two batters remain distinct and each bite shows contrast.
- Line the pan well Parchment overhang makes it simple to lift the slab out and trim neat edges without damaging the top crust.
- Check doneness early Begin testing at 25 minutes and look for a slightly soft center, overbaking dries the brownies and reduces chewiness.