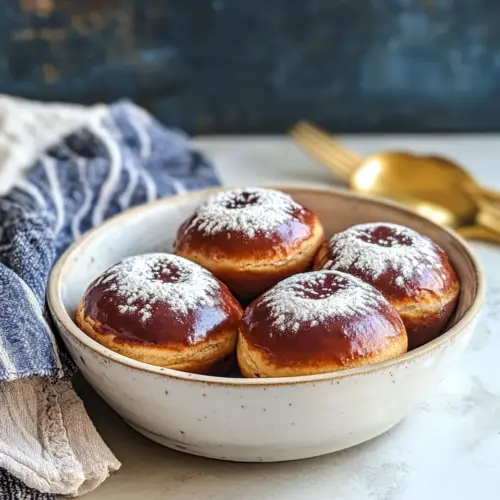
Sufganiyot
Sufganiyot are pillowy, deep fried doughnuts filled with spiced grape jelly and topped with a glossy vanilla glaze. These crispy outside yet tender inside treats deliver a burst of sweet, warm jam and aromatic vanilla with every bite, making them an irresistible option for festive breakfasts or easy weekend baking. Make a batch to share, because their joyful texture and flavor invite company and celebration.
Equipment
- Stand mixer
- Paddle attachment
- Dough Hook
- deep fry thermometer
- Heavy-Bottomed Saucepan
- Spider strainer
- Squeeze bottle
- 3 1/4-inch round cutter
Ingredients
- 1 cup (240 grams) warm water (110°F/43°C to 115°F/46°C) Provide warm water to activate yeast and dissolve sugar, creating a bubbly starter for the dough; maintain 110°F–115°F to avoid killing the yeast and ensure proper fermentation. Help hydrate flour and develop gluten structure for light, airy sufganiyot when mixed and rested.
- 6 tablespoons (72 grams) granulated sugar, divided Add sweetness and feed the yeast during proofing while contributing subtle caramelization to the dough surface when fried. Divide use between yeast activation and dough mixing to balance fermentation and final flavor.
- 2 1/4 teaspoons (7 grams) active dry yeast Leaven the dough by producing carbon dioxide during fermentation, creating the characteristic airy interior of sufganiyot. Combine with warm water and a portion of the sugar to bloom properly before mixing into the flour.
- 4 1/4 to 4 1/2 cups (531 to 562 grams) all-purpose flour, divided Build the dough’s structure and bulk while providing the starches and proteins needed for gluten development; the specified range allows slight adjustment for dough hydration. Reserve a portion for dusting or adjusting consistency to achieve a soft, pliable dough that fries up tender.
- 2 large eggs (100 grams), room temperature Enrich the dough with fat and protein, improving tenderness, color, and richness while aiding in browning during frying. Use room-temperature eggs to incorporate evenly for a smooth, elastic dough and consistent crumb.
- 3 tablespoons (42 grams) canola oil Introduce fat to tenderize the dough, contribute to moistness, and help with frying stability; canola oil offers a neutral flavor and high smoke point. Ensure even distribution so the dough remains supple and fries without excessive oil absorption.
- 1 tablespoon (9 grams) kosher salt Season the dough to enhance overall flavor and balance sweetness; kosher salt also tightens gluten bonds, improving dough strength for shaping and frying. Sprinkle into dry ingredients for even dispersion and consistent taste.
- 2 teaspoons (6 grams) tightly packed lemon zest Impart bright citrus aroma and subtle acidity to cut through richness, enhancing the overall flavor profile of the fried dough and complementing the jelly filling. Pack tightly when measuring to ensure consistent intensity in each batch.
- Vegetable oil*, for frying Provide the frying medium to quickly crisp the exterior while cooking the interior evenly; choose an oil with a high smoke point and neutral flavor to avoid off-notes. Maintain proper temperature to minimize oil absorption and achieve golden-brown sufganiyot.
- 1 1/2 cups (480 grams) Concord grape jelly Offer a classic, sweet filling with a robust Concord grape flavor and smooth consistency that pairs well with the enriched dough and vanilla-spiced glaze. Spoon into a piping bag or injector for even distribution inside each fried dough ball.
- 1 1/2 teaspoons (9 grams) vanilla bean paste Add deep aromatic vanilla complexity to the filling and glaze, elevating the overall flavor profile with concentrated vanilla seeds and paste. Stir into jelly or glaze to achieve a balanced, bakery-quality taste.
- 1/2 teaspoon (1 gram) ground cinnamon Provide warm, fragrant spice notes that complement the grape filling and vanilla glaze, enhancing the overall flavor without overpowering. Sprinkle into fillings or glazes for a subtle, cozy depth typical of holiday pastries.
- 1/4 teaspoon ground allspice Contribute a slightly peppery, warm background note that pairs with cinnamon and vanilla, rounding out the spice blend for the filling and glaze. Use sparingly to avoid dominating the delicate balance of flavors.
- Vanilla Glaze (recipe follows) Coat finished sufganiyot with a sweet glaze that adds gloss, additional vanilla flavor, and a pleasant sugary finish; serves as a sticky surface to help powdered sugar or sprinkles adhere if desired. Prepare to drizzle or dip while glaze is warm for smooth coverage.
Instructions
- In the bowl of a stand mixer, stir together 1 cup (240 grams) warm water, 1 tablespoon (12 grams) sugar, and yeast. Let stand until foamy, 5 to 10 minutes.: You will notice a creamy, frothy layer forming on the surface, accompanied by a sweet, bready aroma that signals the yeast is active. This foam is crucial because it confirms fermentation has started, which means your Sufganiyot will rise properly. If nothing appears after 10 minutes, your yeast may be inactive, which will yield a dense dough. Avoid using water warmer than the specified range, as it can kill the yeast and stop fermentation.
- Add 2 cups (250 grams) flour, eggs, canola oil, salt, lemon zest, and remaining 5 tablespoons (60 grams) sugar to yeast mixture; using the paddle attachment, beat at low speed just until combined. Add 2 1/4 cups (281 grams) flour; beat just until combined.: At this stage the mixture will be shaggy and slightly sticky, with bits of flour still visible, and you should smell the citrus from the lemon zest . Beating briefly avoids overworking gluten early on, which helps keep the final crumb tender. A common mistake is overmixing now, which tightens the dough and produces chewy sufganiyot later.
- Switch to the dough hook attachment. Beat at low speed until a smooth, soft, slightly sticky dough forms, about 14 minutes; add up to remaining 1/4 cup (31 grams) flour, 1 tablespoon (8 grams) at a time, if needed. (Be careful not to add too much flour. It is important for the dough to be soft and slightly sticky so it will have the soft interior we want after frying).: The dough will transform into a cohesive, glossy mass that pulls away from the bowl slightly but still clings when you touch it. It should feel elastic and springy, and you may hear a faint stretching sound as gluten develops. Adding small increments of flour helps you avoid a dry, heavy dough, which would make the interior dense rather than fluffy. If the dough becomes too stiff, your Sufganiyot will be tight and less tender.
- Spray a large bowl with cooking spray. Place dough in bowl, turning to grease top. Cover and let rise in a warm, draft-free place (75°F/24°C) until doubled in size, 45 minutes to 1 hour. (Alternatively, cover and refrigerate overnight. When ready to use, proceed as directed.): When the dough has doubled, it will look puffy and hold a gentle indentation when poked with a finger. This rise builds flavor and lightness, and you should detect a faint fermented aroma. Rushing this step is tempting but detrimental, as underproofed dough will not be airy. If your kitchen is cool, the dough will take longer and you may want to find a warmer spot to rise.
- Cut out 10 (6-inch) squares of parchment paper, and place 2 to 2 1/2 inches apart on 2 baking sheets. Spray parchment squares with cooking spray.: Preparing the parchment prevents the cut rounds from sticking and makes transferring into hot oil safer, as you can drop the paper and dough into the fryer then remove the paper once the dough has floated. The spacing lets the rounds puff without touching, ensuring even shapes. Crowding the rounds will lead to misshapen sufganiyot as they expand.
- Punch down dough; turn out onto a heavily floured surface, and roll to 1/2-inch thickness. Using a 3 1/4-inch round cutter dipped in flour, cut dough. Gently transfer cut dough to prepared parchment squares. Reroll scraps, and let stand for 5 to 10 minutes; cut scraps. Discard remaining dough. Cover and let rise in a warm, draft-free place (75°F/24°C) until puffed, about 30 minutes.: As you roll, the dough should feel soft with a slightly tacky surface dusted with flour. The rounds should hold their shape and show a light, airy texture at the edges. Handle them gently to preserve the gas pockets that create a tender interior. Overworking at this stage deflates the dough and results in dense sufganiyot.
- In a large heavy-bottomed saucepan, pour vegetable oil to a depth of 2 inches, and heat over medium heat until a deep-fry thermometer registers 365°F (185°C).: After the second rise the rounds will look noticeably puffed and soft, like little pillows ready to fry. The additional rest relaxes the gluten, producing more tender pastries. If the rounds remain flat, the oil will soak in rather than creating a crisp shell, so ensure they have visibly puffed before frying.
- Line a large rimmed baking sheet with paper towels.: The oil should shimmer slightly and give off only a faint scent of warmth, not smoke. Frying at the correct temperature creates a quick golden crust that seals moisture inside. If the oil is too cool the sufganiyot will absorb excess oil and become greasy; too hot and they will brown too fast, leaving raw interior. Maintain consistent temperature between batches for even results.
- Working in batches, using parchment squares, gently pick up sufganiyot and add to oil. (Do not place parchment paper in oil.) Fry until golden brown, about 2 1/2 minutes, turning halfway through frying. Using a spider strainer, remove sufganiyot from oil, and place on prepared pan. Let cool completely.: The paper towels will absorb excess oil, and you should see faint oil sheen on them after draining, indicating correct frying. A clean, organized draining area helps you manage hot pastries safely. Skipping this step leaves the finished sufganiyot overly oily and less pleasant to eat.
- Using a small paring knife, make a hole in side of each cooled sufganiyah; using a small wooden skewer, hollow inside of each sufganiyah.: As they fry you will hear a gentle bubbling and see the surface transform to a uniform golden color. Turning halfway ensures even browning and a symmetrical crust. Remove with a spider strainer when done and transfer to the prepared pan. Frying too long will darken them and risk drying the interior, while under frying leaves them pale and doughy.
- In a medium bowl, whisk together jelly, vanilla bean paste, cinnamon, and allspice. Place in a squeeze bottle. Pipe jelly mixture into sufganiyot, being careful not to overfill. (Each sufganiyah will hold about 50 grams. If it is overfilled, it will just leak back out, which can be wiped off but gets sticky). Dip tops in Vanilla Glaze, letting excess drip off. Let stand until glaze is set. Best served same day.: Cooling allows the interior to set so you can hollow and fill without collapsing. You will notice the aroma shift from sizzling oil to sweet dough and jam. Rushing to fill when still very hot can melt the filling and glaze, creating a mess.
- Using a small paring knife, make a hole in side of each cooled sufganiyah; using a small wooden skewer, hollow inside of each sufganiyah: When you hollow them out you should see a soft, airy interior with small uniform air pockets, which is the sign of proper fermentation. Work gently to avoid tearing the exterior shell. A common error is cutting too large a hole which can cause fillings to leak out.
- In a medium bowl, whisk together jelly, vanilla bean paste, cinnamon, and allspice. Place in a squeeze bottle: The mixture will be glossy and fragrant, with a warm spice aroma. Using a squeeze bottle gives you control while piping, preventing overfilling. If the jelly is too stiff, warm it slightly to make piping easier, but avoid overheating which thins it too much and increases leaking.
- Pipe jelly mixture into sufganiyot, being careful not to overfill. Dip tops in Vanilla Glaze, letting excess drip off. Let stand until glaze is set: As you pipe, you will feel gentle resistance when the cavity is full and may see the dough expand slightly as the filling settles. The glaze should form a satiny coating that firms to the touch in a few minutes, adding visual shine and sweetness. Overfilling leads to leakage and stickiness, which can be messy for serving.
Notes
- Swap the jelly for a different high quality jam, keeping viscosity similar so it pipes cleanly and does not leak.
- Infuse the oil with a neutral flavor by ensuring it stays clean between batches, which helps maintain a pure fried taste.
- Adjust spices in the filling to lean more citrusy or more warm spice depending on season and preference.
- Use different glazes such as a light powdered sugar glaze to change sweetness level and appearance.
- Serve warm for the most nostalgic experience, as the contrast of warm jam and set glaze is delightful.