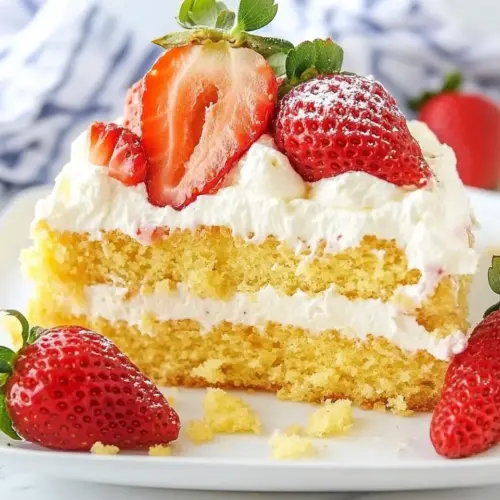
Strawberry Tres Leches Cake
Strawberry Tres Leches Cake is a creamy, fruit forward indulgence with a tender cake soaked in three milks and topped with bright strawberries. This easy, make ahead dessert is perfect for gatherings and weeknight celebrations, offering a luscious mouthfeel and clear strawberry notes. Try it for its moist texture and simple, impressive finish.
Equipment
- 9x13 pan
- Mixing Bowls
- Whisk
- Fork
- Refrigerator
- Oven
Ingredients
- 15.25 ounces yellow cake mix Provides a pre-mixed base that supplies flour, sugar, leavening, and flavor to simplify batter preparation and ensure consistent cake texture. Helps create structure and a tender crumb that soaks up the milk mixture without falling apart. Contains stabilizers and flavors that contribute to the cake’s uniform rise and reliable baking performance.
- 4 large eggs Adds richness, moisture, and binding to the cake batter while contributing to lift and tenderness when beaten with other wet ingredients. Incorporates air when mixed to help the cake rise and creates a softer mouthfeel that complements the milk soak. Offers natural emulsifying properties to improve batter cohesion and final crumb quality.
- 1/2 cup melted butter Contributes fat and moisture to the batter, improving tenderness and flavor while enhancing the cake’s richness. When melted and mixed with eggs and other liquids, it helps incorporate fat evenly for a moist crumb that absorbs the tres leches mixture. Adds a subtle buttery taste that balances the sweetness of condensed milk and jam.
- 2 cups milk (divided) Serves as the primary liquid to hydrate dry ingredients and create a pourable batter; dividing the amount allows part to be used in the cake batter and part reserved for the milk soak. Provides mild dairy flavor and thins the cake mixture to the proper consistency for baking. Helps the cake absorb the tres leches mixture, lending creaminess throughout the finished dessert.
- 12 ounces evaporated milk Supplies concentrated milk solids and a slightly caramelized milk flavor that enriches the tres leches soak and adds creaminess. Thick consistency increases the overall richness of the milk mixture, helping the cake remain moist without becoming soggy. Balances the sweet condensed milk by contributing milk flavor depth and body.
- 14 ounces sweetened condensed milk Delivers intense sweetness and thick, creamy texture to the milk soak, creating the signature sweet, luscious tres leches syrup that the cake soaks up. Its viscosity helps the mixture cling to and penetrate the crumb, ensuring each slice is decadently moist. Sweetened condensed milk also contributes a subtle caramelized dairy flavor that complements strawberries and whipped topping.
- 3 cups fresh sliced strawberries (divided) Provides fresh fruity flavor, bright acidity, and natural moisture for both folding into the cake layers and garnishing the top, with divided portions allowing for incorporation and decoration. Adds texture and freshness that cuts through the richness of the milk soak and whipped topping. Offers color contrast and a vibrant strawberry taste that enhances the overall dessert balance.
- 1 cup strawberry jam Adds concentrated strawberry flavor and sweetness to intensify the fruit component and help create a saucy or spreadable layer that complements the soaked cake. Provides glossy shine and stabilized fruit flavor that can be warmed or spread over cake layers for extra strawberry coverage. Helps marry fresh strawberries with the moist cake for a cohesive taste profile.
- 8 ounces Cool Whip Provides light, airy sweetness and a stabilized whipped texture for topping and layering, lending creaminess without overpowering the strawberry and milk flavors. Eases assembly and slicing by forming a smooth, pipeable finish that holds its shape during serving. Adds a cool, creamy contrast to the soaked cake and fruit while keeping preparation simple.
Instructions
- Preheat the oven to 350°F and prepare a 9×13 pan by spraying it with cooking spray.: The scent of warming oven and the faint warmth on your face signals the start of baking, and preheating ensures even rise. A well prepared 9×13 pan with nonstick spray helps the cake release cleanly after baking, and it promotes even browning on the edges. Listen for the quiet hum of the oven settling at temperature, and watch for the interior racks to feel warm when you briefly open the door. If you skip preheating, the batter may bake unevenly, leading to dense areas and an inconsistent soak. Common mistake to avoid: placing the pan in before the oven reaches temperature, which can alter the rise and change how the crumb soaks up the milk.
- In a medium bowl, mix the cake mix, 4 eggs, melted butter, and one cup of milk.: As you whisk these ingredients together you will notice the batter transform from powder to glossy batter, releasing a sweet, baked aroma even before it hits the oven. Combining the cake mix with room temperature eggs and slightly cooled melted butter ensures a smooth emulsion, preventing the batter from separating. The texture should be thick but pourable, clinging slightly to the spoon. If the batter seems lumpy, give it a gentle stir rather than frantic beating, which can overwork the mix. One pitfall is overheating the butter which can cook the eggs and create scrambled bits, so allow the butter to cool a bit before adding.
- Pour the batter into the prepared pan and bake for 30 minutes or until a toothpick comes out clean.: When you pour the batter into the pan it will spread and settle, and as it bakes the edges will set and develop a pale golden hue. The interior should spring back slightly when you touch the surface gently, and a toothpick inserted in the center coming out clean is the classic cue that it is done. You may catch faint sweet, toasty notes coming from the oven as it nears completion. Avoid opening the oven repeatedly, which can cause uneven baking; instead check near the end of the suggested time. A common error is relying only on time, not texture, so use the toothpick and spring back as your guide.
- While the cake is baking, combine the remaining 1 cup of milk, evaporated milk, and sweetened condensed milk in a medium bowl. Place it in the refrigerator until needed.: Whisking these three milks together creates a silky, fragrant soak whose aroma is rich and milky with a whisper of caramel from the condensed milk. Chill this mixture in the refrigerator so it is cool when you pour it over the warm cake , this helps control how quickly the liquid is absorbed. You will notice a glossy sheen on the surface of the milk mix, and the texture will be noticeably thicker than plain milk. If you pour hot milk on the cake, it can steam and loosen the crumb, so chilling prevents over saturation. A frequent misstep is using warm or room temperature milks that encourage the cake to break down, so keep the soak chilled.
- In a small bowl, mix together the strawberry jam and 1 cup of the sliced strawberries. Set aside.: Combining strawberry jam with fresh sliced strawberries produces an aromatic, textured topping that spreads easily and melds with the milk soaked surface. Stirring reveals flecks of fruit and bursts of jammy sweetness, and the mixture should be cohesive yet slightly chunky so it anchors to the cake . Warm the jam briefly if it resists mixing, but avoid overheating which will make it runny. A common mistake is using too much jam which can dominate the delicate milk flavor, so keep to the measured amount for balance.
- Let the cake cool completely before poking the cake all over with a fork. Pour the milk mixture over the cooled cake, then spread the cake with the jam mixture, then the Cool Whip.: Cooling is an understated but crucial moment where the structure firms and the crumb stabilizes. When the cake is completely cool, use a fork to create many small holes across the surface; these perforations are what allow the milk mixture to sink in evenly. The texture should feel set yet tender under your fingers, and you will avoid tearing by poking gently. If the cake is still warm, the holes will enlarge and the crumb can break apart as you pour the soak. Avoid using a single large hole making tool, which can create channels and uneven absorption.
- Top the cake with the remaining sliced strawberries, then cover and refrigerate for at least 1 hour.: As the chilled milk hits the perforated cake , you will see it glisten and slowly sink, carrying sweet milky aroma into the crumb. After the soak is fully absorbed, spreading the jam mixture creates a fruity layer that binds to the top surface, and finishing with Cool Whip adds a soft, snow like cap. The contrast between the silky soak and glossy jam is fragrant and visually appealing. Work patiently and let the milk settle between pours to avoid pooling on the sides. One common error is pouring all the milk at once without allowing absorption time, which can lead to uneven soak and puddles.
- Slice into 12 squares and serve immediately. Any leftover cake should be stored in the refrigerator.: Placing the reserved fresh strawberries on top adds color, texture, and bright acidity that wakes up the rich milky layers. After topping, cover the pan to retain moisture and chill for at least 1 hour so the flavors knit and the cake firms for neat slicing. The fragrance in the fridge becomes a promise of the dessert to come, and the chilled cake slices hold shape better. Avoid leaving it uncovered or at room temperature for long periods, as the fruit can weep and the texture may soften too much.
- Slice into 12 squares and serve immediately: When you slice, the edges should be clean and the layers visible, with a glossy top and bright strawberry accents. The first forkful will reveal the milky tenderness and fruit contrast that defines this dessert. Serve chilled for the best texture and store any leftovers in the refrigerator, as the cake keeps well but is perishable. A common mistake is attempting to slice too soon; slices will crumble if the cake has not had time to set in the fridge.
Notes
- Lighten the topping Use a fresh whipped cream in place of the Cool Whip for a less processed finish, whipping to soft peaks so it remains pillowy without separating.
- Boost strawberry flavor Fold a spoonful of strawberry jam into some of the milk soak to distribute fruit notes more thoroughly, but do so sparingly to avoid altering soak viscosity.
- Make it glossier Warm the remaining jam slightly and brush it over the top strawberries to give them a professional, shiny finish that also helps them hold up in the fridge.
- Adjust sweetness If you prefer less sweet, reduce the amount of sweetened condensed milk by a small fraction and allow the tartness of the strawberries to provide counterpoint.
- Serve in portions For an elegant presentation, assemble in individual ramekins using the same layer order, which is especially handy for dinner parties and make ahead service.