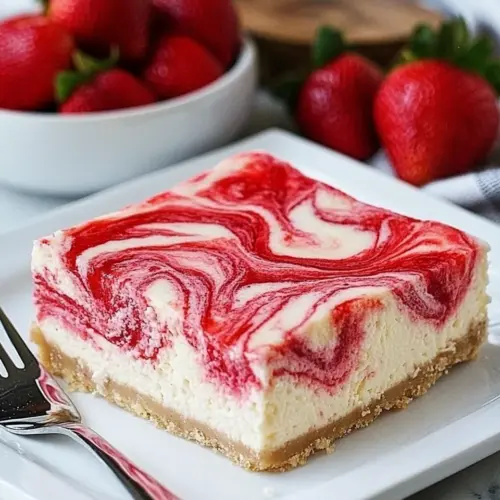
Strawberry Swirl Cheesecake
Strawberry Swirl Cheesecake is a creamy, lightly tangy dessert with glossy berry ribbons and a toasty graham crust. This easy to make treat balances richness and brightness, perfect for spring gatherings or casual celebrations. It is approachable for weeknight baking yet impressive enough for company, promising a pretty presentation and reliably delightful flavor.
Equipment
- 8-inch square baking pan
- Electric Mixer
- Mixing Bowls
- Fork or spoon for mixing crust
- Knife for swirling
Ingredients
- cooking spray Lightly coat the pan to prevent sticking and ensure easy removal of the cheesecake without altering flavor; use an even spray for consistent coverage. Ideal for springform pans or muffin tins when making mini cheesecakes.
- 1/2 cup crushed graham cracker crumbs Provide a crunchy, buttery base when mixed with butter and pressed into the pan; crushed crumbs create texture contrast with the creamy filling. Measure precisely to maintain proper crust-to-filling ratio for balanced slices.
- 1 tbsp light butter, softened Soften and bind the graham cracker crumbs while adding a subtle buttery flavor that enhances the crust richness. Use light butter to keep calories lower while still achieving a cohesive crust that browns slightly during baking.
- 8 oz package reduced fat cream cheese, softened Soften to room temperature to ensure smooth incorporation into the batter and produce a creamy, dense texture characteristic of cheesecake. Choose reduced fat cream cheese to reduce calories while maintaining tangy, rich flavor in the filling.
- 1/4 cups sugar Sweeten the filling to balance the tang of cream cheese and yogurt while contributing to the overall structure and mouthfeel. Measure carefully since sweetness level affects both taste and texture in reduced-fat recipes.
- 6 oz fat-free vanilla Greek yogurt, I used Chobani Add creamy tang and moisture while reducing overall fat; fat-free vanilla Greek yogurt lightens the filling and adds protein. Stir gently to avoid deflating the batter and to maintain a smooth consistency.
- 2 large egg whites Lighten the filling and help set the cheesecake without adding yolk fat; egg whites contribute structure and stability when gently folded in. Whip or beat as directed to incorporate air for a slightly lighter texture.
- 2 tbsp lemon juice Brighten the flavor and add acidity to balance sweetness; lemon juice enhances overall brightness and complements the strawberry swirl. Use fresh juice when possible for the best aromatic lift.
- 1/2 tsp vanilla extract Enhance the overall aroma and deepen the flavor profile with a sweet, warm vanilla note that complements both cheesecake and strawberry components. Use pure vanilla extract sparingly for an authentic taste boost.
- 1 tbsp all purpose flour Thicken the filling slightly and help stabilize the mixture, preventing separation and creating a silkier texture when baked. All purpose flour adds body without changing flavor when mixed thoroughly.
- 1/4 cups strawberry jam, I used sugar free Introduce concentrated strawberry flavor and color for the swirl while providing sweetness and a glossy finish; sugar-free jam lowers added sugar content. Spoon and swirl into the batter before baking to create appealing marbling.
Instructions
- Heat oven to 350°. Coat an 8-inch square baking pan with non-stick spray.: The kitchen fills with a warm, anticipatory scent as the oven comes to temperature, which prepares the pan and ensures even baking. Set the oven rack to center so heat circulates uniformly. A common mistake is not preheating fully, which can lead to uneven rise and longer bake times. You should hear a faint click when the oven reaches temperature and feel consistent warmth from the door if you open it briefly.
- Mix together graham cracker crumbs and butter with a fork until evenly moistened. Press evenly into bottom of prepared pan.: The slight hiss of the spray and the glossy sheen on the pan surface are reassuring signs that the cheesecake will release cleanly. Ensure the spray covers corners and edges to prevent sticking. One trap is spraying too close, leaving a gummy residue; hold the can a few inches away and apply a light, even mist.
- Gently beat cream cheese, sugar and vanilla until smooth using an electric mixer.: When you combine the crumbs and softened butter, you should feel the texture change from dry and powdery to clumping slightly when pressed. This indicates the crust will hold together. Press the mixture firmly into the bottom of the prepared pan using the back of a spoon or a flat measuring cup, creating an even layer. If you press too lightly, the crust can crumble when slicing; press with steady pressure to compact it well.
- Gradually beat in fat free yogurt, egg whites, lemon juice, and flour. Do not over beat. Pour over graham cracker crust.: As you press the crumbs, listen for the slight crunch and watch the surface turn glossy where the butter binds everything. A smooth, even base ensures that slices will hold shape. Avoid overpacking which can result in a dense, hard crust; aim for firm but not rock solid. If the crust feels loose after baking, it usually means it needed more compression before the filling went in.
- Stir jam until smooth. Drop by small spoonfuls over surface of filling.: Softened cream cheese should yield into the beaters with barely any resistance, transforming into a satiny, lump free mass. Start on low to prevent splatter, then up the speed just enough to achieve smoothness. Overworking can introduce air, causing cracks later, so stop once the mixture is unified and silky. A common error is mixing straight from the fridge, which leaves stubborn lumps; always bring cream cheese to room temperature.
- Using a knife, swirl jam gently through filling to create marble effect.: As you incorporate each ingredient, the filling will become silkier and slightly looser, with a scent that shifts from dairy rich to gently citrusy. Beat gradually so the mixture remains cohesive and does not separate. The flour will help it thicken just enough for structure. Avoid vigorous beating which can trap air and make the center puff and crack; fold lightly when possible.
- Bake 25 to 30 minutes or until center is almost set. Cool to room temperature.: Feel the mixture as you work, it should be smooth but not foamy, and it should glide off the mixer beaters in a ribbon without breaking into bubbles. Overbeating is the most common issue that leads to a texture that is too airy and prone to cracking. If you notice foam, stop mixing and gently fold with a spatula to deflate some of the air.
- Chill a few hours in the refrigerator.: As the filling fills the pan, it should spread with a slow, steady flow and settle into a glossy, even layer. Fill to just below the rim to allow for slight rise. If the surface looks lumpy, tap the pan gently on the counter to release trapped air. A frequent mistake is pouring into a warm crust which can cause sliding or separation; ensure the crust is room temperature.
- Stir jam until smooth: The jam should lose any firm chunks and become a velvety ribbon that you can spoon easily. Warm it slightly if needed so it loosens without becoming thin. Smooth jam swirls create clean visual contrast and an even flavor distribution. Avoid heating it too much which will thin it excessively and make swirling hard to control.
- Drop by small spoonfuls over surface of filling: Placing neat little dollops across the filling gives you control over the swirl pattern. The contrast between the glossy jam and the pale filling is visually striking and sets up the marbling. Dropping too much in one area can overwhelm the balance of flavors; distribute evenly for uniform bites.
- Using a knife, swirl jam gently through filling to create marble effect: The soft scraping sound of the knife and the changing pattern on the surface are satisfying cues that the marble is forming. Move the knife in slow, deliberate motions to avoid overmixing. The goal is pretty ribbons, not complete blending. A common error is stirring too aggressively which erases the marbling and mixes the jam into the filling.
- Bake 25 to 30 minutes or until center is almost set: You will notice the edges become slightly puffed and set, while the center still has a gentle jiggle like pudding. The aroma becomes richer and slightly toasty. Pulling it too early will leave a runny center, while baking too long will dry it out. Aim for that tender wobble to achieve a creamy final texture.
- Cool to room temperature: As it cools, you will see the filling settle and the surface lose some of its sheen, which signals the structure is stabilizing. Cooling gradually helps prevent sudden shrinkage or cracking. Resist the urge to rush this with cold air, which can encourage cracks; let it rest calmly on the counter.
- Chill a few hours in the refrigerator: Chilling firms the filling to slicing texture, and the flavors knit together so each bite tastes more integrated. The refrigerator hum becomes part of the ritual while the cake gains body. Cutting too soon will yield messy slices; patient chilling yields clean, beautiful pieces.
Notes
- Adjust sweetness: If you prefer a less sweet result, choose a sugar free or reduced sugar jam and use the lower end of the sugar measurement; this keeps the filling bright and prevents it from tasting cloying.
- Enhance tang: Add a touch more lemon juice for extra brightness if your yogurt is very mild; the acid sharpens the profile and balances sweetness beautifully.
- Firming option: If you want a denser slice, make sure to chill it overnight; longer chilling time allows the filling to fully set and slice more neatly.
- Crust variety: Swap the graham crumbs for digestive biscuit crumbs if you prefer a different crumbly base while keeping the same butter to crumb ratio for proper binding.
- Swirl technique: For more dramatic marbling, create larger dollops of jam and drag the knife in longer, sweeping motions to form bold ribbons across the surface.
- Serving style: Serve slightly chilled rather than ice cold so the texture is creamy and the flavors are more pronounced; remove from the fridge about 15 minutes before slicing.