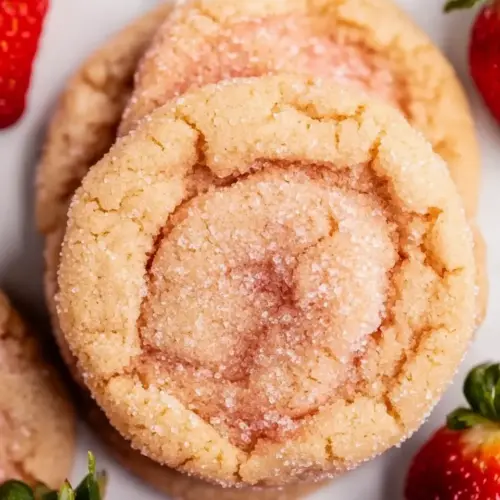
Strawberry Sugar Cookies
Strawberry Sugar Cookies are soft, lightly crisp cookies bursting with concentrated freeze dried strawberry flavor and a subtle vanilla warmth. These easy, spring friendly cookies use a flax "egg" and vegan butter to create a tender crumb and pretty pink flecks throughout. They are perfect for casual gatherings or make ahead baking, delivering bright aroma and comforting texture that's worth making again.
Equipment
- Mixing Bowl
- Handheld Mixer
- Food Processor
- Blender
- Baking Sheet
- Parchment Paper
Ingredients
- 1 flax "egg" 1 tbsp ground flax + 2 1/2 tbsp water Bind together as an egg substitute by stirring ground flax with water and letting it gel for a moist, vegan-friendly binder that helps provide structure and chewiness in the cookie dough.
- 1.2 ounces freeze-dried strawberries divided Add bright strawberry flavor and natural color by crushing most of the freeze-dried strawberries into a powder while reserving a few pieces for texture, intensifying fruity notes without adding moisture.
- 1/2 cup 1 stick salted vegan butter * softened Cream for richness and tenderness by using softened salted vegan butter to incorporate air when beaten with sugars, contributing to flavor, spread, and a soft crumb in the finished cookie.
- 1/3 cup + 2 tablespoons cane sugar divided Sweeten and aid in creaming by splitting the cane sugar so some is beaten with butter for texture and some is sprinkled or folded in for additional sweetness and slight crunch.
- 1 packed tablespoon light brown sugar Contribute deep, caramel-like sweetness and moisture due to its molasses content, helping tenderize the cookies and adding a subtle complexity to the overall flavor profile.
- 1 teaspoon vanilla extract Enhance overall flavor profile and amplify other sweet and fruity notes by adding floral, warming vanilla, rounding out the cookie’s taste without altering texture.
- 1 cup all-purpose flour * spooned and leveled Provide structure and bulk by being measured spooned and leveled to ensure accurate flour quantity for proper dough consistency and optimal cookie texture.
- 1/2 teaspoon baking powder Leaven lightly and create slight lift by incorporating baking powder to produce gentle rise and a soft, tender crumb without making cookies cake-like.
- Pinch of kosher salt Balance sweetness and enhance other flavors with a pinch of kosher salt to sharpen taste, control sweetness perception, and strengthen gluten development slightly.
Instructions
- Prep: Prepare the flax egg by combining the ground flax and water in a small bowl, then set aside for at least 5 minutes to thicken. Use a food processor knife to chop half of the freeze-dried strawberries into small pieces; set aside. Place the remaining strawberries in a blender or food processor (make sure it is completely dry!) and blend or pulse for 30 to 45 seconds until a fine powder forms; set aside. Note: do not open the blender/processor right away – it will be very dusty! I recommend keeping it sealed until adding the dry ingredients in step 3 after some of the powder settles.: When the flax mixture begins to thicken, you will notice it go from watery to slightly gel like, with a faint nutty scent that tells you it is ready. This transformation matters because it gives the dough binding power, preventing crumbly cookies. Avoid the mistake of rushing this step, as a thin flax mix will not hold the dough properly and can lead to flattening during baking. Also, when you pulse the freeze dried strawberries you will hear a high pitched chopping sound, and the processor will smell intensely fruity, which is normal. The fine powder will billow when you open the lid, so wait a moment for dust to settle, or open the lid slowly to avoid a pink cloud over your counter.
- Cream the Sugar: Add the vegan butter to a large mixing bowl, then add in 1/3 cup of cane sugar and brown sugar. Use a handheld mixer to cream the butter and sugar together over a medium speed until light and fluffy, about 3 minutes. Add the thickened flax egg and vanilla to the bowl and beat again until the flax is fully incorporated into the butter mixture.: As you beat the softened butter with the 1/3 cup cane sugar and light brown sugar, listen for the mixer changing tone from heavy to lighter, and watch the mixture turn paler and fluffier after about three minutes. This aeration traps tiny air pockets that create a tender lift in the cookie, so don’t skimp on creaming. A common error is using butter that is too cold, which prevents proper aeration and yields denser cookies. Once you add the thickened flax and vanilla, the mixture should smooth and shiny, smelling warmly of vanilla with a subtle buttery note.
- Dry Ingredients: Add the flour, strawberry "powder", baking powder, and salt to the bowl. Beat on the lowest setting of your mixer and mix until just combined, using a spatula to scrape the sides of the bowl if necessary. Add the chopped freeze-dried strawberries to the bowl and fold them into the batter. Cover the cookie dough with plastic wrap and place in the fridge to cool for 60 minutes, or up to overnight.: When you add the flour, powdered strawberry, baking powder, and salt and mix on low, you will see the dough transform from sticky to manageable, with streaks of pink from the powder. Mixing slowly prevents overworking the gluten, which keeps the cookies tender rather than chewy. If you overmix here you risk a tougher crumb, so stop as soon as the streaks disappear and fold in the chopped strawberries gently, noticing little bursts of red against the pale dough. Using a spatula to scrape the bowl ensures everything is evenly incorporated without excessive beating.
- Form the Cookies: Preheat the oven to 350 F while the cookie dough is chilling and line a baking sheet with parchment paper. Place the remaining 2 tablespoons of sugar in a small bowl. Divide the cookie dough into 12 even balls (mine were just under 2 tablespoons each), using your hands to roll into small spheres. Roll each cookie dough ball in the cane sugar until fully coated, then place on the lined baking sheet about 2" apart. Use your hands to flatten each cookie dough ball slightly – they will spread some in the oven, but not a lot.: As the dough chills, it firms and the flavors meld, and it will be noticeably easier to handle. Preheating the oven to 350 F warms the baking environment for consistent rise, and lining a baking sheet with parchment prevents sticking and encourages even browning underneath. When you roll each ball and coat it with the remaining 2 tablespoons sugar, you will feel a slight granulated crunch on the surface that caramelizes in the oven. A frequent mistake is not spacing the cookies about 2 inches apart, which can cause them to bake into each other. Flattening them slightly helps achieve the right shape, because they will spread modestly, keeping a soft center with set edges.
- Bake: Bake in the middle rack of the oven for 12 to 13 minutes, or until the edges of the cookies look set, but the centers are still soft and puffy. Remove the cookie sheet from the oven and let the cookies set for 5 to 10 minutes before using a spatula to transfer them to a cooling rack.: While the cookies bake for about 12 to 13 minutes, your kitchen will fill with a sweet, fruity aroma and the cookies will puff and settle. Look for edges that appear set and faintly golden while centers remain soft and puffy, that visual cue is key to avoiding overbake which dries them. When you remove the sheet, the cookies will continue to set on the hot tray, so letting them rest for 5 to 10 minutes before transferring prevents breakage and yields a tender center with slightly crisp edges. A common trap is pulling them out too late, which loses the gentle chew we aim for.
- Serve & Store: Enjoy immediately, or store in an airtight container on the counter for up to 4 days. You can also store your cookies in the freezer for 1 to 2 months and de-frost as necessary.: After cooling on a rack, the cookies feel pleasantly mellow, with restrained sweetness and concentrated strawberry notes. Store in an airtight container on the counter up to four days to keep them soft, or freeze for longer storage, noting that freezing locks in texture but may slightly reduce surface sparkle. When thawing, let them come to room temperature in the container to prevent condensation that can soften the exterior. Avoid leaving them exposed to air, which will dry them out quickly.
Notes
- Flour measurement: Use the spoon and level method to measure flour to keep the dough tender and prevent dryness, because too much flour makes the cookies dense and crumbly.
- Gluten free option: Replace with an equal part all purpose gluten free flour blend; expect a little more spread, but the cookies will still hold together and taste great.
- Vegan butter swap: If using unsalted vegan butter, increase the salt to 1/4 teaspoon to maintain balance, and note that coconut oil can substitute if chilled first so it is slightly firm and easier to cream.
- Freeze dried strawberry use: Divide the strawberries exactly as directed, chopping some for texture and powdering the rest to infuse the dough evenly, which preserves that bright berry flavor.
- Rolling sugar: Roll each dough ball thoroughly in the reserved cane sugar to create that pretty, crackled appearance and slight crunch on the exterior.
- Storage tips: Keep in an airtight container at room temperature up to four days, or freeze for one to two months and thaw at room temperature to preserve texture.