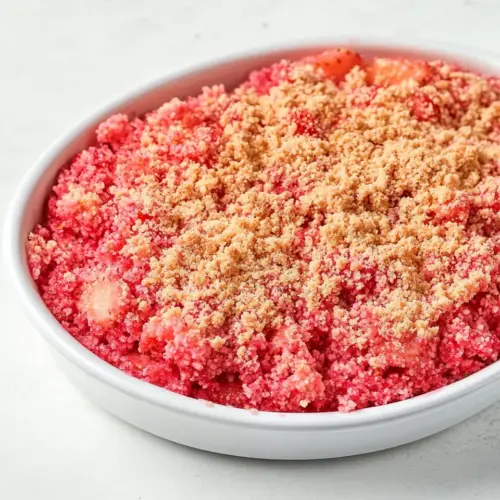
Strawberry Shortcake Crunch Topping
Strawberry Shortcake Crunch Topping is a buttery, crispy crumble with bright freeze dried strawberry flavor and toasty notes, perfect for adding crunchy texture to desserts and breakfasts. This easy, pantry driven topping blends flour, sugar, milk powder, and freeze dried strawberry powder for an irresistibly sandy crunch that pairs beautifully with whipped cream and berries, making it a must try finishing touch.
Equipment
- Mixing Bowl
- Whisk
- Baking Sheet
- Parchment Paper
- Spatula
Ingredients
- 3/4 cup 95 g all-purpose flour Provide structure and body to the topping mixture, helping form the crunchy base when combined with fat and baked or toasted; sifts easily into a uniform texture and balances moisture absorption to prevent sogginess. Adds subtle gluten-based chew that contrasts with tender inclusions and complements the shortcake profile. Can be measured precisely by weight for consistent results.
- 6 tablespoons 75 g granulated sugar Sweeten and caramelize during baking or toasting to create a pleasant crunchy sweetness; dissolves into the dough and helps bind dry ingredients while enhancing overall flavor. Contributes to golden color and helps balance tartness from strawberries.
- 2 tablespoons 16 g whole milk powder Contribute richness and a concentrated dairy flavor while helping to tenderize the crumb; whole milk powder re-introduces milk solids without adding liquid, improving texture and browning. Aid in creating a slightly creamy mouthfeel and support shelf stability of the topping.
- 1 tablespoon 8 g cornstarch Thicken and stabilize the batter components, preventing them from becoming mealy after baking; cornstarch lightens the texture by absorbing extra moisture and giving a delicate crispness. Helps achieve a consistent crunch without adding gluten.
- 1/4 teaspoon baking powder Leaven gently to give a light lift and prevent the topping from becoming overly dense; small amounts create subtle aeration that enhances texture. Work in combination with other dry ingredients to ensure an even rise.
- 1/4 teaspoon fine sea salt Enhance overall flavor balance by amplifying sweetness and moderating bitterness; a pinch rounds out the profile and heightens other ingredients' tastes. Also aids in preserving the topping's freshness by controlling seasoning.
- 6 tablespoons 84 g unsalted butter, melted Provide richness and moisture while promoting browning and a tender, flaky crunch when melted into the dry mixture; melted unsalted butter carries flavors and coats flour to limit gluten development. Allows for even distribution of fat and contributes to the desirable shortbread-like texture.
- 1/2 teaspoon vanilla extract Impart a warm, aromatic vanilla note that rounds out sweetness and deepens flavor complexity; a small amount boosts perceived sweetness without adding sugar. Mixes easily into melted butter for even flavor distribution.
- 3 tablespoons 21 g freeze dried strawberry powder Deliver concentrated bright strawberry flavor and vivid color without adding moisture, intensifying fruit notes in the crunch topping; freeze-dried powder disperses evenly and creates bursts of tartness. Also adds visual appeal and natural fruit intensity when mixed into the batter.
Instructions
- Preheat oven to 250 degrees F. Line a baking sheet with parchment paper or a silicone baking mat.: Right away you will notice the warm, dry air from the oven, and preparing the pan prevents sticking and makes cleanup effortless; a lined sheet also ensures even browning, because the crumbs will sit directly on the surface. The low temperature encourages gradual dehydration rather than rapid browning, which helps the crumbs crisp evenly; if you bake too hot the outsides may color before the interior dries. A common mistake here is skipping the lining, which can lead to stuck crumbs and uneven heat contact, so take the extra minute to line the sheet.
- In a mixing bowl, whisk together flour, sugar, milk powder, cornstarch, baking powder, and salt until evenly incorporated. Drizzle in melted butter and vanilla and mix until no dry ingredients remain; it should stick together into a crumbly dough.: As you whisk the dry mix you will see the individual powders become a uniform pale blend, and a faint sweet scent of sugar and milk powder will emerge. This step matters because even distribution ensures each crumb has the intended balance of lift, sweetness, and structure; clumps of baking powder or salt can create pockets of off flavor. Watch for any gritty lumps, and break them up with the whisk; a common error is under-whisking, which results in uneven pockets of taste and texture later on.
- Chill dough for 20 to 30 minutes (this makes it easier to crumble), then use your fingers to crumble dough onto prepared baking sheet, spreading crumbs into a single layer and breaking up any extra large pieces (ideally you want mostly pea-sized pieces).: When the butter meets the dry mix you will notice the texture transform from powdery to slightly clumpy, and the aroma will become buttery and fragrant from the vanilla . The butter coats the flour particles, which is why this step is crucial for developing crumbs that will brown and crisp rather than stay powdery. If the mixture seems too wet, pause and let the melted butter cool a touch, since overly hot butter can make the dough too loose; conversely, too little butter will leave dry patches. A typical mistake is adding all the butter at once without mixing, which can cause uneven binding, so drizzle and stir for even coating.
- Bake for 30 minutes or until just starting to turn light golden brown (they will crisp up more as they cool). As soon as you remove the baking sheet from the oven, use a spatula to lightly toss and break up the crumbs into smaller pieces where they've stuck together.: Chilling firms the fat and makes the dough easy to crumble, and when you press it between your fingers you should aim for mostly pea sized pieces with a few smaller bits. The tactile feedback is important, you should feel the dough give way into little clusters rather than a paste; this produces the best range of textures after baking. If you skip chilling the crumb may smear on the pan and bake into uneven clumps. A common misstep here is making the pieces unevenly large, which leads to some bits staying soft while others overbake, so take care to break up big pieces.
- Separate out about 2/3 of the warm crumb mixture on the pan, and sprinkle this section with 2 tablespoons strawberry powder. Gently toss to coat crumbs evenly with strawberry. Sprinkle with remaining strawberry, and toss once more. Let cool completely, then mix the two colors of crumbs together to blend.: As the crumbs bake a gentle toasty scent will rise from the oven and you will see the edges take on a pale golden hue, signaling that sugars are caramelizing and the crumbs are drying. Because you are baking at a low temperature, the change is subtle, so watch carefully toward the end of the time. Right after removing the sheet, use a spatula to gently toss and break up any clusters while the crumbs are warm, which prevents large glued lumps as they cool. The trick to success is timing; overbaking will make the crumbs too hard and underbaking leaves them soft. Avoid the mistake of assuming darker equals better, aim for light gold so the crumbs remain tender yet crisp.
- Crumbs can be made a few days ahead of time and stored in an airtight container at room temperature until ready to use.: Working while the crumbs are warm helps the powder adhere, and you will see the pale crumbs pick up a light pink tint as you sprinkle and gently toss. The warmth allows the powder to cling without dissolving, preserving crispness while distributing flavor. Using 2/3 of the crumbs ensures you have a ratio for a visually varied mix once combined. A common mistake is adding the powder to the entire batch at once, which can lead to uneven coloring and flavor concentration; portioning helps achieve balance.
- Gently toss to coat crumbs evenly with strawberry. Sprinkle with remaining strawberry, and toss once more. Let cool completely, then mix the two colors of crumbs together to blend.: As you toss you should hear a faint shuffle of dry pieces and see the color become more unified; cooling is when crispness sets, and you will notice the crumbs dry further and become firm to the touch. Combining the two batches after cooling creates a beautiful marbled effect and ensures varied bites. If you taste a sample before cooling you may not get the full crisp texture, so resist the urge to immediately use warm crumbs. Avoid storing while warm, which traps steam and softens the topping; always cool fully before storing.
- Crumbs can be made a few days ahead of time and stored in an airtight container at room temperature until ready to use.: Proper storage preserves the crunch and flavor, and when you reopen the jar you will smell the buttery, strawberry scented crumbs. Keeping them in an airtight container away from heat and humidity is key to maintaining texture; exposure to moisture dulls the crispness quickly. A common oversight is placing them near the stove or a boiling pot, which can introduce humidity and soften the crumbs, so choose a cool pantry spot.
Notes
- Adjust crumb size by crumbling more finely for a sand like sprinkle, or leaving slightly larger clusters for a louder crunch, depending on whether you want subtle texture or bold bite.
- Boost strawberry flavor by folding an extra teaspoon of freeze dried strawberry powder into a small portion of crumbs and mixing them back in, which increases fruit intensity without adding moisture.
- Toast for more depth by baking for a few additional minutes until a bit darker, but watch closely since the crumbs can go from golden to overdone quickly and lose tenderness.
- Make it ahead by preparing the full batch and storing in an airtight jar at room temperature for easy finishing on demand; keep it away from humidity to maintain crispness.
- Control sweetness by reducing the granulated sugar slightly for less sweet applications like yogurt bowls, while keeping the butter ratio the same to preserve texture.