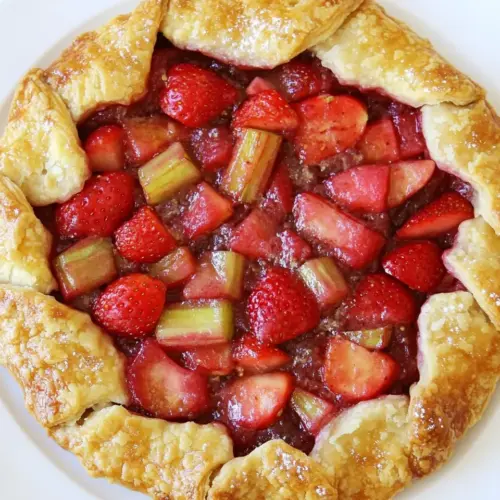
Strawberry Rhubarb Galette
Strawberry Rhubarb Galette is a rustic, flaky tart bursting with sweet strawberries and tart rhubarb, finished with a crunchy sugar rim and golden crust. This easy spring dessert balances juicy fruit filling with a tender, flaky pastry, making it perfect for casual gatherings or weeknight celebrations. Try it warm with a scoop of ice cream for an irresistible treat.
Equipment
- Food Processor
- Parchment Paper
- Baking Sheet
- Wire Rack
- Mixing Bowl
Ingredients
- 1 3/4 cups all-purpose flour Provide structure and bulk to the pastry, creating a tender but sturdy crust when combined with fat and liquid. Sift or whisk before measuring to ensure even distribution and prevent dense spots in the dough.
- 1/3 cup granulated sugar Add sweetness to both the crust and filling while helping to tenderize dough by weakening gluten formation. Sprinkle into the dry mixture for the crust and reserve the rest to sweeten the fruit filling as needed.
- 1/4 cup coarse cornmeal Contribute a subtle crunch and rustic texture to the crust while absorbing a small amount of moisture for a flakier result. Stir into the flour mixture so the cornmeal is evenly dispersed throughout the dough.
- 1/4 teaspoons salt Enhance overall flavor by balancing sweetness and brightening the fruit filling, while also strengthening the dough slightly. Dissolve evenly into the flour mixture to ensure consistent seasoning throughout the pastry.
- 1/2 cup cold butter cut into small pieces Provide cold fat that creates flaky layers and rich flavor when cut into the flour; keeping it cold preserves flakiness. Work the butter quickly into small pieces so it remains in distinct pockets that steam during baking.
- 1/3 cup buttermilk Moisten and bind the dough while adding a slight tang that enhances flavor and tenderness in the pastry. Chill briefly after combining to allow the dough to rest and the buttermilk to hydrate the flour fully.
- 2 1/2 cups sliced strawberries Offer juicy sweetness, bright color, and a soft texture to the filling while melding with rhubarb for a balanced flavor. Toss gently with sugar and cornstarch to macerate and release juices before assembling.
- 1 cup chopped rhubarb Provide tartness, firm texture, and structural support to the filling, balancing the strawberries' sweetness. Chop into uniform pieces so the rhubarb cooks evenly and pairs well with the berries.
- 1/3 cup granulated sugar Sweeten the filling to balance rhubarb's tartness and enhance overall fruit flavor; can also be adjusted to taste. Combine with the fruit to draw out juices and create a syrupy consistency once baked.
- 3 tablespoons cornstarch Thicken the fruit juices released during baking to prevent a runny filling and create a glossy texture. Mix with the sugar before tossing with the fruit to ensure even distribution and avoid clumping.
- 1 teaspoon lemon zest Brighten and lift the fruit filling with citrus oils and aromatic lift, complementing the strawberries and rhubarb. Finely grate and add to the fruit mixture for an immediate burst of fresh flavor.
- 1 egg beaten Bind and add a golden finish when brushed over the pastry, promoting even browning and a glossy surface. Whisk until smooth and apply just before baking to avoid soaking the dough.
- 2 tablespoons turbinado sugar Provide a crunchy, sparkling finish and additional caramel-like sweetness to the crust edges after egg wash. Sprinkle evenly on the pastry rim to enhance texture and visual appeal once baked.
Instructions
- To make the dough, combine flour, sugar, cornmeal, and salt in a processor; pulse 2-3 times. Add butter and pulse 4-5 times, or until mixture resembles coarse meal. With the processor running, slowly pour the buttermilk through the chute, processing until the dough forms a ball. Remove the dough ball and adhere any remaining pieces of dough to it, then wrap in plastic wrap or parchment paper. Refrigerate for at least 45 minutes before rolling out.: As you start, notice the dry mixture's pale, sandy texture and faint sweetness from the granulated sugar . Pulsing briefly keeps the blend airy rather than compacted, which helps the butter incorporate without becoming greasy. You should hear quick, light motor bursts rather than a continuous whir, indicating you are not overworking the flour. A common mistake is pulsing too long so the mixture becomes dense, which makes the crust tough; if that happens, chill the bowl and continue gently. The goal here is an even sand like base that will cradle the cold fat pieces.
- Center a rack in the oven and preheat to 350 degrees F.: When you add the cold butter pieces, the sound shifts to slightly louder, staccato pulses as the blades chop fat into the dry ingredients. Visually you want pea sized bits distributed through the flour, creating a patchy, coarse meal look. This texture is what produces flakiness during baking, because the melting butter leaves air pockets. Avoid over pulsing which can make the butter too integrated, losing those flaky layers. If the butter starts to soften, pop the bowl into the fridge to keep it chilled.
- To make the strawberry rhubarb filling, combine all ingredients in a medium bowl, and toss gently, making sure that the cornstarch is coating the fruit. Set aside.: Pouring the buttermilk in slowly allows the mixture to hydrate evenly without becoming sticky. Keep the processor on low pulses so the dough comes together in a cohesive mass but remains slightly shaggy. You should feel a soft, tacky ball forming on the side of the bowl rather than a wet paste. Over hydrating is a common pitfall, which makes rolling difficult; if it becomes too wet, add a tablespoon of flour at a time until manageable.
- Remove the dough from the refrigerator and place on a sheet of parchment paper. Starting at the center of the dough, roll out, forming a 14-15-inch wide circle. Place the dough with parchment paper on a baking sheet. Add the fruit mixture to the center of the dough, leaving a 2-inch border. Fold the border over the filling, overlapping where necessary and pressing gently to adhere the folds.: Once the dough is cohesive, handling it warms the surface, so work quickly to press stray crumbs into the ball. The texture should be cool and slightly firm to the touch, not sticky. Wrapping firmly prevents drying and preserves the chill. If you are careless and leave it uncovered, the surface will form a crust that cracks when rolled. Proper wrapping ensures even rolling later on.
- Lightly brush the edge of the dough with the egg and sprinkle with turbinado sugar. You don't need to use the whole egg, just enough to brush the edge of the galette.: Chilling solidifies the butter and relaxes the gluten, making the dough easier to roll and producing flakier layers when baked. You will notice the dough becomes noticeably firmer and quieter to handle after chilling. Cutting this time short often results in tearing or a greasy texture, so be patient. If pressed for time, a brief freeze works but watch closely so it does not become rock hard.
- Bake for 1 hour, or until crust is golden brown and the filling is bubbly. Transfer the baking sheet to a wire rack to cool for at least 20 minutes. Serve warm or at room temperature.: Preheating the oven to 350 degrees F ensures even heat once the galette goes in, producing a golden crust and bubbling filling. Listen for the oven fan to cycle off as a cue that it has reached temperature. Putting an unpreheated galette into the oven can prolong baking and lead to a soggy bottom, so always wait for the correct temp. If your oven runs hot or cool, use an oven thermometer for accuracy.
- Note-you can make the galette dough in advance. It will keep in the refrigerator for 3 days. Try serving the galette with vanilla ice cream for an extra special dessert.: When you toss the strawberries , rhubarb , granulated sugar , cornstarch , and lemon zest , feel the fruit give slightly under your touch and see the cornstarch dust the pieces. The cornstarch works by absorbing released juices and thickening them into a glossy sauce while baking. Be gentle to avoid bruising the strawberries , and make sure each piece is lightly coated. A common error is adding too much cornstarch which creates a gummy texture, so stick to the measured amount.
- Remove the dough from the refrigerator and place on a sheet of parchment paper: The chilled dough should feel cold and slightly firm. Placing it on parchment prevents sticking and makes transferring the galette to a baking sheet effortless. If the dough has become too stiff, let it rest for a few minutes at room temperature until pliable but still cool. Trying to roll a frozen dough will crack the edges, while overly warm dough will tear and stick.
- Starting at the center of the dough, roll out, forming a 14 to 15 inch wide circle: Rolling from the center outward creates an even thickness, and a 14 to 15 inch circle gives enough room for the filling and a generous border. You should see a smooth, pale surface with no visible cracks; if cracks form, press and patch gently with a little flour. The dough should slide on the parchment easily as you rotate it. Rolling too thin risks a fragile crust, while too thick will yield a doughy base.
- Place the dough with parchment paper on a baking sheet: Transferring the dough on its parchment keeps it intact and makes assembly tidy. The baking sheet will catch any juices that bubble out. At this point the dough should lie flat and even, with the center slightly thinner where the fruit will sit. Sliding it carefully avoids spills that could burn in the oven. If the dough droops, tuck the edges slightly to create a stable border.
- Add the fruit mixture to the center of the dough, leaving a 2 inch border: Spoon the filling into the center, seeing bright red and pink fruit piled gently in the middle. Leave about a 2 inch border so you can fold the edges over neatly. The fruit will settle and release juices as it bakes, so pile slightly higher than you think necessary. Overfilling is the main mistake here, which causes spillage and messy edges; keep the mound contained within the border.
- Fold the border over the filling, overlapping where necessary and pressing gently to adhere the folds: Folding creates a rustic, protective edge that keeps the filling contained and provides a contrasting crisp rim. As you fold, the dough should feel supple and hold its shape. Press lightly where folds overlap so they stick together. Avoid stretching the dough which can cause tearing; if a tear occurs, patch with a small piece of reserved dough.
- Lightly brush the edge of the dough with the egg and sprinkle with turbinado sugar: Brushing with the beaten egg adds shimmer and helps the turbinado sugar cling, resulting in crunchy, golden edges. Use a light touch so the sugar does not sink into the dough and the surface does not darken too quickly. Overbrushing can pool and create soggy spots, so dab off excess on the brush before applying.
- Bake for 1 hour, or until crust is golden brown and the filling is bubbly: During baking, the kitchen will fill with a warm fruit aroma and you may hear gentle bubbling as the juices thicken. The crust should reach a deep golden hue and the fruit should be visibly syrupy. If the edges brown too fast, tent with foil to prevent burning while allowing the filling to finish cooking. Undercooking leaves a runny center, so watch for that glossy, bubbling cue.
- Transfer the baking sheet to a wire rack to cool for at least 20 minutes: Cooling lets the filling set so slices hold their shape, and the crust firms up slightly as steam dissipates. You will notice the bubbling slow and the scent mellow into a warm, fruit forward perfume. Cutting too soon often causes a runny slice, so give it the time to rest. If you want it warm, serve after this brief rest rather than straight from the oven.
- Serve warm or at room temperature: The galette is delightful either warm with a creamy accompaniment or at room temperature where the flavors meld. The texture varies slightly with temperature, warm being softer and more saucy while room temperature offers firmer slices. A common serving mistake is reheating too aggressively which can dry the crust; brief, gentle warming keeps the balance intact.
- Note you can make the galette dough in advance it will keep in the refrigerator for 3 days: Keeping the dough chilled for up to three days lets you prepare ahead, and you will find the crust often feels even more relaxed to roll after a gentle rest. When refrigerated, wrap tightly to prevent drying and bring it to a workable firmness before rolling. A frequent oversight is leaving the dough uncovered which causes a tough outer layer, so always wrap well.
- Try serving the galette with vanilla ice cream for an extra special dessert: The contrast of cold, creamy ice cream against warm, fruity filling is delightful, adding a soft richness that complements the tartness of rhubarb . Scoop thoughtfully so the ice cream melts just enough to marry with the fruit juices. Avoid very high heat when reheating slices because it will melt the accompaniment too quickly and soften the crust.
Notes
- Chill your ingredients Keep the butter and the finished dough cold until you are ready to roll. Cold butter creates steam pockets as it melts, which forms flaky layers. If the butter softens, return the dough to the fridge for 10 to 15 minutes to firm up, otherwise the crust may spread and lose flakiness.
- Measure flour properly Spoon and level your all-purpose flour into the cup rather than scooping directly. Overpacked flour leads to a drier dough that is harder to roll and can produce a dense crust, so accurate measurement preserves tenderness.
- Do not overfill Keep the fruit mound within the 2 inch border to avoid spillage. Overfilling causes juices to run onto the baking sheet, which can burn and smoke in the oven and also prevent a neat folded edge.
- Use coarse sugar for finishing Sprinkle turbinado sugar on the edges for crunch and a pleasant caramelized sparkle. The coarse crystals hold up during baking and add a lovely textural contrast to the tender crust and juicy filling.
- Tent with foil if edges brown too quickly If the crust edges reach a deep brown before the filling bubbles, loosely tent foil over the galette. This preserves crust color while allowing the center to continue cooking without burning the rim.
- Rest before slicing Let the galette cool for at least 20 minutes so the filling thickens. Slicing too soon yields a loose, soggy slice, while a short rest helps keep tidy portions.