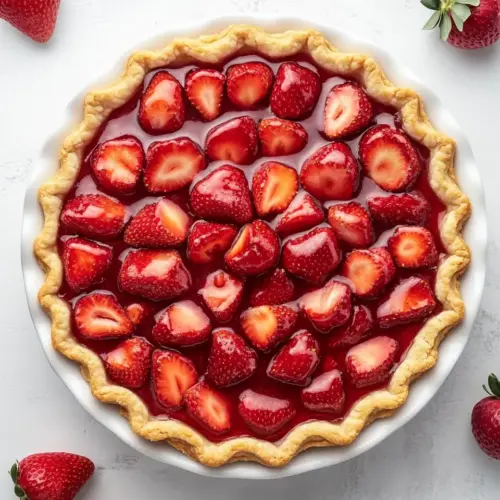
Strawberry Pie
Strawberry Pie is a bright, glossy dessert featuring fresh strawberries set in a silky glaze atop a crisp, pre baked crust. The combination is creamy and slightly tart, perfect for spring and summer gatherings. This easy sliceable pie delivers show stopping presentation with minimal fuss, making it an ideal choice for an easy weeknight dessert or a celebratory potluck.
Equipment
- Oven
- 9-inch pie plate
- Aluminum Foil
- Pie weights or dry beans
- Pastry Brush
- 4 to 5 quart heavy bottomed saucepan
- Whisk
- Refrigerator
Ingredients
- 1 unbaked rolled pie crust Provide a flaky bakery-style base for the pie that holds the filling and provides structure; can be prebaked or baked with filling and should be chilled before rolling to prevent shrinkage. Brush with egg white or dock the bottom to avoid bubbling, and crimp edges for an attractive presentation.
- 1 egg white (beaten) Brush a thin layer over crust edges or use as a glaze to help toppings adhere and to promote browning; beaten egg white creates a glossy finish without adding much fat. Apply gently to avoid pooling and use only what is needed for sheen and sealing.
- 3/4 cup water Dissolve and hydrate thickening agents and gelatin mixes to create a clear, cohesive syrup for the filling; water acts as the solvent and medium for heating cornstarch and gelatin. Heat gently while stirring to avoid scorching and ensure an even, smooth texture.
- 1/2 cup granulated sugar Provide sweetness and help balance the tartness of strawberries while contributing to the gel set when combined with gelatin and cornstarch; sugar also aids in preserving color and flavor. Dissolve fully into the water before heating to prevent graininess and taste test for desired sweetness.
- 3 1/2 tablespoons cornstarch Thicken the filling by forming a smooth, translucent gel that suspends fruit pieces and prevents runniness; cornstarch yields a glossy, stable filling when cooked with water and sugar. Mix with a small amount of cold liquid first to make a slurry, then whisk into hot liquid until clear and thickened.
- 3 ounces strawberry gelatin mix Impart concentrated strawberry flavor and vibrant color while assisting the filling to set into a slightly firm, sliceable gel; flavored gelatin blends with cornstarch-thickened syrup for added stability. Sprinkle and dissolve fully into the hot liquid to avoid gritty spots and ensure uniform flavor.
- 1 1/2 pounds fresh strawberries (washed, dried, hulled, and halved) Provide fresh fruity texture, bright natural flavor, and visual appeal as the main filling component; halved strawberries release juice that integrates with the gelatinous syrup to create a cohesive pie. Arrange evenly in the crust for uniform slices and add just before the filling sets to maintain shape.
- Whipped topping (optional garnish) Add a light, airy finishing touch to each slice that enhances creaminess and presentation; whipped topping complements the tart-sweet filling without altering the pie structure. Pipe or dollop sparingly for an elegant garnish and serve chilled for best texture.
Instructions
- Preheat the oven to 425°F. Lightly spray a 9-inch pie plate with nonstick spray.: The kitchen will warm and you may hear the oven fan spin up, a practical signal that the crust will get a quick burst of heat to set and blind bake. This high initial temperature encourages rapid steam release from the dough, helping layers separate for flakiness. A common mistake is placing the pie too low in the oven, which can brown the bottom too fast; use the center rack for even heat. Keep an eye on the crust edges as they can color quickly.
- Unroll pie crust and place in pie plate. Prick the pie crust with a fork. Line the pie crust with aluminum foil sprayed with nonstick spray. Fill the foil with pie weights. Bake for 10 minutes.: The scent of the spray is faint but useful, and it prevents sticking so slices release cleanly. Ensuring the pan is evenly coated avoids pockets where the crust might adhere. One misstep is using too much spray, which can pool and make the crust greasy; a light, even mist is best.
- Remove the pie plate from the oven. Remove the pie weights and foil.: As you press the pie crust into the plate, you will feel the dough conform to curves, a tactile cue that it is seated correctly. The crust should come up the sides gently, without stretching, because overstretching can cause shrinkage during baking. Avoid stretching and patching, since seams may separate when baked.
- Using a pastry brush, brush the beaten egg whites on the inside of the pie crust. Be sure to brush the sides of the crust as well as the bottom. Bake the coated pie crust for another 8-10 minutes until the crust is golden. Remove and allow the crust to cool.: The tiny holes let steam escape, preventing bubbling, and you will see a pattern of tiny punctures across the surface. If you skip pricking you might get large pockets of air under the crust, which create uneven baking and affect texture.
- Using a 4 to 5-quart heavy-bottomed saucepan over medium-high heat, whisk together the granulated sugar and cornstarch. Whisk in the water.: The foil conforms to the crust, and the sprayed surface ensures the pie weights are easy to remove. This layer keeps the crust edges supported during blind baking, preventing collapse. A pitfall is folding the foil too tightly which can press marks into the crust edge.
- Whisk continuously until the mixture is thickened, 2 to 3 minutes.: When the weights settle, they make a steady, low rattle, indicating good contact with the crust. The weights stop the bottom from puffing, yielding a flat surface for the filling. Using nontraditional weights without foil can leave residues, so always keep foil between weights and dough.
- Remove the mixture from the heat. Sprinkle with the strawberry gelatin and whisk until the gelatin is completely dissolved. Allow the glaze to sit for 5 minutes.: During this brief bake you will notice the crust shifting from pale to a subtle golden hue at the edges, a visual cue that structure is developing. This short bake sets the crust so it can later hold wet filling without sogging. If you overbake at this point the crust can become too dark before the interior is ready, so watch for even color.
- Arrange the strawberries in the bottom of the pre-baked pie crust.: The oven heat will release a warm aroma of toasted dough; set the plate on a cooling rack to stop carryover cooking. Letting it rest briefly stabilizes the structure before you remove weights. A common error is rushing the removal of weights which can damage the warm crust if it is still too fragile.
- Pour the glaze over the top of the strawberries. Chill in the refrigerator for 4 hours. Top with whipped topping before serving.: As you lift them out, you may hear a soft scrape as the foil separates; the crust should hold its shape. Leaving weights in too long can cause overbrowning of the contact areas, so remove them promptly. Be careful not to press on the crust when lifting, which can dent the shell.
- Using a pastry brush, brush the beaten egg whites on the inside of the pie crust.: The glossy sheen appears as the egg white goes on, and you should coat the sides and bottom thinly to form a barrier. This step helps prevent sogginess by sealing the surface, and it slightly caramelizes for flavor during the second bake. A mistake is applying too much egg white which can leave a rubbery film after baking.
- Bake the coated pie crust for another 8 to 10 minutes until the crust is golden.: The sound is mostly quiet, but visually you will see a warm, even golden color appear, signaling the seal is set. This finishing bake tightens the crust texture so it resists moisture from the filling. Overbaking at this stage leads to an overly hard crust, so aim for a gentle golden tone.
- Remove and allow the crust to cool.: Cooling calms the steam locked in the pastry, and the crust firms so it will not break when filled. Cooling on a rack helps air circulate underneath to preserve crispness. A common slip is attempting to fill a hot crust, which softens quickly and can cause the filling to sink into the base.
- Using a 4 to 5 quart heavy bottomed saucepan over medium high heat, whisk together the granulated sugar and cornstarch.: The dry ingredients will hiss faintly as they hit the warm pan, and whisking them first ensures even distribution before adding water . This keeps lumps from forming and promotes a smooth sauce. Adding liquid too quickly can create clumps of cornstarch that are hard to dissolve.
- Whisk in the water.: As the water blends in, the mixture will take on a glossy wet look, and the whisking motion prevents clumping. Constant motion helps the granules hydrate evenly. If you pour cold water without whisking you may see gelatinized bits that require vigorous straining to remove.
- Whisk continuously until the mixture is thickened, 2 to 3 minutes.: You will notice the mixture change from cloudy to translucent and it will coat the whisk, a clear sign it is thickening. Heat activates the cornstarch, creating a velvety texture that will cling to the fruit. Stop whisking too early and the glaze will be runny, failing to set properly in the fridge.
- Remove the mixture from the heat.: Pulling the pan off the heat prevents overcooking, which can cause cornstarch to break down and thin the glaze. The residual warmth will continue to carry it for a moment, so move thoughtfully. Leaving the pan on heat risks scorching and a grainy texture.
- Sprinkle with the strawberry gelatin and whisk until the gelatin is completely dissolved.: The powdered strawberry gelatin mix dissolves into the warm glaze, adding color and extra setting power; whisk until no granules remain. This gives the pie that classic sheen and fruity note. If you add gelatin to boiling liquid it can clump, so moderate temperature is important.
- Allow the glaze to sit for 5 minutes.: Letting the glaze rest lets it cool slightly and thicken, so it will coat berries instead of running off. You will see it become glossier as it stabilizes. Pouring it too hot can cook the berries and make them release juice, diluting the glaze.
- Arrange the strawberries in the bottom of the pre baked pie crust.: Laying each halved strawberry with the cut side down creates a polished pattern, and filling the surface evenly ensures each slice has the right balance. The tactile arranging helps me get a consistent look and portioning. Haphazard placement can leave empty pockets and uneven slices.
- Pour the glaze over the top of the strawberries.: The glossy liquid will flow and pool, settling between berries and giving a mirror finish, a visual cue that the pie is nearly complete. The glaze binds the fruit and stabilizes the filling so slices hold together. Pacing the pour is key, pouring too fast can displace berries and create gaps.
- Chill in the refrigerator for 4 hours.: The refrigerator will hush the kitchen while the glaze sets; over this time the filling firms to a sliceable consistency. Chilling also deepens flavor perception, making the pie taste brighter when served. Removing it early risks a sloppy filling that will not slice cleanly.
- Top with whipped topping before serving.: A cloud of whipped topping adds creaminess and visual contrast, and it softens the fruit's brightness on the palate. Spoon or pipe it on just before serving to keep it fresh and airy. If you add it too early it may weep and lose its structure.
Notes
- Oven calibration matters: Oven temperatures vary widely, so if you know your oven runs hot or cold, adjust accordingly. I keep an oven thermometer near the center rack and check it periodically; small adjustments of 10°F can prevent overbrowned crusts or underbaked centers.
- Substitute dry beans for pie weights: Dry beans work well as a weight during blind baking, and they are easy to reuse for baking. Always place a layer of foil or parchment between the beans and the crust to prevent bean dust from transferring to the pastry.
- Egg white seals the crust: Brushing the interior of the crust with beaten egg white creates a thin, protective layer, and it reduces sogginess from the filling. Apply a light coat and allow it to dry briefly before the second bake for the best results.
- Hull strawberries quickly with a straw: Running a straw through the center from the bottom removes the hull cleanly and preserves berry shape, which is helpful when arranging them. A metal straw gives you control and speed, especially when prepping large quantities.
- Watch the glaze temperature: Add the gelatin after removing the pan from heat and allow a short rest so the mix does not overcook. Adding it to excessively hot liquid may cause clumping, while too cool a glaze will not dissolve the powder fully.
- Chill fully before slicing: Patience is rewarded; chilling the pie for the full four hours ensures tidy slices. If you need to speed things up slightly, place the pie on a lower shelf in the fridge where it is coldest, but avoid the freezer which can alter textures.