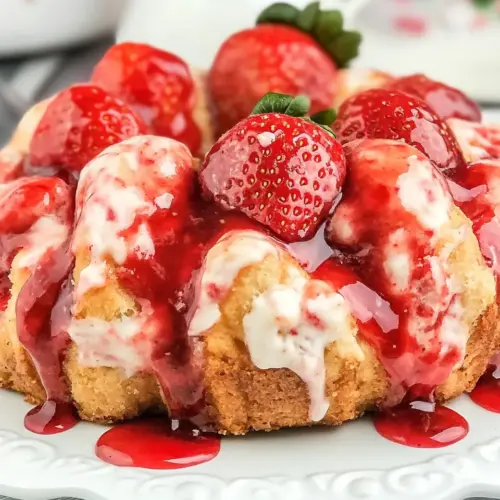
Strawberry Monkey Bread
Strawberry Monkey Bread is a sticky, fruity pull apart loaf with gooey brown sugar caramel and fresh strawberries. Soft biscuit pieces bake into a golden, shareable bread with a silky glaze, making it an easy brunch winner. Ideal for spring gatherings and casual brunches, it delivers warm, comforting sweetness that invites everyone to dig in.
Equipment
- 12 cup bundt pan
- Large cookie sheet
- Gallon size ziploc bag
- Mixing Bowl
- Sandwich bag
Ingredients
- 2 cans (16.3 ounces each) Grands! Biscuits (not flakey) (16 total biscuits) Provide canned dough pieces that form the base of the monkey bread, offering structure and a soft, pillowy texture when baked; choose the specified non-flaky Grands! biscuits for consistent layers and reliable browning. Cut or tear into pieces before coating so they bake evenly and absorb the sugary and buttery toppings for a tender pull-apart loaf.
- 1/2 cup (100 g) granulated sugar Add sweetness and help create the caramelized exterior when mixed with cinnamon; granulated sugar also contributes to the syrupy coating that helps the biscuit pieces adhere into a cohesive loaf. Measure precisely by weight or volume to balance sweetness and ensure proper caramel development during baking.
- 1 teaspoon ground cinnamon Contribute warm, aromatic spice that complements the strawberries and sugars, enhancing overall flavor complexity without overpowering; cinnamon also pairs with butter to create a classic sweet-spice profile. Use a leveled teaspoon for even spice distribution among the coated biscuit pieces.
- 1 cup (200 g) brown sugar packed Provide deep, molasses-like sweetness and moisture to create a rich caramel coating for the monkey bread, yielding a glossy, sticky finish when melted with butter. Pack firmly into the cup to achieve accurate measurement and stir well with melted butter to form the signature gooey layers between dough pieces.
- 3/4 cup (170 g) unsalted butter melted Supply fat that melts into the brown sugar to form a lush caramel sauce, promoting browning and tenderizing the biscuits; melted unsalted butter offers control over salt level in the recipe. Pour evenly over the sugar-coated dough pieces so the butter soaks in and produces a cohesive, buttery crumb.
- 2 cups chopped strawberries about 3/4 pound Introduce fresh fruit brightness and a slight tartness that balances the richness of the sugars and butter; chopped strawberries also add bursts of juice and color throughout the pull-apart bread. Chop to uniform size to ensure even distribution and prevent large fruit pockets that could make parts soggy.
- 2 tablespoons (28 g) unsalted butter softened Provide a soft, spreadable fat to bind the glaze ingredients, lending a creamy mouthfeel and aiding in smooth icing consistency; softened unsalted butter keeps salt levels neutral while adding richness. Beat briefly with powdered sugar and creamer to form a glossy finishing drizzle for the cooled loaf.
- 3/4 cup (85 g) powdered sugar Create the sweet, smooth foundation of the glaze, dissolving into the softened butter to produce a silky icing that complements the sticky monkey bread; powdered sugar also helps the glaze set to a light sheen. Sift if lumpy and mix thoroughly to reach a pourable yet slightly thick consistency for drizzling.
- 2 tablespoons International Delight Sweet Cream Coffee Creamer Impart subtle creamy flavor and thin the glaze slightly for a smoother pour, adding a faint vanilla-and-cream note that enhances overall sweetness; use the specified sweet cream creamer to maintain intended flavor balance. Stir into the butter and powdered sugar a little at a time to achieve desired glaze consistency.
Instructions
- Preheat oven to 350°F. Spray a 12-cup bundt pan with nonstick cooking spray.: As the oven warms, you will notice the kitchen begin to smell faintly warm and dry, a subtle cue that the environment is starting to support even baking. Preheating ensures the biscuits begin rising immediately when they hit the pan, which contributes to the pillowy interior and prevents sogginess. A well greased pan helps the finished loaf release cleanly, avoiding tears or stuck bits that ruin presentation. Common mistake to avoid, if the oven is not fully up to temperature, the dough may expand unevenly causing dense pockets; waiting until the oven reads 350 F ensures consistent rise and browning. I like to set a timer and double check the rack position so the top of the loaf browns evenly.
- Open cans of biscuits and slice each biscuit into 4 pieces. Place in a large gallon size ziploc bag. Add granulated sugar and cinnamon. Seal the bag and shake until all the biscuit pieces are coated.: You will hear the pieces clink together in the bag as the granulated sugar and cinnamon tumble over the dough, and the sugar will cling, providing a dry, textured layer that later becomes a delicate crust. This coating helps separate the dough pieces slightly so the caramel sauce can permeate edges without turning everything into a single dense mass. A frequent error is overcrowding the bag which prevents even coating, so work in batches if needed to ensure every piece is lightly dusted. The tactile feedback of sugar clinging to the dough is a good indicator that you are ready to move on.
- Layer the biscuit pieces with the strawberries in the prepared pan.: As you layer, press gently to nest each strawberry chunk among the sugared dough so fruit juices infuse surrounding pieces during baking. You will see spots of red peek through the dough, and as heat reaches those pockets, the aroma shifts to ripe berry and caramel. This layered approach ensures flavor distribution rather than fruit settling in one area. One common mistake is adding too many strawberries in a single layer which can create a soggy section; instead space them evenly so juices disperse through the loaf. Lightly pressing layers together creates good contact without compressing the dough.
- Stir together the brown sugar and melted butter until thick and combined. Pour evenly over dough in pan.: When you mix brown sugar with hot melted butter , you will notice the mixture become glossy and syrupy, and that sheen signals an effective caramel base. Pouring slowly and evenly ensures the sauce finds gaps between pieces and seeps down to flavor interior bites. The sound will be a soft glug as it flows into crevices, and visually you want an even coating without pools in one spot. A common pitfall is pouring while the butter is too cool which can clump the sugar; warm butter helps dissolve the sugar and creates a smooth pour.
- Place the pan on a large cookie sheet (in case of drips) and bake for 40-50 minutes, or until the dough is cooked through. It’ll get quite brown on top.: As the loaf bakes, the kitchen fills with deep caramel notes and the top starts to form a dark golden brown crust, crackling slightly. The cookie sheet is essential because the caramel can bubble over, and catching the drips keeps your oven tidy. Use visual cues to judge doneness, such as a deep amber color and an internal temperature that indicates cooked dough; the interior should be springy when touched. A typical error is removing it too early because the top looks done; that can leave dense, undercooked pockets. If the top browns too quickly, tent loosely with foil to prevent burning while the center finishes baking.
- While the bread is baking, make the glaze. Mix the butter and powdered sugar together for about one minute, until the mixture is crumbly. Add the coffee creamer and mix until smooth. Place the glaze in a sandwich bag and seal until ready to top the bread.: Working on the glaze while the loaf bakes keeps timing on your side so the glaze is fresh and pourable when you need it. The powdered sugar will first form a crumbly texture with the softened butter , and adding the coffee creamer transforms it into a glossy, silky glaze. You are looking for a consistency that will drizzle but not run off immediately; practice by testing a small dollop on a plate. Over thinning the glaze makes it soak away, while too thick will clump; add creamer slowly to find the right balance. A common oversight is making the glaze too early and letting it stiffen, so keeping it in a sealed bag preserves its sheen and pourability.
- Once the bread is done, remove from the oven. Let it sit for just a minute, then place a large plate over the top and invert the bread onto the plate. Do this over the sink because the bread is somewhat juicy and you don’t want the liquid to spill all over your counter. You must turn it out of the pan before it cools or it will stick.: The immediate post bake moment is full of steam and intensified aroma, and that steam loosens the caramel from the pan walls so the loaf unmolds cleanly. Inverting quickly is important because as it cools the caramel firms and can glue the bread to the pan, making removal messy. Doing this over the sink captures any excess syrup, and you will likely hear a faint sizzle as trapped juices release. A common mistake is letting it cool inside the pan, which leads to tearing; act promptly and use a gentle wiggle if needed to dislodge it.
- Let cool for 5 minutes, then top with frosting. Serve warm.: After a brief rest the loaf still holds warm steam but is stable enough to top. When you pipe or drizzle the glaze, it should flow slightly and set to a glossy finish, adding a sweet, creamy contrast to the caramelized exterior. Serving warm enhances the pull apart texture and flavor, and the contrast between warm interior and cool glaze is delightful. One common error is waiting too long, which allows the glaze to harden and the bread to lose that freshly baked softness; aim to serve within minutes of glazing.
Notes
- Swap the creamer: If you cannot find the specified creamer, you can substitute milk or heavy cream and add a 1/2 teaspoon of vanilla for a similar creamy finish, adjusting liquid slowly to reach the right glaze consistency.
- Control the crust color: If you prefer a lighter top, check the loaf at 35 minutes and tent with foil for the remaining time to allow the center to finish without over browning the exterior.
- Manage strawberry juice: For less liquid release, gently pat the chopped strawberries dry with paper towels before layering so the loaf remains structured and not overly wet in the middle.
- Make ahead glaze: Mix the glaze components and store in the refrigerator up to 24 hours, bringing it to room temperature and re whisking before piping so it regains smooth, pourable texture.
- Serving temperature: Serve warm for best pull apart texture and flavor contrast, but you can reheat individual pieces briefly in a low oven to refresh the glaze and soften the interior without drying it out.