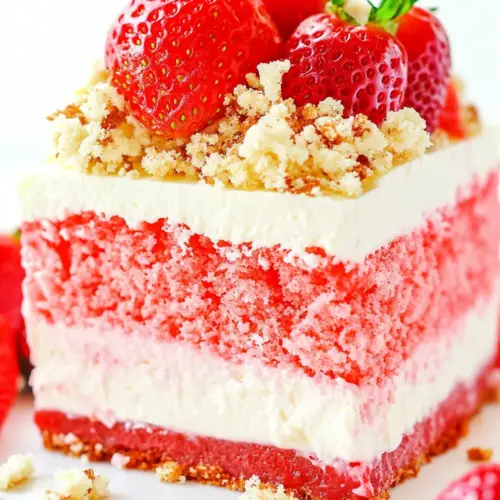
Strawberry Crunch Cheesecake
Strawberry Crunch Cheesecake is a creamy, fruity layered cake with a crunchy golden Oreo coating and bright strawberry puree. This indulgent dessert combines silky cream cheese filling with tender strawberry cake layers for an easy showstopper perfect for celebrations and easy weeknight treats. Make it to impress and enjoy decadent textures that please a crowd.
Equipment
- Stand mixer
- Paddle attachment
- 8 inch springform pan
- 8 inch cake pans
- Food Processor
- Wire Rack
- Small Saucepan
Ingredients
- 1 1/2 cups strawberries chopped Chopped and sweet, provides fresh strawberry flavor and tender fruit texture when folded into batter or used as a topping. Enhances natural fruit brightness and adds visual appeal with red flecks throughout the cheesecake. Balances acidity against richer dairy components for a fresher finish.
- 3 tablespoons granulated sugar Sweet and granulated, helps macerate chopped strawberries and draw out juices to create a flavorful puree or topping. Provides balanced sweetness to the fruit component without overpowering the dairy filling. Aids in preserving color and extending freshness in the assembled dessert.
- 1 3 oz box strawberry Jell-o Powdered gelatin dessert mix imparts concentrated strawberry flavor and helps set fillings or glazes when dissolved. Dissolves into hot liquid to form a firm gel that stabilizes fillings or creates a glossy topping. Adds shelf-stable flavor and color intensity to the strawberry components.
- 1/3 cup water Clear and hydrating, dissolves gelatin or Jell-o powder to activate gelling properties and create a smooth strawberry set. Warms to fully dissolve sugars and gelatin then cools to achieve desired consistency in fillings or glazes. Controls overall texture of the gelled strawberry layer.
- 2 1/2 cups all-purpose flour All-purpose flour builds the cake or crust structure by forming gluten that supports the cake layers and crumb. Provides bulk and structure for the base component of the dessert while interacting with leavening agents for rise. Creates a tender crumb when combined correctly with fat and liquids.
- 1 cup granulated sugar Sweet and granulated, adds bulk sweetening to cake or crust components and balances tartness from fruit and cream cheese. Dissolves into batter to help caramelize and brown during baking. Controls overall sweetness level of baked layers.
- 2 teaspoons baking powder Leavening powder produces lift and lightness in cake or crust layers by releasing gas during baking. Reacts with batter moisture and heat to create airy crumb structure. Helps ensure tender texture and proper rise for cake components.
- 1/2 teaspoon baking soda Fine and reactive, baking soda neutralizes acidic elements in the batter and contributes to browning and leavening. Reacts with dairy or acidic ingredients to create carbon dioxide for tender crumb. Requires accurate measurement to avoid off flavors and uneven rise.
- 1 cup unsalted butter softened to room temperature and cut into pieces Softened unsalted butter adds richness, moisture, and tender crumb to cake batter while controlling fat content. Creamed with sugar, it traps air to aid leavening and gives a smooth buttery flavor. Unsalted form allows precise control over overall seasoning.
- 1 cup greek yogurt Thick and tangy Greek yogurt provides moisture, acidity, and a creamy tang that tenderizes the crumb and enriches flavor. Contributes to soft texture and complements cream cheese layers by balancing sweetness. Adds protein and density to the batter without excess fat.
- 3 eggs room temperature Room-temperature eggs emulsify and bind the batter, creating structure and stability throughout cake layers. Help trap air for lift when beaten and contribute to moisture and richness. Temperatures at room level ensure even mixing and smoother texture.
- 1 1/2 teaspoons vanilla extract Floral and aromatic, vanilla extract enhances overall flavor depth and rounds out sweet and fruity notes in the cake. Adds a warm background aroma that complements both strawberry and cream cheese components. Small amounts dramatically improve perceived sweetness and complexity.
- 1 cup strawberry puree from recipe above – cooled Vibrant strawberry puree adds concentrated fruit flavor, moisture, and natural color to the cheesecake or cake batter. Cooled puree integrates smoothly to avoid altering batter temperature and contributes authentic strawberry intensity. Enhances overall fruit-forward character of the dessert.
- Pink gel food coloring Concentrated colorant, gel food coloring intensifies pink hue without altering batter consistency or flavor. A little goes a long way to achieve visually striking layers or decorations. Stable in baked and chilled preparations for consistent presentation.
- 2 8 oz packages cream cheese softened to room temperature Softened cream cheese provides the rich, tangy base for the cheesecake filling, creating velvety texture and depth of flavor. Beating at room temperature ensures smooth, lump-free filling that sets uniformly. Balances sweetness and adds creamy stability when combined with eggs and starch.
- 1/2 cup granulated sugar Fine granulated sugar sweetens the cream cheese filling, balancing its tang while contributing to smooth texture when dissolved during mixing. Controls overall sweetness level of the cheesecake and influences mouthfeel. Properly dissolved sugar prevents graininess in the final filling.
- 2 tablespoons cornstarch Fine cornstarch stabilizes the cream cheese filling by thickening and helping it hold shape during baking or chilling. Prevents curdling of dairy and improves sliceability and firmness. Acts as a tender binder without affecting flavor.
- 2 eggs room temperature Room-temperature eggs enrich and set the cream cheese filling, providing structure and smoothness when baked or chilled. Emulsify fats and liquids for a cohesive custard-like texture. Proper warming prevents lumps and ensures even cooking.
- 1 teaspoon vanilla extract Aromatic and warming, vanilla extract enhances the nuanced flavors in the cheesecake filling and rounds sweetness. Blends with cream cheese and strawberry notes to lift overall flavor profile. Small addition increases perceived richness and complexity.
- 1/4 cup heavy cream Rich heavy cream increases creaminess and contributes to a velvety mouthfeel in the filling or swirl components. Adds fat for silkier texture and can loosen overly stiff batter slightly to aid pourability. Helps create a luxurious finish in chilled desserts.
- 1 cup unsalted butter softened to room temperature Soft unsalted butter contributes richness and moisture to components such as crumbs, fillings, or toppings, improving mouthfeel and flavor. Provides structure when creamed or melted and ensures a tender crumb when used in cake layers. Unsalted choice allows controlled seasoning.
- 1 8 oz package cream cheese softened to room temperature Single-package cream cheese offers additional tangy, creamy base for frostings or fillings, ensuring consistent texture and flavor in layered elements. Softened form blends smoothly into buttercream or mousse for stable consistency. Balances sweetness and stabilizes whipped components.
- 2 teaspoons vanilla extract Pure and floral, vanilla extract enriches frostings or fillings by rounding out flavors and adding warm aromatic notes. Small amounts improve the perceived sweetness and depth of the topping. Compatible with dairy and fruit elements for cohesive flavor.
- 3 tablespoons heavy whipping cream Light heavy whipping cream whips to add volume or loosens frosting for spreadable consistency, contributing richness and smooth texture. Stabilizes airy frostings when combined with sugar and chilled components. Helps create glossy, creamy finishes on cakes.
- 3 -4 cups powdered sugar Finely sifted powdered sugar sweetens and stabilizes frostings or fillings while providing smooth, lump-free texture for piping or spreading. Adjustable quantity controls sweetness and firmness of buttercream or glaze. Dissolves easily into fats for silky results.
- 30 g golden Oreos crushed Crushed golden Oreos contribute crunchy texture and buttery cookie flavor as a crunchy layer or garnish in the dessert. Provide contrast to creamy cheesecake with small bits that add visual interest and mouthfeel. Can be mixed into crumbs or sprinkled on top for added crunch.
- 1/3 cup whipped topping thawed Light and airy whipped topping adds softness and volume when folded into fillings or used as light garnish, creating a lighter mouthfeel. Thawed form integrates easily without changing texture significantly. Provides convenience for quick stabilization and topping.
- 1 3 oz box strawberry Jell-o Powdered Jell-o mix creates an additional strawberry-flavored gel or glaze layer and helps intensify fruit flavor when dissolved. Adds bright color and firm set to decorative layers or small molded elements. Dissolves into hot liquid to form a consistent, stable gel.
Instructions
- Preheat the oven to 350 degrees F.: As the oven warms, you will notice a subtle dry warmth in the air that signals it is ready; having a fully preheated oven ensures even rise and predictable baking times. If you start with an oven that is not hot enough, the crusts and cakes can bake unevenly and sink, so always wait until the oven reaches temperature before inserting pans. Also, check the oven thermometer occasionally for accuracy.
- Add a piece of parchment paper to the bottom of an 8” springform pan and spray the sides and bottom with non-stick spray. Set it aside.: The scent of the non-stick spray is faint but reassuring, and the parchment makes clean removal simple. This step prevents the cheesecake from sticking and keeps the edges intact. A common mistake is skipping parchment, which can tear the fragile cheesecake when unmolding.
- Add the softened cream cheese to the bowl of a stand mixer equipped with a paddle attachment. Beat on medium speed for 5 minutes or until light and creamy. Scrape the sides and bottom of the bowl.: As you mix, the cream cheese will go from lumpy to smooth and glossy, releasing a rich dairy aroma. Proper aeration at this stage helps create a lighter texture in the finished cheesecake. If you rush or underbeat, you may end up with lumps, which can lead to an uneven bake.
- Add the sugar and cornstarch and beat on low speed until combined, scrape the sides and bottom of the bowl.: The sugar dissolving into the cream cheese mutes its tang and sweetens evenly, while the cornstarch begins its stabilizing work. Mixing too aggressively can incorporate excess air that might cause cracking later, so keep the speed low and scrape often.
- Increase the speed to medium and cream everything for an additional 2-3 minutes.: You will see the mixture become paler and smoother, with a satiny sheen that signals readiness. This extra creaming ensures the cornstarch is fully integrated and helps the filling hold together during baking. Overcreaming, however, can warm the mixture too much, so pause if it seems too loose.
- With the mixer on low speed and add the eggs one at a time and beat until fully incorporated. Add the vanilla extract, and scrape the sides and bottom of the bowl. Whisk an additional 1-2 minutes.: Each egg should disappear into the batter and leave a smooth, homogenous texture. The smell will lift faintly with the vanilla, and a silky texture is the goal. Adding eggs too quickly can break the emulsion and create a runny batter, so add them slowly.
- Finally, add the whipping cream and mix for 2-3 minutes at medium speed.: The addition of whipping cream enriches the filling and produces a more luxurious mouthfeel; the batter should feel slightly looser but still substantial. Mixing here helps distribute fat evenly, which improves creaminess when baked. Overmixing may incorporate too much air, increasing the chance of cracks.
- Give the batter a good stir and transfer it into the prepared pan, gently tap to release any air bubbles.: Tapping the pan produces tiny popping sounds as air escapes, and you will see the surface settle into a smooth, even layer. This reduces large air pockets that could lead to faults in texture. Do not overdo the tapping as it can flatten delicate structure too much.
- Bake at 350 for 10 minutes, after that, without opening the oven door, reduce the heat to 200 and bake for an additional 55-60 minutes until the center slightly jiggles and the edges are set.: The oven will emit a warm, comforting smell as the sugars brown and the proteins set. The gentle reduction in temperature allows the center to set slowly, preventing cracking and giving you a silkier interior. Opening the oven during this time can cause temperature shock and lead to sinking.
- Turn off the oven and allow the cheesecake to cool for 15 minutes before removing it.: A faint steam may rise when you open the oven, and the cheesecake will slowly relax as it cools, which helps prevent sudden contraction and cracking. Removing it too soon can result in a collapsed center, so patience is essential.
- Place it on a wire rack to cool completely and after that refrigerate it for at least 2 hours to overnight.: The cool air around the cheesecake will firm it up uniformly; chilling overnight enhances flavor melding and makes the cheesecake easier to handle during assembly. Skipping adequate chill time often makes the layer too soft to work with when stacking.
- Add the chopped strawberries, sugar, Jell-O, and water to a small saucepan and bring to a boil. Stir and boil for 2-3 minutes or until the strawberries are softened and they had completely melted.: As the mixture simmers, the strawberries will release a fragrant, jamlike aroma and the sugars will caramelize slightly, deepening flavor. This step concentrates fruit taste and dissolves the Jell-o so it can set. Boiling too long can over reduce the liquid and make the puree sticky.
- Transfer the mixture into a food processor and puree. Set aside to cool.: The puree should be glossy and vibrantly colored with a smooth texture that smells intensely fruity. Cooling it prevents it from thinning batters when combined later. Trying to use it warm can alter batter consistency and affect rise.
- Add a piece of parchment paper to the bottom of two 8” cake pans and spray the sides and bottom with non-stick spray. Set them aside.: Preparing pans gives clean removal and helps the cake layers release without damage. This step is simple but crucial to keep the edges intact. Forgetting this leads to torn or stuck cake layers.
- Add the flour, sugar, baking soda, and baking powder into the bowl of a stand mixer with a paddle attachment. Give the dry ingredients a good stir.: The dry mix will smell slightly of sweet grain, and pre-mixing ensures the baking powder and baking soda distribute evenly, which is vital for consistent rise. Inadequate mixing can cause uneven pockets or uneven texture.
- Add the butter and mix on low speed until incorporated.: The butter will become uniformly distributed among the dry ingredients, resulting in a pebbled texture before liquids are added. Properly softened butter ensures a homogeneous batter; cold butter will create lumps and uneven crumb.
- In a medium bowl, whisk together the sour cream, eggs, vanilla, and cooled strawberry puree.: The mixture will be smooth and a rich pink color, with a tangy aroma from the yogurt or sour cream. Combining wet ingredients separately creates a uniform emulsion that prevents overmixing when added to the flour. If the puree is warm, it can affect leavening, so ensure it is cooled.
- Add the strawberry mixture into the flour mixture and mix on low-medium speed until fully combined. Stop to scrape the sides and bottom of the bowl.: The batter should have a cohesive, slightly glossy appearance and a fragrant strawberry scent. Low mixing preserves air and keeps the cake tender. Overmixing develops gluten and leads to a dense cake.
- To get the shade of pink you like, add a few drops of pink gel food coloring and mix on medium speed for a few minutes.: The gel will deepen the hue without adding liquid, and the batter will shine a clear, appealing pink. Work slowly and add color in small increments to avoid an artificial tone. Too much color can mask the natural strawberry appearance.
- Divide the batter evenly between the prepared two cake pans, tap to release air bubbles, and bake for 20-25 minutes or until a stick inserted in the middle of each cake comes out clean.: The kitchen will fill with a warm, sweet scent as the cakes rise and set. A clean toothpick indicates proper doneness and a tender crumb. Underbaking leaves a gummy center, while overbaking dries the cake.
- Allow the cakes to cool in the pans for about 10 minutes, after that remove them and place them on a wire rack to cool completely.: Cooling in the pan helps the cake stabilize; moving them too soon can cause them to break. Once on the rack, the steam dissipates and the crumb firms for easier handling during assembly.
- In the bowl of a stand mixer with the paddle attachment, add the cream cheese and butter and beat for 2-3 minutes or until light and fluffy.: The aroma is rich and dairy forward, and the texture becomes airy and pale, ideal for a spreading frosting. Properly softened ingredients ensure a smooth, lump free frosting. Cold ingredients will yield a grainy texture.
- Add the vanilla and mix until just combined.: The vanilla lifts the buttercream, making it smell warm and inviting. Mix just enough to distribute the flavor without overworking the texture, which can make the frosting too soft.
- With the mixer on low speed, add the powdered sugar one cup at a time and mix until fully combined. Stop a few times to scrape down the sides and bottom of the bowl.: Adding powdered sugar gradually prevents a cloud of fine sugar particles and ensures a silky consistency. Scraping is necessary to avoid uneven pockets of sugar. Pouring all at once can make it clumpy.
- Add the whipping cream and mix on low speed, slowly increasing to high speed and mix everything for 2-3 minutes, until light and fluffy.: The frosting will transform into a cloudlike texture that spreads easily; the cream gives it body and sheen. Overwhipping can cause it to become too airy or separate, so watch the texture closely.
- Chill the frosting for 30 minutes so it's easier to handle when assembling the cake.: The chill firms up the buttercream, making it simpler to spread smoothly and preventing sliding layers. Skipping this step can lead to messy assembly and sliding layers under the weight of the cake.
- Add the Oreo cookies to a food processor and pulse until you get coarse crumbs.: Pulsing creates varied texture with some larger pieces for crunch and smaller bits for adhesion. The aroma will become toasty and sweet. Overprocessing yields dust, which will not provide the desired crunch.
- Divide the mixture between two bowls. And add the whipped topping and strawberry Jell-O to one of the bowls, and mix well to fully coat the crumbs.: The coated crumbs will glisten slightly and hold together better when pressed into the frosting. This makes them adhere to the cake sides. Leaving crumbs dry will make them fall off instead of sticking.
- Now combine with the plain crumbs from the second bowl and toss well.: Combining gives a balanced texture, with some pieces offering pure cookie notes and others carrying a strawberry kiss. Toss until distributed but avoid crushing the crumbs further, which reduces crunch.
- Take one strawberry cake layer and place it face-down onto a cake stand.: The layer will sit invitingly as its exposed top reveals a tender crumb, and placing it face-down creates a perfectly flat surface for frosting. Handle gently to avoid breaking the layer, which is fragile when cool.
- Top with about 3/4 cup of frosting and spread it evenly.: The frosting should feel smooth and slightly cool as you spread, creating an even bed for the next layer. Aim for consistent thickness to balance texture and sweetness. Too thin and the cake may be unstable; too thick and it overwhelms the strawberry flavor.
- Remove the ring from the springform pan and flip the cheesecake layer face-down onto the frosted cake layer, slowly take off the bottom of the pan and the parchment paper.: The cheesecake layer will reveal a glossy top and a dense, creamy cross section; set it carefully to avoid sliding. If the cheesecake is not firm enough, it can shift and cause uneven stacking, so ensure it is chilled appropriately.
- Top the cheesecake layer with another 3/4 cup of frosting and spread it evenly.: Spreading here helps marry the textures and creates a buffer between the dense cheesecake and the top cake layer. Work with chilled frosting so it holds its shape and prevents slippage.
- Add the second strawberry cake layer and top with another 3/4 cup of frosting and spread it evenly.: The final cake layer completes the stack and the smell is now a layered symphony of strawberry, dairy, and baked sugar. Ensure layers are aligned to avoid a tilted cake that affects presentation.
- Use the remaining frosting to cover the idea of the cake.: Smooth the frosting across the top and sides for a neat canvas that will hold the crumbs. The tactile sensation of smoothing frosting is soothing, and a clean finish makes the cake look professional. Rushing here leads to uneven coverage.
- After that, use your hands to gently press the strawberry crunch crumbs around the sides of the cake, and also sprinkle them and lightly press them on top of the cake.: Pressing the crumbs yields a satisfying crunch under your fingertips as they adhere to the soft frosting; visually the golden bits contrast beautifully with pink. Work in sections to keep the frosting from warming and losing tackiness. Pressing too hard can flatten the frosting design.
- Chill the cake for 4 hours or better overnight before slicing and serving.: As the cake chills, flavors meld and the layers settle into a cohesive whole; the texture firms so slices hold their shape cleanly. Serving too soon risks a squishy cut and messy plates.
- Garnish with whipped cream and fresh strawberries before slicing.: Fresh strawberries add brightness and a final fruity perfume, while whipped cream gives a soft cloud contrast to the crunch. Add these just before serving for the freshest look and taste; placing them too early invites weeping and sogginess.
Notes
- Swap food coloring carefully: If you do not have gel food coloring, liquid food coloring can be used sparingly. Since liquid adds moisture, add one drop at a time and mix thoroughly to judge the color, stopping when you reach the desired shade to avoid altering batter consistency.
- Freezing the cheesecake layer: Freezing the cheesecake overnight firms it up for easy stacking, which I often do to reduce stress during assembly. Wrap it tightly in plastic and parchment so it doesnt pick up freezer odors, and thaw in the refrigerator for several hours before decorating.
- Short on time shortcut: When pressed for time, a boxed strawberry cake mix and store bought frosting work well. I slightly boost the boxed mix by folding in a small amount of strawberry puree or extra vanilla extract to keep flavor bright and homemade tasting.
- Handling soft frosting: If your frosting gets too soft while spreading, chill it for 15 to 30 minutes to firm up. Working with chilled frosting prevents sliding and makes crumb application much easier.
- Make the strawberry puree ahead: You can make and chill the strawberry puree up to three days in advance; chilling allows the flavors to deepen and makes assembly smoother. Store it in an airtight container to maintain vibrant color and aroma.
- Use a hand mixer if needed: No stand mixer is required; a strong hand mixer and a large bowl will do the job. It just takes a bit longer to achieve the same smoothness, so be patient and scrape the bowl frequently for even mixing.