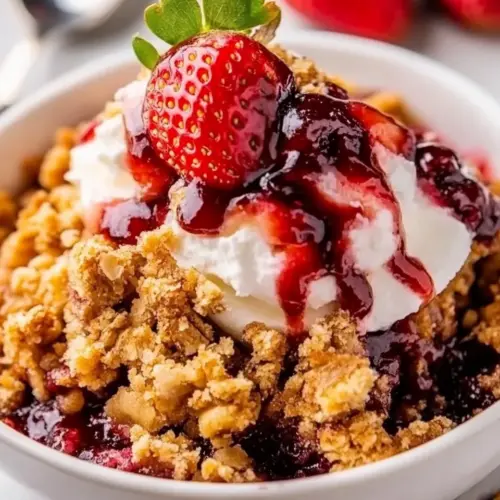
Strawberry Crisp
Strawberry Crisp is a warm, crispy fruit dessert with a buttery oat topping and bright, juicy berries. This easy, comforting recipe delivers a balance of sweet and tart, perfect for an easy weeknight dessert or a spring gathering served warm. Make it for its fresh fruit flavor and crunchy, caramelized topping, a reason to bake it again and again.
Equipment
- 9-inch cast iron skillet
- Mixing Bowl
- Pastry blender
- Measuring Cups
Ingredients
- 1 1/2 pounds strawberries chopped Provide chopped strawberries as the primary fruity base, offering natural sweetness and bright color; they release juices when baked to create the filling’s texture and flavor. Use ripe berries for maximum aroma and a tender mouthfeel, ensuring even chop for consistent cooking. Balance fruit and thickener to avoid a soggy topping while preserving pleasant berry chunks.
- 1 teaspoon orange zest Add grated orange zest to contribute a citrusy aroma and subtle brightness that complements the berries; it elevates the overall flavor profile without adding liquid. Use finely grated zest to distribute fragrant oils evenly, enhancing freshness and complexity. Pair lightly with other flavorings to avoid overpowering delicate strawberry notes.
- 1 teaspoon vanilla extract Add vanilla extract to impart warm, sweet aromatic notes that deepen the filling’s flavor; it enhances the perception of sweetness and rounds fruitiness. Measure precisely as concentrated extract can dominate when overused. Fold in with the filling liquids to ensure even flavor distribution.
- 3 tablespoons white sugar Add white sugar to provide straightforward sweetness and help macerate the strawberries, drawing out juices for a saucy filling. Use granulated sugar to achieve predictable sweetness and promote balanced caramelization during baking. Combine with thickeners to control filling consistency.
- 4 tablespoons cornstarch Add cornstarch to thicken the strawberry juices into a cohesive filling, preventing excessive runniness after baking. Dissolve thoroughly in a small amount of liquid before combining with fruit to avoid lumps and ensure smooth texture. Adjust amount based on fruit juiciness for optimal set.
- 1/2 cup butter cut into cubes Cut butter into cubes to enable cold fat distribution throughout the topping, creating tender, flaky, or crumbly textures when baked. Use chilled butter and work quickly to maintain small pockets of fat that melt and create desirable crispness. Incorporate evenly with dry topping ingredients for uniform browning.
- 3/4 cup rolled oats Include rolled oats to contribute chewy texture and rustic heartiness to the crisp topping while absorbing some butter for structure. Choose old-fashioned rolled oats for a balance of chew and crispness; they toast during baking to add nutty flavor. Mix thoroughly with sugars and flour for cohesive crumb.
- 1/4 cup sugar Add sugar to provide sweetness in the topping and assist with browning, contributing to a crisp, caramelized surface. Use granulated sugar to blend smoothly with dry ingredients and help with texture. Balance with brown sugar for more depth if desired.
- 1/2 cup light brown sugar Add light brown sugar to introduce moist sweetness and a hint of molasses that deepens the topping’s flavor and promotes chewiness. Use packed measurement for consistency, and combine with butter so the sugars dissolve and caramelize during baking. Adjust ratio with granulated sugar for desired texture.
- 3/4 cup all-purpose flour Add all-purpose flour to bind the topping ingredients and provide structure, yielding a cohesive crumb that browns when baked. Measure and mix with sugars and oats to create the base of the crisp, ensuring even distribution for consistent texture. Use spoon-and-level technique for accurate measurement.
- 1 teaspoon cinnamon Add cinnamon to contribute warm, sweet-spicy aromatic notes that complement both fruit and topping elements, enhancing overall complexity. Use ground cinnamon sparingly to avoid overpowering the delicate strawberry flavor, and mix into the topping or filling as specified. Pair with citrus zest for layered aroma.
- 1/4 teaspoon salt Add salt to enhance and balance the sweet flavors while accentuating the other aromatics; a small amount improves overall taste clarity. Sprinkle evenly into both filling and topping mixtures as directed to avoid pockets of saltiness. Use measured quantity to maintain subtle seasoning rather than overt salinity.
Instructions
- Preheat the oven to 190 C/375 F.: You will notice a warm, dry scent begin to build in the oven as it reaches temperature, which ensures the topping starts to brown quickly when placed inside. Proper preheating prevents underbaked centers and uneven texture, so wait for a steady oven reading. A common mistake is placing the dish in too early, which can result in a soggy topping because the filling starts releasing juices before the top crisps.
- In a large bowl, mix together the chopped strawberries, orange zest, vanilla extract, granulated sugar, and cornstarch. Stir well to ensure that the strawberries are evenly coated with the mixture.: As you stir the strawberries with sugar and cornstarch , you should see juices begin to glisten on the fruit, and the mixture will smell fragrant from the orange zest and vanilla extract . This step helps the cornstarch coat the fruit so it thickens evenly during baking, which creates a glossy, clingy filling. Avoid overmixing vigorously, which can break down the berries too much and yield a mushy texture.
- Pour the strawberry filling into a 9-inch cast iron skillet.: When you transfer the filling, the pan will catch any juices and concentrate heat, promoting even bubbling around the edges. A skillet is ideal because it goes from oven to table, and its heat retention keeps the crisp warm for serving. If you use a thinner dish, the fruit may cook too quickly at the edges, so opt for a sturdy pan when possible.
- In a separate bowl, combine the unsalted butter cubes, old-fashioned oats, granulated sugar, light brown sugar, ground cinnamon, salt, and all-purpose flour. Mix the ingredients with a pastry blender or fork until the mixture resembles coarse crumbs.: As you mix these dry components with the butter , you should feel the texture change under your fingertips from loose to crumbly clusters. The sugars begin to cling to the oats and flour, foreshadowing a crunchy, caramelized topping. Work quickly with butter that is cold, since warm butter will make the mixture greasy rather than crumbly.
- Spread the crisp topping mixture evenly over the strawberry filling.: The sound will be a soft clatter as the tool breaks the butter into pea sized pieces within the dry mixture, and small golden flecks of butter will glint in the crumbs. These butter pockets melt in the oven to create flaky, crisp bits. A typical error is overworking the topping, which can make it uniform and prevent the desirable clumps from forming.
- Bake the crisp in the preheated oven for 40-45 minutes or until the topping is golden brown and the filling is bubbly.: As you scatter the topping, you will notice contrast between the wet, glossy fruit and the dry, sandy crumble. Distribute the topping so some areas have larger clusters for texture, and press lightly in spots if needed to help it adhere. Rushing this step can leave some fruit uncovered, causing uneven browning and potential burning of exposed fruit edges.
- Remove the strawberry crisp from the oven and let it cool for a few minutes before serving.: While baking, the kitchen will fill with a warm scent of caramel and fruit, and you may hear faint bubbling as the filling releases steam. Watch for a deep golden color on the topping and active bubbling at the edges, those are signs the cornstarch has activated and the topping is done. Opening the oven frequently is a mistake, it causes temperature drops that can lengthen cooking time and prevent proper browning.
- Remove the strawberry crisp from the oven and let it cool for a few minutes before serving.: Cooling allows the filling to set so you can spoon neat portions, and the contrast between warm filling and slightly crisp topping is at its best. The aroma will shift to a concentrated fruit and toasted sugar note as it cools. Serving immediately without a brief rest may lead to runny slices that do not hold shape.
Notes
- Boost the citrus: Increase the orange zest by a little for a brighter, more aromatic filling that cuts through sweetness and pairs beautifully with warm toppings.
- Adjust sweetness: If your strawberries are very ripe, reduce the 3 tablespoons white sugar in the filling by one to keep the fruit forward and prevent an overly sugary syrup.
- Crispier topping: Swap half the all purpose flour for almond flour to add a nutty flavor and crispier texture in the topping clusters.
- More chew: Add an extra quarter cup of rolled oats to the topping for chewier bites and a heartier mouthfeel.
- Make ahead: Assemble the crisp and refrigerate for up to a day before baking, then add a few extra minutes to the baking time to account for the chilled filling.
- Freezing the dessert: Once cooled, wrap the whole baked crisp tightly and freeze for up to six months; thaw overnight in the fridge and reheat in a low oven until warmed through.