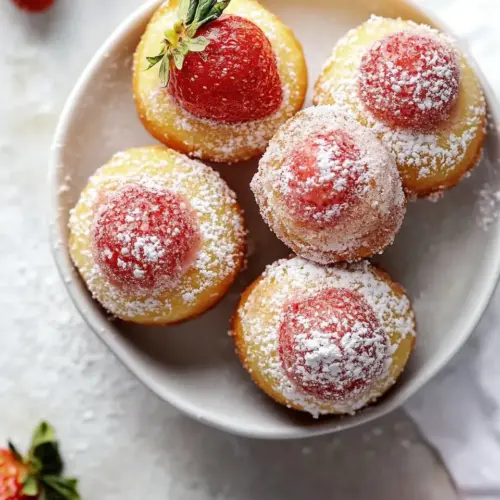
Strawberry Cheesecake Donut Holes
Strawberry Cheesecake Donut Holes are creamy filled, cake like bites with a fruity strawberry swirl and a delicate sugar coating. Soft, tender, and easy to share, these mini treats bring crunchy exterior notes and luscious filling in every bite, perfect for brunch or parties. Make a batch for a crowd or freeze extras for quick, sweet snacks that taste freshly baked.
Equipment
- 24-count mini muffin pan
- Mixing Bowls
- Whisk
- Piping bag with narrow nozzle
Ingredients
- 1 cups elf raising flour or plain, all-purpose flour Use to provide structure and bulk to the donut holes while determining texture; sifted if possible to avoid lumps and ensure even mixing. Adjust choice between self-raising or all-purpose flour with rising agents accordingly to control leavening. Measure carefully to maintain proper dough hydration and final crumb consistency.
- 2 tablespoons sugar white, raw or coconut sugar Add sweetness and slight caramelization to the dough while balancing tartness from other elements; granulated white, raw, or coconut sugar each impart subtle flavor differences. Sprinkle or dissolve into wet ingredients to ensure even distribution and avoid grainy texture.
- 1/4 teaspoons salt Enhance overall flavor balance and strengthen gluten slightly to elevate taste perception; dissolve thoroughly into dry ingredients. Use sparingly to avoid flattening the dough’s rise while rounding savory-sweet contrast.
- 1 teaspoon baking powder Provide lift and lightness by releasing gas during baking to create a tender interior; whisk into the dry mix to distribute evenly. Verify freshness for consistent rising and avoid clumping with other dry ingredients.
- 1/2 teaspoon baking soda only if using plain or all-purpose flour/s Assist in additional leavening when using plain or all-purpose flour, reacting with acidic components to produce rise; only include if specified flour choice lacks baking agents. Mix with the other leavening to prevent uneven pockets of gas and ensure uniform texture.
- 2 tablespoons olive oil or canola or melted coconut oil Contribute moisture and richness while aiding in tender crumb formation; choose olive, canola, or melted coconut oil based on flavor preference. Incorporate with sugars and eggs to emulsify the batter and improve mouthfeel.
- 1 egg large Bind ingredients and introduce structure through coagulated proteins during baking for stable dough; use a large egg at room temperature for best incorporation. Beat lightly before adding to achieve even texture and help trap air.
- 2 teaspoons pure vanilla extract Introduce fragrant, sweet aromatics that complement strawberry and cream cheese flavors; use pure vanilla extract for best clarity of flavor. Add to wet mixture to disperse aroma and round overall taste.
- 1/2 cup unsweetened almond milk or low fat/skim milk Provide liquid volume and slight tang depending on milk type, contributing to batter consistency and final tenderness; unsweetened almond or low-fat/skim milk alters richness. Warm slightly for easier incorporation and smoother batter.
- 1/4 cups sugar or mild tasting sweetener for coating Create a final outer sweetness or coating that adheres to warm donut holes enhancing texture and flavor; choose sugar or a mild-tasting sweetener to suit dietary needs. Toss donut holes immediately after frying or baking for best adherence.
- 1/3 cup reduced fat cream cheese block or spreadable Offer creamy, tangy filling or layered flavor while reducing overall fat when using reduced-fat options; use block or spreadable cream cheese to adjust filling technique. Soften before mixing to ensure smooth, lump-free incorporation.
- 2 tablespoons powdered sugar icing sugar Sweeten and stabilize the cream cheese filling or glaze while adding a fine powdery texture that dissolves readily; powdered or icing sugar blends smoothly. Sift if necessary to prevent clumps and achieve silky consistency.
- 2 tablespoons strawberry jam or jelly, or topping if you prefer Provide concentrated strawberry flavor and fruity sweetness as a filling, glaze component, or topping to reinforce the dessert’s theme; choose jam, jelly, or topping based on desired texture. Warm slightly for easier spreading and to meld with cream cheese if mixing.
Instructions
- Preheat oven to 176 C | 350 F. Spray a 24-count mini muffin pan with cooking oil spray; wipe over excess with paper towel and set aside. Alternatively, use a cake pop tray or cake pop maker.: The warm, dry oven smell signals readiness, and preheating to 176 C | 350 F ensures even rise from the moment the batter goes in. I can tell the oven is at the right temperature when the element cycles quietly and the air inside feels consistently warm if you hold your hand near the door, without being hot enough to burn. Preparing the pan with a light coat of oil prevents sticking and helps the bottoms brown evenly, while wiping excess avoids pooling and uneven frying of the edges. If you skip the wipe step, the oil can collect and cause one side to brown faster, so always remove excess. A common mistake is not preheating long enough, which can make the donut holes dense instead of airy.
- In a large bowl, whisk all of the dry ingredients together. Make a well in the centre and add the oil, egg, vanilla and milk. Whisk the batter until smooth and lump free.: As you whisk the dry mix, you should see a uniform pale mixture with tiny specs of baking powder and soda dispersed, which is your visual cue that the leaveners are distributed. Making a well helps the wet ingredients incorporate gently, reducing over mixing which would tighten gluten and yield a tougher crumb. When you whisk in the oil , egg , vanilla , and milk , watch for a glossy, slightly thick batter that flows slowly from the whisk. The batter should be smooth and free of lumps, but still a bit thick so it holds shape when spooned. Over mixing or adding too much liquid will thin the batter, leading to flatter donut holes, so stop once it is homogeneous.
- Spoon the batter (about 2 teaspoons) into each muffin hole, filling to 3/4 full. Bake for 10-15 minutes, or until they are golden in colour and a toothpick inserted into the centre of a donut comes out clean. Allow them to cool for 5 minutes. While they're still warm, gently roll each donut hole into the sugar until evenly coated.: When spooning, you should hear a soft thud as the batter drops into the tin, and the little domes should sit neatly in each cavity. Filling to 3/4 full gives room for the tops to puff and form a rounded crown. During baking, the tiny cakes will scent the kitchen with a warm, bready aroma and the tops should turn a light golden hue. The toothpick test ensures the centers are set, and a slight spring when touched confirms doneness. Cooling for five minutes lets them firm slightly so they do not break when handled. Rolling warm donut holes in the coating sugar creates a fine, sparkling crust; if they are too hot, the sugar will melt into a glaze rather than coat, so roll while just warm. A common pitfall is overbaking which dries them out, so watch closely in the final minutes.
- While the donuts are baking, make the cheesecake filling. Combine the cream cheese together in a small bowl with the sugar. Beat until smooth and combined. Add the strawberry jam, jelly or topping and mix through slowly until creating an almost marble/swirl effect (if using jam, make sure any bigger fruit pieces are removed before using, or they will get jammed in the nozzle).: As you beat the cream cheese with the powdered sugar , the mixture should become pale, glossy, and silky. Smoothness tells you there are no lumps and that the filling will pipe cleanly. When you fold in the strawberry jam , move gently to create a marbled swirl rather than fully blending; you will see ribbons of pink against the creamy base. This visual contrast is part of the charm. If the filling becomes too thin, chill briefly so it firms; if it is too stiff, a teaspoon of milk will loosen it. One mistake to avoid is using jam with large fruit chunks, which can clog the piping tip, so strain or mash any big pieces first.
- Fill a piping bag with the cheesecake filling, and using a narrow nozzle, fill each donut with the strawberry cheesecake until they puff up and expand (not too much or the donuts will overflow).: When piping into the donut holes, you will feel slight resistance that eases as the filling enters the center. The surface of each donut will give a tiny puff and look slightly domed when filled correctly. The filling should feel cool against your skin if you test a small dab, contrasting with the warm cake. Stop filling if you notice the filling beginning to seep out the sides, as overfilling can cause messy leaks during serving. If you encounter clogging at the nozzle, stop and clear it with a toothpick rather than forcing, which can tear the dough. A typical error here is rushing and overfilling, which spoils the neat round shape, so pipe slowly and watch the surface for that gentle puffing.
Notes
- Make ahead: These Strawberry Cheesecake Donut Holes can be baked ahead and frozen. I like to freeze them on a tray first, then store in a sealed bag for up to two months.
- Thawing: To thaw, remove from the freezer and let them sit for thirty to forty five minutes at room temperature, or warm gently in a low oven for a few minutes to refresh the exterior.
- Coating tip: Roll the warm donut holes in the sugar coating while they are still slightly warm to achieve a fine sugary crust that adheres beautifully.
- Filling firmness: If your filling seems loose, chill it for ten to fifteen minutes to firm up before piping, which ensures neater filling and less seepage.
- Pan alternatives: A cake pop maker or mini cake pop tray works well. Adjust bake time slightly if using a different mold, and watch for the same golden cues.