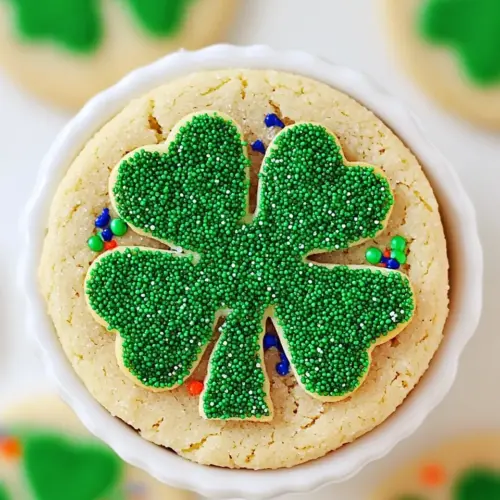
St. Patrick’s Day Cookies
St. Patrick’s Day Cookies are a charming, buttery cookie with a tender crumb and a colorful, crunchy exterior. These easy to slice and bake treats combine creamy butter and warm vanilla extract notes with bright green gel coloring and festive rainbow nonpareil sprinkles, making them ideal for holiday gatherings and easy weeknight baking. Make a batch to celebrate and impress without fuss.
Equipment
- Stand mixer
- Mixing Bowl
- Clove shaped cookie cutter
- Loaf Pan
- Baking Sheet
- Parchment Paper
- Wire Rack
Ingredients
- 3/4 cups salted butter room temperature Soften to room temperature to ensure easy creaming and even incorporation into the dough; contributes richness and tender texture to the cookies and helps spread during baking.
- 1/3 cup brown sugar packed Provide deep, caramel-like sweetness and moisture when packed into the measuring cup; enhances flavor complexity and helps keep cookies soft and chewy.
- 1/3 cups sugar Sweeten the dough and promote proper browning; granulated sugar helps create structure and a slightly crisp edge when cookies bake.
- 1 large egg Whisk until combined to bind ingredients, add moisture, and contribute to leavening through steam; supports structure and a tender crumb in the finished cookie.
- 2 teaspoons vanilla extract Add aromatic sweetness and roundness to the flavor profile; balances other extracts and lifts the overall taste of the cookie dough.
- 1/2 teaspoon almond extract Introduce a subtle nutty-floral note that complements vanilla without overpowering; enhances complexity and gives a distinct background flavor.
- 2 cups all purpose flour Provide the primary structure and bulk of the cookie dough; forms gluten when mixed and influences texture and chewiness based on handling.
- 1/4 teaspoon kosher sea salt Enhance overall flavor by balancing sweetness and strengthening gluten slightly; helps control rising and brings out other ingredient notes.
- 1/4 teaspoon green gel food coloring Impart festive color with a concentrated gel that won’t thin the dough; allows vibrant green without affecting texture or hydration.
- 1 egg white Brush or bind toppings and add a glossy sheen when baked; helps sprinkles adhere and can contribute a slight crispness to the cookie surface.
- 1 tablespoon water Thin the egg white for easier brushing and even coverage; helps create a smooth surface for decorations and improves adhesion of sprinkles.
- 1/4 cup rainbow nonpareil sprinkles Provide colorful, crunchy decoration and visual appeal; add a sweet, slightly crunchy texture contrast on the cookie exterior.
Instructions
- In the bowl of a stand mixer or a large mixing bowl (with a hand mixer), beat butter and sugars for 2-3 minutes until light and fluffy. Add egg, vanilla, and almond. Mix until combined. Add the flour and salt. Mix until a soft dough forms.: As you cream the softened butter and both sugars , you should hear a soft beating sound and see the mixture become paler and airy, with streaks of sugar gradually smoothing out. This aeration helps create a tender texture by incorporating small pockets of air that expand in the oven. If the mixture still looks grainy after two minutes, continue beating until it appears lighter and smoother. A common mistake is using butter that is too cold, which will not cream properly, or too warm, which will produce a greasy mix. If that happens, chill the bowl briefly and resume. Smell the mixture for a faint caramel note from the brown sugar, and stop once the texture resembles whipped cream with soft peaks of butter, because overbeating can lead to a fragile dough that spreads in the oven.
- Divide the dough into two balls. Wrap one ball in plastic wrap and set it aside. Fold the green food coloring into the remaining ball until it is a uniform color. Flatten into a 1-inch thick disk. Wrap in plastic wrap and place in the refrigerator along with the ball of dough. Chill for 3 hours.: When you add the egg , vanilla extract , and almond extract , you will notice the mixture become more cohesive, and the scent will shift toward warm, aromatic notes. Mixing these liquids disperses flavor evenly and helps bind the dry ingredients later. Combine until fully incorporated, scraping the bowl to ensure there are no streaks of unblended egg. Avoid adding too quickly; if the batter looks curdled, pause and scrape then continue on a low speed to bring it together. This step matters because proper emulsification prevents pockets of liquid that could alter dough texture. A troubleshooting tip is if the mixture separates, add a tablespoon of flour and beat briefly, which can rescue the emulsion.
- Remove the green dough, using a clover-shaped cookie cutter, cut as many clovers as you can out of the dough, re-rolling the dough as needed.: As you fold in the all purpose flour and kosher sea salt , the dough will thicken and pull away from the bowl. Watch for a soft, slightly tacky but manageable texture; it should not be overly sticky or crumbly. Mixing just until combined preserves tenderness, while overmixing develops gluten and yields a tougher cookie. If the dough feels dense, check that you used the correct flour measurement. A common error is packing flour into the cup, which makes the dough dry; spoon and level for accuracy. The visual cue here is a smooth, cohesive ball of dough that holds shape when pressed lightly.
- In a small bowl, whisk together the egg white and water. Brush over the tops of each clover, and stack into a tall "tower." You want the clovers to be lined up as evenly as possible. Lay the tower down, so that it's one long log of clovers. Wrap with plastic wrap and freeze for 30 minutes.: Once the dough is formed, divide it into two equal pieces, wrap one in plastic wrap and set it aside; this separation lets you color only one portion while keeping the other plain. When you work the green gel into one ball, it should become uniformly colored with no streaks. Flatten the colored dough into a 1 inch thick disk before wrapping; this shape helps it chill evenly. If the coloring seems to soften the dough, return it to the fridge for a short period. A mistake to avoid is overworking the colored dough, which can warm it and make it sticky; handle it minimally to retain shape and chill it thoroughly for at least three hours.
- Break the ball of dough into several pieces and roll it into ropes. When the clover log is ready, remove it and line the clovers with the long ropes. You want to encase the clovers completely. Press tightly, then roll on a lightly floured surface into a smooth log. Brush the outside with egg wash, then roll in the sprinkles. I used a loaf pan to do this and it worked really well. Return to the freezer for 30 minutes.: After folding in the green gel food coloring , the dough should display a consistent hue without streaks, and it will feel firmer as it cools. Chilling solidifies the fats, which prevents spreading and keeps cookie edges crisp. The three hour rest allows flavors to meld and the dough to hydrate for easier handling. If you are short on time, a minimum of one hour will help, but expect slightly more spread in the oven. Avoid skipping the chill, because a warm dough will lose details when cut and will not produce clean clover shapes.
- Preheat oven to 375 degrees. Line a baking sheet with parchment paper or a silicone mat. Slice the log into 1/4" thick slices. Place 12 on a baking sheet at a time. Bake for 10-12 minutes, remove from the oven, and allow to cool on the sheet for 3 minutes before transferring to a wire rack to cool completely.: When you cut shapes, the edges should be clean and defined; you will feel a slight resistance as the cutter slices through chilled dough. Re rolling any scraps on a lightly floured surface lets you maximize yield, but do not overwork the scraps because repeated handling warms the dough and softens the edges. Press firmly and lift the cutter straight up to maintain the shape. A common pitfall is applying too much flour when rolling, which dries the dough; use just enough to prevent sticking. The visual cue of success is crisp, well formed clovers that hold their shape when moved to a tray.
- In a small bowl whisk together the egg white and water brush over the tops of each clover and stack into a tall tower: The mixture of egg white and water should look glossy and slightly frothy when whisked. Brushing it over each clover gives a tacky surface so the next steps will adhere, and the sheen will bake into a subtle glaze. As you stack the clovers into a tower, align them carefully so they sit flat against each other, creating a uniform log. If the egg wash runs, you mixed it too thin, so use the measured amount. Troubleshoot by blotting any excess with a clean fingertip; too much wash can make the sprinkles slide off during rolling.
- Lay the tower down so that it is one long log of clovers wrap with plastic wrap and freeze for 30 minutes: Laying the stacked clovers into a single log helps when encasing them with the plain dough ropes. Freezing for 30 minutes firms the layered shape so the encasement step is neat and the slices cut cleanly. The log should feel firm to the touch but not rock hard. If it is still soft, add another 10 to 15 minutes in the freezer. Avoid skipping this freeze, because a soft log will compress and distort when you roll the outer layer.
- Break the ball of dough into several pieces and roll it into ropes when the clover log is ready remove it and line the clovers with the long ropes: Rolling the plain dough into ropes creates an even shell; as you wrap the ropes around the clover log, press gently so there are no gaps. The outer dough should meet and seal, forming a smooth surface. Work on a lightly floured surface to prevent sticking, but use minimal flour to avoid drying the exterior. The tactile cue is a continuous, seamless layer around the colored clovers. A common mistake is leaving seams unsealed, which can let sprinkles fall away or cause the log to separate while slicing; press seams firmly to avoid that.
- Press tightly then roll on a lightly floured surface into a smooth log brush the outside with egg wash then roll in the sprinkles return to the freezer for 30 minutes: After sealing, rolling the entire log smooths any imperfections and compresses air pockets for clean slices. Brushing the outside with the egg white wash allows the rainbow nonpareil sprinkles to adhere uniformly, creating a decorative, crunchy shell. The freezer rest firms the log so you can slice thin rounds without crumbling. If sprinkles fall off while rolling, press them gently into the surface with a flat palm. Avoid warming the log in your hands, which will soften it and make slicing messy.
- Preheat oven to 375 degrees line a baking sheet with parchment paper or a silicone mat slice the log into 1 slash 4 inch thick slices place 12 on a baking sheet at a time bake for 10 to 12 minutes remove from the oven and allow to cool on the sheet for 3 minutes before transferring to a wire rack to cool completely: As the oven reaches 375 degrees , the smell of butter and sugar will become noticeable in the kitchen as the cookies bake to a gentle golden edge. Slicing into 1 slash 4 inch rounds should produce clean discs, and spacing 12 per sheet gives them room to breathe. Bake for the recommended time until edges show a faint golden tint while centers remain pale. After removing from the oven, the cookies will be soft; letting them rest on the sheet for three minutes lets them set and finish firming before moving to a wire rack . A common error is overbaking which yields dry cookies, so watch closely in the final minutes and pull them when the centers are set but not browned.
Notes
- Freeze for later — Prepare and freeze the completed logs for up to three months, wrapped tightly in plastic then placed in a sealed bag, so you can slice and bake fresh cookies on demand.
- Change the interior shape — Swap the clover cutter for hearts stars or any shape that fits the occasion, keeping the assembly steps identical for festive variations.
- Adjust color intensity — Use gel food coloring to deepen or soften the shade, adding tiny amounts at a time until you reach the hue you want without changing dough texture.
- Make smaller cookies — Roll thinner logs and slice into smaller rounds for bite sized treats, remembering to reduce baking time slightly and watch for set centers.
- Prep ahead in stages — Complete the dough and shape the logs a day or two in advance, storing them in the freezer until ready to bake to simplify party day prep.