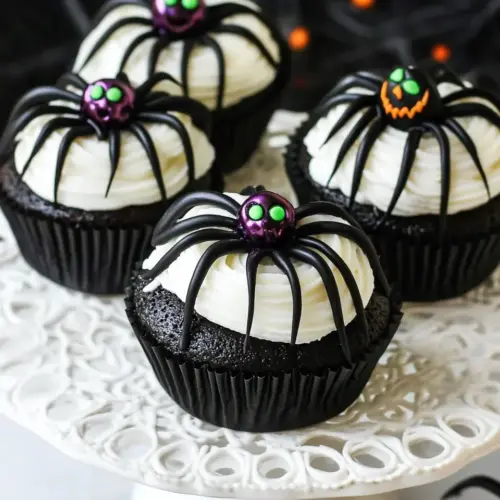
Spider Halloween Cupcakes
Spider Halloween Cupcakes are a fun, spooky dessert featuring rich chocolate cupcakes topped with jet black frosting and playful toy spiders. The contrast of dark frosting and bright white eyes creates a dramatic look that is surprisingly easy to assemble, making these cupcakes ideal for party baking and quick holiday gatherings. Try them for a festive centerpiece that everyone will remember.
Equipment
- Oven
- Wire Rack
- Spatula
- Piping Bag
- Toothpick
Ingredients
- 24 baked Chocolate Cupcakes (I like to bake them in black cupcake liners) Baked to perfection and already cooled, provide the base for the Halloween treats and set the size and shape for decoration; use black cupcake liners to enhance the spooky appearance and prevent sticking. Make sure they are fully baked and firm so they hold frosting and toppings without collapsing during assembly.
- 3 cups chocolate frosting Rich and creamy chocolate frosting used to cover the cupcakes completely, creating a smooth dark surface that complements the spooky theme; spread or pipe it generously to form a backdrop for additional decorations. Temper the frosting to an easily spreadable consistency so it adheres well and holds piping details if desired.
- 1 cup white frosting Smooth and thick white frosting used for contrast accents such as eyes or highlights, providing stark visual contrast against the dark chocolate surface; apply with small piping tips or a zip-top bag corner to create precise shapes. Keep it at a firmer consistency to maintain defined lines and prevent it from blending into the chocolate base.
- black food coloring Highly concentrated coloring agent used sparingly to tint frostings or accents a deep black hue, intensifying the spooky aesthetic; add a drop at a time and mix thoroughly until the desired darkness is reached. Use gel or paste food coloring for the richest color without thinning frostings, and wear gloves to avoid staining hands.
- 24 toy spider rings Novelty toy rings shaped like spiders intended as edible-safe, non-edible toppers to enhance the Halloween theme and provide a playful, dramatic finishing touch; place one ring atop each cupcake after frosting has set. Verify that rings are clean and positioned securely so they do not tip or become a choking hazard for small children.
Instructions
- Fill your cupcake liners a little less than 2/3 full of batter so that they bake with flat tops. Allow the baked cupcakes to cool completely before frosting them.: The aroma of batter will be warm and chocolatey as the cupcakes go into the oven, and the visual cue you are aiming for is a flat top rather than a domed peak because it makes frosting and decorating simpler. A common mistake is overfilling liners which causes domed tops that are harder to frost evenly, so use a scoop or measuring cup to be consistent. Why this matters, the flat top gives you a predictable surface for the black frosting to sit on without sliding off, and for final presentation it helps the spider sit centered. If the tops are slightly rounded, you can level them gently with a serrated knife once cooled, but try to get the fill right in your batter stage.
- Make your chocolate frosting. Add some black food coloring to make the frosting black. Frost a thin layer of black frosting on the tops of the cupcakes.: When you open the oven the smell of baked chocolate will drift out and the cupcakes will still look glossy and soft, but it is critical to wait until they are cool to the touch before frosting. If you frost warm cupcakes, the frosting will melt and lose shape, and any piped details like the white eyes will blur. A typical troubleshooting note is to transfer cupcakes to a wire rack to speed cooling and ensure air circulates around each one, avoid stacking them while warm as trapped heat causes condensation and soggy tops.
- Use a small frosting tip (or a ziplock bag with a corner cut) to pipe two white circles with the white frosting, and a dot in the center.: The texture should be smooth and spreadable, glossy but thick enough to hold shape, and adding the black food coloring will deepen the shade wonderfully. I like to mix in small amounts of gel coloring until I reach an even, deep black, stirring thoroughly to avoid streaks. One common issue is overmixing with liquid color which can thin the frosting, so use concentrated gels and add them in minimal increments. This step matters because a well colored, stable frosting makes the whole visual effect dramatic and professional looking.
- Starting at the center dot, use a toothpick to pull a straight line out to the edge of the cupcake. Repeat around the cupcake to make a spiderweb. Stick the toy spiders on top.: The smell at this point is mostly sweet from the frosting, and visually you will be transforming brown chocolate into a near black canvas. Use a toothpick to blend in concentrated gel color sparingly until the shade is right, and always mix until uniform to avoid marbling. Watch for the frosting becoming runny from too much liquid; if that happens refrigerate briefly to firm it up, as runny frosting will not hold piping details or support toppers.
- Frost a thin layer of black frosting on the tops of the cupcakes: You want a smooth, even coating that covers the surface without piling too high, creating the background for your spiderweb. The sound of a spatula moving across the cupcake should be gentle and deliberate, and the visual cue is a matte, even surface. Overworking the frosting can cause it to become glossy or soft, and too thick a layer may obscure the white eye details, so aim for a controlled thin spread. Achieving an even base here sets up the best contrast for the webbing and the toy spider.
- Use a small frosting tip or a ziplock bag with a corner cut to pipe two white circles with the white frosting and a dot in the center: The tactile satisfaction of piping the tiny eyes is immense, and you should aim for two consistent, round dots on each cupcake. The small white dots will be bright against the black background, and a central tiny dot inside each larger circle creates a pupil effect. A frequent mistake is piping too close together or making eyes uneven, which can make the cupcakes look lopsided, so practice piping a few on parchment first if you are unsure. This step is important because precise eyes give personality to each cupcake and make the design readable from a distance.
- Starting at the center dot, use a toothpick to pull a straight line out to the edge of the cupcake: You will feel gentle resistance as the toothpick moves through the frosting and see a thin white line fanning outward, creating a spiderweb effect. Use steady pressure and short, confident strokes, and repeat around the cupcake for a symmetrical pattern. A common pitfall is dragging the toothpick back and forth which smudges the design, so always pull outward from the center in one motion. This technique matters because those clean radial lines form the web structure and give the cupcakes their signature haunting look.
- Repeat around the cupcake to make a spiderweb: Continue pulling lines from the center to the edge in a repeated rhythm until you have a complete web. The visual cue to stop is an even number of strands spaced like slices of a pie, and the sound is silent but satisfying as frosting parts on the surface. If the lines are too faint, you may need slightly thicker white frosting, but avoid overloading which will cause blobs. Neat, evenly spaced web lines ensure the overall design reads as a web from across the table.
- Stick the toy spiders on top: Gently press each toy spider ring into the center of the web where the lines converge so it sits securely. The weight and feel should be light and stable, and you may notice a tiny indent where the toy rests in the frosting, which actually helps it stay in place. A mistake to avoid is forcing a heavy toy into the frosting which can crack or collapse the web design, choose lightweight rings and press just enough to anchor them. This final touch brings playfulness and completes the cupcake's personality for serving.
Notes
- Chill if needed: If your frostings feel soft after adding color, pop them into the refrigerator for a few minutes to firm up, which makes piping and spreading neater and prevents colors from blending unintentionally.
- Use gel coloring: Gel or paste black food coloring gives a deep color without thinning the frosting like liquid dyes can, and it lets you reach a true black with less product used.
- Practice piping: Practice the white eye circles on parchment to perfect your pressure and spacing, this will help keep the final set consistent and charming.
- Work on a cool surface: Decorating in a slightly cool room prevents frostings from becoming too soft, especially if you are making many cupcakes in one session.
- Secure toppers gently: Press toy spider rings just enough to anchor them, heavy pressure can smear the web or sink the topper into the cupcake.