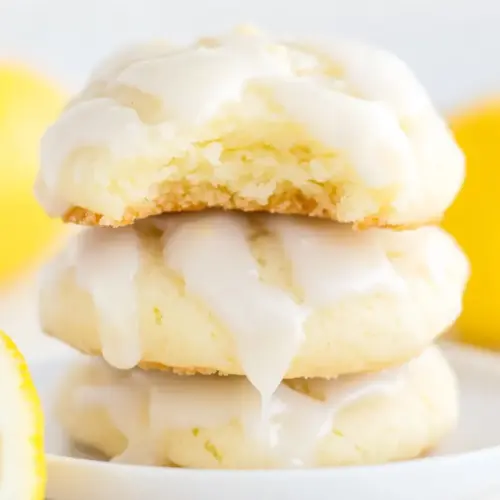
Softbatch Glazed Lemon Cream Cheese Cookies
Softbatch Glazed Lemon Cream Cheese Cookies are tender, creamy, and bright with lemon. These soft, glossy cookies feature a rich cream cheese base and a tangy lemon glaze, perfect for spring gatherings or easy weeknight baking. The texture is pillowy and soft, with a delicate citrus finish, making them irresistible and simple to share.
Equipment
- Stand mixer
- Paddle attachment
- Mixing Bowl
- Electric Mixer
- Cookie Scoop
- Baking Sheet
- Silpat
- Whisk
Ingredients
- 1/2 cup unsalted butter, softened Creamy and softened to room temperature to ensure even creaming with sugars, providing rich fat that yields tender, moist cookies; helps create a soft, cake-like crumb and aids spreading control during baking.
- 1/4 cup cream cheese, softened (use full-fat, brick-style cream cheese not ‘spreadable’ or whipped cream cheese) Softened full-fat brick-style cream cheese for tangy richness and moisture, contributing to tender texture and slight lift; avoid whipped varieties to ensure correct fat ratio and consistency in the dough.
- 1 cup granulated sugar Granulated sugar creamed with butter and cream cheese to incorporate air for a light texture, while supplying sweetness and aiding browning through caramelization during baking.
- 1 large egg Beaten large egg binds ingredients together, adds structure and moisture, and contributes to leavening and a tender crumb through its proteins and fats.
- 1 tablespoon lemon extract, do not substitute with lemon juice Concentrated lemon extract provides concentrated citrus flavor without extra liquid, delivering bright lemon aroma and consistent flavor intensity that won’t alter dough hydration.
- yellow food coloring, optional and as desired Optional yellow food coloring used sparingly to enhance visual appeal and give cookies a cheerful lemony hue without affecting flavor or texture when desired.
- 1 tablespoon lemon zest, or 2 tablespoons if you want cookies very lemony Fresh lemon zest added for intense citrus oils and aromatics, boosting bright lemon flavor; increasing to 2 tablespoons intensifies the lemon profile in both aroma and taste.
- 2 cups all-purpose flour All-purpose flour forms the bulk of the cookie structure, supplying gluten and starch that set the dough into a tender, soft-baked cookie when combined with fats and leaveners.
- 2 teaspoons cornstarch Cornstarch incorporated to soften the texture by reducing gluten development and adding tenderness, contributing to a delicate, melt-in-your-mouth softbatch quality.
- 1 teaspoon baking soda Baking soda provides chemical leavening and reacts with acidic components to create lift and a light crumb, while also influencing browning and spread.
- 1/2 teaspoons salt Salt enhances overall flavor by balancing sweetness and amplifying the lemon and dairy notes, while subtly strengthening gluten for better dough performance.
- 1 cup confectioners’ sugar Confectioners’ sugar used in the glaze for a smooth, lump-free finish that dissolves easily, adding sweetness and structure to the lemon glaze for proper coating consistency.
- 2 to 3 tablespoons lemon juice, or as necessary for consistency Lemon juice added gradually to the confectioners’ sugar to form a glossy glaze, supplying acidity and bright citrus flavor while adjusting thickness for drizzling or coating.
- lemon zest, for garnishing Finely grated lemon zest for garnishing to add fresh citrus aroma, a pop of bright flavor, and attractive visual contrast when sprinkled over the glazed cookies.
Instructions
- Make the Cookies: The room will fill with a soft dairy scent when you begin combining fats, and you should notice a smoother, silkier texture as the unsalted butter and cream cheese come together. If the mixture seems grainy, keep beating for a bit, scraping sides to ensure even mixing. A common mistake is working with ingredients that are too cold, which prevents proper creaming and leaves lumps.
- To the bowl of a stand mixer fitted with the paddle attachment (or large mixing bowl and electric mixer) add the butter, cream cheese, sugar, and beat on medium-high speed until creamed, light, fluffy, and well combined, about 3 minutes.: As you beat, listen for a lighter, airy sound and watch the volume increase to a pale, ribbon like mixture. This aeration helps the cookies rise and stay tender. If you rush this step the dough can be dense, so allow the full time and scrape down the bowl occasionally for even texture.
- Stop, scrape down the sides of the bowl, add the egg, lemon extract, and beat on medium-high speed until well combined, about 2 minutes.: After adding the egg and lemon extract , observe the batter smooth out and become cohesive, with a glossy sheen. Smell the citrus lift as the extract integrates. Avoid over mixing here, which may tighten gluten and make the final cookie firmer than intended.
- Stop, scrape down the sides of the bowl, and optionally add the yellow food coloring (as many drops as necessary until desired shade is achieved), the lemon zest, and beat on medium speed until combined, about 30 seconds.: The batter will take on color and the tiny flecks of lemon zest will release fragrant oils, adding a fresh citrus perfume. If you skip this brief mixing the zest may not be evenly distributed, creating pockets of flavor rather than a uniform lemon note.
- Stop, scrape down the sides of the bowl and add the flour, cornstarch, baking soda, salt, and beat on low speed until just combined, about 1 minute; don’t overmix.: When the dry ingredients enter, you will see the dough thicken and mattify visually. Mixing on low protects the tender structure, preserving a soft crumb. Over mixing will develop gluten and can lead to tougher cookies, so stop as soon as streaks disappear.
- Stop, scrape down the sides of the bowl, and using a 2-tablespoon cookie scoop or your hands, form approximately 18 equal-sized mounds of dough, roll into balls, and flatten slightly.: The dough should feel slightly sticky yet manageable; rolling into balls gives each cookie even weight for consistent baking. Flattening ensures even baking and the softbatch texture. Mistakes at this stage include making uneven sizes, which yields uneven baking and some cookies that overbake while others remain underdone.
- Place mounds on a large plate or tray, cover with plastic wrap, and refrigerate for at least 3 hours, up to 5 days. Do not bake with unchilled dough because cookies will bake thinner, flatter, and be more prone to spreading.: Refrigeration firms the fats and relaxes gluten, which prevents spreading and creates that soft center. You will notice the dough cools and becomes less sticky. Skipping the chill is the most common error and results in cookies that flatten excessively.
- Preheat oven to 350 F, line a baking sheet with a Silpat or spray with cooking spray. Place dough mounds on baking sheet, spaced at least 2 inches apart (I bake 8 cookies per sheet) and bake for about 8 minutes, or until edges have set and tops are just set, even if slightly undercooked, pale, and glossy in the center; don’t overbake or undersides could become too browned. Cookies firm up as they cool.: The oven will give a faint sweet butter aroma and the edges will set first; look for pale tops that still have a glossy sheen. This visual cue ensures a soft center. Overbaking is common and will produce firmer, drier cookies, so remove them when just set.
- Allow cookies to cool completely before glazing. I let them cool on the baking sheet and don’t use a rack.: Cooling allows the structure to set and prevents the glaze from running off. You will notice the cookies lose their warm, doughy scent and become slightly firmer to the touch. Glazing too soon will make the icing slide and thin, ruining the finish.
- Make the Glaze: The sound when whisking becomes smoother as the confectioners' sugar dissolves, and the mixture will shine as it comes together. Whisk until lump free and silky, adjusting with tiny amounts of lemon juice to reach desired thickness. Adding too much liquid at once can make the glaze overly runny, so add slowly.
- To a medium bowl, add the confectioners’ sugar, 2 tablespoons lemon juice, and whisk until smooth and combined. Depending on preference and desired glaze consistency, you may have to play with the sugar and lemon juice ratios slightly.: As you stir, notice the glaze transition from powdery to glossy. Taste a dab for sweetness and acidity; tweak if needed. A common pitfall is impatience with consistency, leading to either dripping or chunks.
- Using a small spoon, drizzle about 1 tablespoon of glaze over each cookie, and spread glaze out using the back of the spoon. Repeat until all cookies are glazed.: When you drizzle, watch the glaze pool and then set into a thin skin, that moment indicates correct thickness. Spread gently to avoid disturbing the cookie surface. Overworking the glaze can create streaks that look uneven.
- Sprinkle a small pinch of lemon zest over all cookies before the glaze sets and before serving.: The final sprinkle adds a burst of fragrance and visual contrast, tiny flecks of zest bright against the glaze. Do this just before the glaze firms, or the zest may sink or stick inconsistently. Avoid adding zest too early if you want a crisp presentation; it will blur into the glaze.
Notes
- Stronger Lemon: Increase the lemon zest to 2 tablespoons for a brighter citrus hit, which will amplify aroma and make each bite more vivid without altering dough consistency.
- Lighter Glaze: Use 2 tablespoons of lemon juice and add more only if needed to thin the glaze, achieving a translucent finish ideal for a delicate look.
- Decorative Zest: Reserve extra lemon zest to sprinkle immediately before the glaze sets, providing a fresh color pop and concentrated citrus aroma on the finished cookie.
- Color Accent: Add a drop or two of yellow food coloring during mixing for a cheerful presentation; it does not affect flavor but lifts the visual appeal.
- Make Ahead Dough: Store the shaped dough mounds covered in the refrigerator for up to five days, then bake as needed to enjoy warm cookies with minimal last minute effort.