Soft Frosted Chocolate Chocolate Chip Sprinkles Cookies
Soft Frosted Chocolate Chocolate Chip Sprinkles Cookies combine a tender, fudgy cookie with creamy tangy frosting and playful chocolate sprinkles for texture. The recipe is easy to follow and yields melt in your mouth centers with pockets of semi sweet chocolate. Perfect for parties or weeknight baking, these cookies are a guaranteed crowd pleaser and worth making whenever you want a comforting, chocolaty treat.
Equipment
- Stand mixer
- Paddle attachment
- Cookie Scoop
- Baking Sheet
- Silpat or nonstick liner
Ingredients
- 1/2 cup unsalted butter, softened (1 stick) Creamed until light and fluffy, contributes rich fat and structure to the dough while providing tenderness and flavor to the cookies.
- 1/2 cup granulated sugar Sweetens the dough and helps create a crisp edge while aiding in spreading and caramelization during baking for depth of flavor.
- 1/2 cup light brown sugar, packed Adds moistness and a subtle molasses flavor while promoting chewiness and helping the cookies stay soft over time.
- 1 large egg Beaten into the batter to bind ingredients, add moisture, and provide leavening support through steam and structure from proteins.
- 2 tablespoons cream or half-and-half Enriches the dough with fat and moisture, improving texture and creating a more tender, soft cookie crumb.
- 1 1/2 teaspoons McCormick Pure Vanilla Extract Adds aromatic vanilla flavor to enhance overall taste and round out the chocolate notes without overpowering the recipe.
- 1 1/4 cups all-purpose flour Provides the main dry structure and bulk for the cookies, supplying gluten for chew and helping absorb wet ingredients.
- heaping 1/2 cup, almost 2/3 cup unsweetened natural cocoa powder Introduces rich chocolate flavor and deep color while contributing dryness that intensifies cocoa taste in the cookie matrix.
- 1 teaspoon instant espresso granules, optional but recommended (doesn’t make the cookies taste like coffee; serves to intensify the chocolate flavor) Boosts and intensifies chocolate flavor without making the cookies taste like coffee, while helping balance bitterness and richness.
- 1 teaspoon baking soda Leavens the dough by releasing carbon dioxide when activated, contributing to rise and a lighter, softer cookie texture.
- 1/4 teaspoons salt, or to taste Balances sweetness and enhances flavor, controlling overall taste while strengthening gluten slightly and aiding preservation.
- 2 cups semi-sweet chocolate chips Dispersed throughout the dough to add pockets of melted chocolate, creating texture contrast and concentrated chocolate bursts in each bite.
- 6 ounces cream cheese, softened (lite okay) Softened and blended into the frosting to add creaminess, tang, and stability while reducing overall sweetness for balance.
- 1/4 cup unsalted butter, softened Creamed into the frosting to add richness, help achieve spreadable consistency, and provide buttery flavor and structure.
- 1 1/2 cups confectioners’ sugar, sifted Sweetens and stabilizes the frosting while providing smooth texture and body when sifted and incorporated for a silky finish.
- 1/4 teaspoons salt, or to taste Seasoning the frosting to balance sweetness and enhance flavors, preventing it from tasting flat and rounding the overall profile.
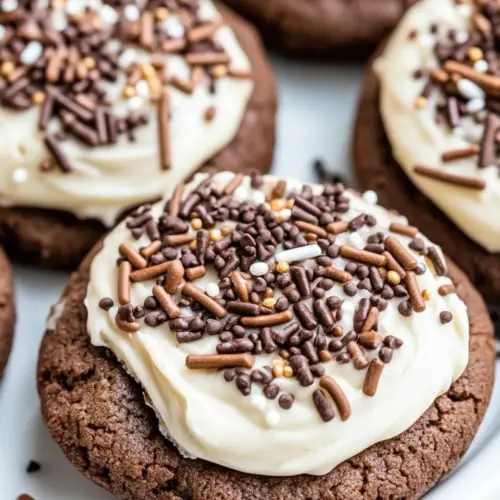
- chocolate sprinkles or chocolate shavings, to taste Used as a decorative topping to add crunch, visual appeal, and a final note of chocolate texture on the frosted cookies.
Instructions
- To the bowl of a stand mixer fitted with the paddle attachment (or large bowl and electric mixer), add the butter, sugars, and beat on medium-high speed until creamed and well combined, about 3 to 4 minutes.: Warm scents of sweet butter and caramelizing sugar emerge as you cream butter with the granulated and light brown sugar . You should hear a steady but not frantic whir from the mixer, and the mixture will lighten in color and develop a slightly fluffy texture, which indicates trapped air that helps the cookies rise. The sugars should be fully incorporated with no visible streaks of unmixed butter . If you smell faintly toasted notes, that means you may have mixed too long at too high a speed, which can melt the butter and make the dough too soft. A common mistake is using overly warm butter , which prevents proper aeration and yields flat cookies, so aim for room temperature but not oily butter . Scrape the bowl once midway through to ensure even mixing.
- Stop, scrape down the sides of the bowl, and add the egg, vanilla, and beat on medium-high speed until well combined, about 2 minutes.: As you incorporate the egg and the vanilla, you should notice the mixture becoming smoother and slightly more cohesive. The aroma will brighten with the sweet, floral notes of vanilla , and the beat will create a glossy sheen in the batter. If the mixture looks curdled or separated, don’t panic, it often rebinds once the next wet ingredient is added. Avoid adding cold eggs straight from the fridge, because the temperature shock can cause the butter to seize and create a broken texture. Scrape the bowl to ensure all pockets of sugar and butter are incorporated.
- Stop, scrape down the sides of the bowl, and add the cream, and beat on medium-high speed until well combined, about 1 minute. The batter may look a little ‘grainy’ and almost as if it’s separated, this is okay.: Adding the small amount of cream loosens the batter and contributes to a tender crumb. The batter may look a little grainy or slightly separated at this point, and that is perfectly normal; the tiny droplets of liquid will integrate with the fats as you continue. You should sense a sheen returning as the mixture becomes homogenous. If you overwork at this stage you may incorporate too much air which changes texture, so mix just until combined. A typical error is adding too much liquid which makes the dough slack, so stick to the measured two tablespoons.
- Stop, scrape down the sides of the bowl, and add the flour, cocoa powder, optional but recommended instant espresso granules, baking soda, salt, and beat on low speed until just combined, about 1 minute.: Once the dry ingredients join the wet, look for an evenly colored dough without dry flour streaks. The aroma shifts to a raw chocolate fragrance as the cocoa powder distributes. Mixing on low preserves tenderness by minimizing gluten development; overmixing here causes tough cookies. If you still see pockets of flour after a minute, finish folding by hand with a spatula to avoid overbeating. A common mistake is using dutch process cocoa when the recipe expects natural cocoa, which can alter rise; follow the listed cocoa powder type for best results.
- Stop, scrape down the sides of the bowl, and add the chocolate chips, and beat on low speed until just combined, about 30 seconds.: When the chocolate chips are folded in, the dough takes on a speckled look with glossy chips distributed throughout. The chips should be intact and not melted into the dough. The sound is quieter now, a gentle thump from the paddle as it moves through the denser mixture. Be careful not to crush the chips by overmixing, which can turn the dough uniformly chocolate and reduce those delightful pockets of melted chocolate. If your chips stick to the paddle, stop and finish folding with a spatula.
- Using a 2-tablespoon cookie scoop or your hands, form approximately 19 equal-sized mounds of dough. The dough is very soft and I find it easiest to use a cookie scoop. Place mounds on a large plate or tray, cover with plastic wrap, and refrigerate for at least 3 hours, up to 5 days. Do not bake with unchilled dough because cookies will bake thinner, flatter, and be more prone to spreading.: The dough will feel soft and slightly tacky to the touch, almost like a thick brownie batter. Scooping yields uniform cookies which bake evenly, giving consistent rise and texture. After placing the mounds on a tray, you will notice the dough firms as it chills, and the aroma concentrates into a deeper cocoa scent. Chilling is crucial because cold dough spreads less, producing soft centers and slightly set edges instead of thin, flat discs. A common oversight is baking straight away, which leads to overly thin cookies that lack the desired tenderness, so be patient and chill long enough for reliable results.
- After chilling, flatten each mound about half the original height.: The chilled mounds will feel firm but still pliable. Flattening them gently encourages even baking so the centers set just right while keeping a soft interior. You should feel a slight give under your palm, and the flattened tops will have a matte finish rather than a sticky sheen. If you flatten too much the cookie may bake thin, while not flattening at all can lead to domed cookies that bake unevenly. A light, consistent press creates the signature look and texture.
- Preheat oven to 350 F, line a baking sheet with a Silpat or spray with cooking spray. Place dough mounds on baking sheet, spaced at least 2 inches apart (I bake 8 cookies per sheet).: As the oven heats to 350 F , you will smell warming air and a faint toasty aroma even before the cookies go in. Lining with a Silpat prevents sticking and promotes even browning, while proper spacing allows air to circulate for consistent bake. If cookies are placed too close they may merge into each other, and if the oven rack is poorly positioned you might get uneven bottoms, so use the middle rack for even heat. A quick tip is to rotate the sheet halfway through if your oven has hot spots.
- Bake for about 8 minutes or until edges have set and tops are just set, even if slightly undercooked and glossy in the center; don’t overbake. Cookies firm up as they cool.: During baking you will see the edges turn a bit more matte and become slightly firmer while the centers remain glossy. The sound is subtle, a quiet settling rather than a sizzle. Resist the urge to bake until the center looks fully done, because carryover heat firms them up and yields that soft interior. Overbaking results in a drier, crisper texture, so pull them when the center still looks a touch underbaked for best chew. If your oven runs hot, shave a minute off the time and watch closely the first time.
- Allow cookies to cool on baking sheet completely before frosting. I let them cool on the baking sheet and don’t use a rack. Make sure they’re completely cooled before frosting them or the frosting will melt.: Cooling on the sheet lets the cookies finish setting gently, and you will notice steam stop rising when they are fully cooled. Touch the top lightly; it should feel room temperature and no longer warm. If you frost warm cookies the frosting will soften and slide off, losing its shape. A common error is impatience, frosting while still warm which makes the final result messy, so wait until they are truly cool.
- To a large bowl (or to the bowl of a stand mixer using the paddle attachment) add the cream cheese, butter, and beat with an electric mixer on high-speed until fluffy, about 2 minutes.: The cream cheese and frosting butter will aerate and turn pale and light as you beat, producing a dreamy, silky frosting. You should detect a slightly tangy aroma from the cream cheese which balances the sweet confectioners’ sugar added later. Beating too long at very high speed risks a whipped texture that can be too soft for careful spreading, so aim for fluffiness without becoming runny. Ensure the cream cheese is fully softened to avoid lumps.
- Add the confectioners’ sugar, salt, and beat until smooth and incorporated, about 2 minutes.: As the confectioners’ sugar folds in, the frosting will thicken and become glossy and pipeable. Taste and adjust the small pinch of salt to offset sweetness. If the frosting becomes too stiff, a teaspoon of cream can loosen it; if too thin, add a touch more sifted confectioners’ sugar . A frequent slip is adding all the sugar at once which can puff dust into the air; add gradually and keep the mixer on low at first.
- Add about 2 to 3 tablespoons of frosting to each cookie, and spread into a smooth, flat layer using a knife, keeping a bare 1/4-inch perimeter.: The frosting should feel creamy and cool against the knife as you spread, creating a thin, even coat that complements the cookie without overwhelming it. Leaving a small bare edge provides contrast and helps the cookie remain easier to handle. If you mound too much frosting the cookie can become top heavy and messy to eat, so aim for a thin, deliberate layer. Smooth the frosting with long, gentle strokes for a clean finish.
- Add sprinkles to each cookie, to taste.: The sprinkles or shavings will stick immediately if applied while the frosting is still slightly tacky, giving a playful crunch and attractive look. Sprinkle sparingly for an elegant sheen or generously for a festive appearance. If you wait until the frosting has set too long, the sprinkles will not adhere, so apply while it is still fresh. Watch for clumping when using damp or oily toppings, which can ruin the neat finish.
Notes
- Storage guidance Keep baked and frosted cookies airtight at room temperature for up to five days, or refrigerate for up to one week. If refrigerated they may dry out quicker, so store in a single layer separated by parchment when possible.
- Freezing the dough Portion dough mounds and freeze them on a tray until firm, then transfer to an airtight container. Bake from frozen adding a minute or two to the bake time for fresh cookies on demand.
- Frosting freshness Extra cream cheese frosting will keep airtight in the fridge for weeks, so consider making extra for future use. Bring it to room temperature and rebeat briefly before spreading.
- Measuring accuracy Spoon and level flour, and pack the brown sugar. Too much flour results in cakey cookies, while too little gives overly thin cookies.
- Room temperature ingredients Use room temperature butter, egg, and softened cream cheese for smooth batter and frosting; cold ingredients lead to lumps or uneven texture.