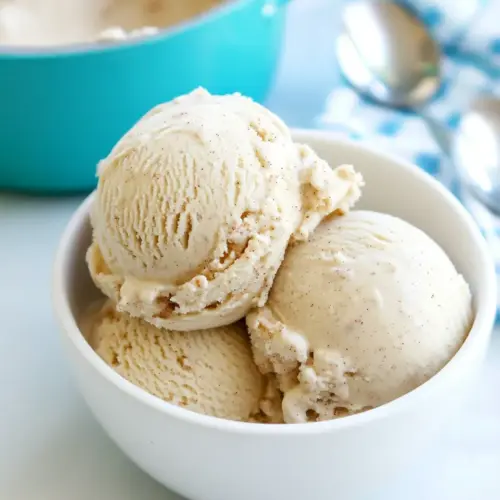
Snickerdoodle Ice Cream
Snickerdoodle Ice Cream is a creamy, cinnamon forward frozen treat that blends cozy cookie flavors with a silky dairy base. This easy churned dessert is perfect for summer gatherings and lazy evenings, offering a smooth texture and warm spice notes. Make it ahead for effortless entertaining and enjoy a nostalgic twist on classic cookies that will keep everyone coming back for more.
Equipment
- Mixing Bowl
- Whisk
- Ice Cream Maker
- Freezer safe container
Ingredients
- 1/2 cup granulated white sugar Provide sweetness and help balance flavors while contributing a fine, crystalline texture that dissolves easily into cold mixtures; aids in preventing iciness and enhances overall mouthfeel when churned into ice cream.
- 1/2 cup packed brown sugar Add a deep, molasses-like sweetness and moistness that complements the white sugar; impart subtle caramel notes and round out the flavor profile while promoting a richer, creamier texture.
- 1/2 teaspoon ground cinnamon Impart warm, aromatic spice and a signature snickerdoodle flavor; enhance the overall sweetness with cinnamon’s fragrant complexity and blend seamlessly into the custard base.
- 1/8 teaspoon ground nutmeg Contribute a subtle, warm nutty nuance that layers with cinnamon to create depth; use sparingly to avoid overpowering and to support the traditional snickerdoodle spice profile.
- 2 cups heavy whipping cream Provide a luxurious, rich fat component that creates the ice cream’s creamy body and smooth texture; stabilize air incorporation during churning and deliver a satisfying mouth-coating richness.
- 1 1/2 cups half and half cream Supply the primary liquid dairy and lighter fat content that balances richness while improving scoopability; help control freezing point and maintain a smooth, soft-serve like consistency.
- 1 1/2 teaspoons vanilla extract Introduce aromatic complexity and enhance the perception of sweetness while rounding out dairy flavors; bind and elevate other flavors without adding extra sweetness.
Instructions
- In a large bowl, combine the sugars with the spices. Add the remaining ingredients and mix until smooth. Cover and refrigerate the mixture until very cold (several hours, or overnight).: The moment you stir these dry ingredients together you will notice a warm, fragrant cloud of cinnamon and nutmeg that hints at the snickerdoodle heritage. Whisking them before adding liquid ensures even spice distribution so every bite is balanced. The reason this step matters is it prevents clumps of spice or pockets of intensely sweet spots in the finished ice cream. A typical mistake is adding spices directly to cold dairy which can lead to uneven flavor. If you find clumps, press them through a fine mesh sieve before proceeding. As you whisk, listen for the faint rustle of sugar grains, and inhale the cozy, sweet aroma that tells you you are on the right track.
- Pour the cold mixture into an ice cream maker and freeze according to the manufacturer's instructions (usually about 25 to 30 minutes.): As you pour in the heavy whipping cream , half and half cream , and vanilla extract , the mixture will transform from a dusty blend into a glossy, pale custard colored base. Use a whisk or spatula to fold until the surface is uniformly smooth, scraping the bowl so no dry pockets remain. This step matters because an even emulsion promotes a consistent freeze and a creamy mouthfeel. A common error is insufficient mixing which can leave grainy sugar pockets. If the base seems thin, that is okay, chilling will firm it. Notice the subtle sheen and how the aroma deepens as the liquid carries the spices.
- Scoop the frozen ice cream into a freezer-safe container. Freeze.: Chilling the base for several hours or overnight is crucial, you will feel the temperature drop and the mixture will thicken slightly. Cold liquid churns into smoother ice cream because the fat and water droplets are already stabilized and the churning process needs less time to freeze. If you rush this step, the churn may produce icy, coarse texture rather than a creamy one. To avoid contamination, cover the bowl tightly, and place it on a low shelf away from strong smelling foods which could transfer aroma. The silent hum of the fridge is part of the patience; resist the temptation to skip this chilling stage for best results.
- Pour the cold mixture into an ice cream maker and freeze according to the manufacturer's instructions: As you pour the chilled base into the machine, you will see it begin to thicken and cling to the paddle. The sound changes to a gentle churn and the mixture will slowly increase in viscosity, developing that soft serve like ribbon. Following the manufacturer timing ensures the texture sets properly without overworking the mix. Over-churning can incorporate too much air, leading to a fluffy rather than dense scoop, while under-churning leaves it too soft. A useful cue is when the mixture holds peaks or the paddle resistance increases, that indicates near completion. Expect about 25 to 30 minutes depending on your machine, and keep a watchful ear and eye for the change in consistency.
- Scoop the frozen ice cream into a freezer-safe container: Transfer the churned ice cream into a container that seals well to prevent freezer burn. As you spoon it in, you will notice the ice cream becoming firmer as it acclimates to the freezer temperature; press a piece of parchment or plastic wrap directly on the surface to minimize ice crystals. This step matters because the way you store it affects texture and longevity. A common issue is leaving air space on top which accelerates freezer drying. Label the container with the date, and position it where it will not be jostled to preserve smoothness. When scooping later, let it sit at room temperature for a few minutes so the ice cream softens for perfect scoops.
Notes
- Chill the base thoroughly, chilling for several hours or overnight allows the flavors to meld and the mixture to reach the right temperature for efficient churning, which produces a smoother, creamier texture.
- Measure sugars accurately, levelling your cups prevents overly sweet or grainy results and ensures the balance between sweetness and spice remains just right for that snickerdoodle character.
- Use fresh ground spices, freshly ground cinnamon and nutmeg will give a brighter, more aromatic profile than older pre ground spices, enhancing the overall nose and taste.
- Follow your ice cream maker's timing, each machine performs differently, so using the suggested churn times avoids under or over churning which impacts texture and density.
- Press wrap on the surface before freezing, covering the ice cream directly minimizes ice crystals and preserves the silky texture achieved during churning, especially during longer storage.