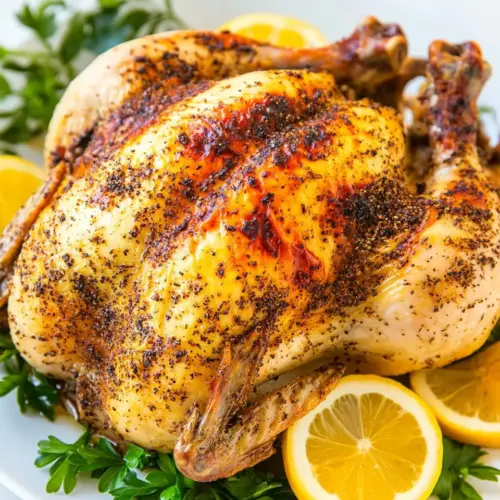
Slow Cooker Whole Chicken
Slow Cooker Whole Chicken delivers tender, juicy meat with a simple herb and spice rub, perfect for an easy weeknight dinner or relaxed Sunday meal. The slow cooking builds deep savory notes while keeping the bird moist, and a quick broil crisps the skin for texture. This recipe is comforting, effortless, and versatile, making it a practical choice when you want a satisfying family meal without fuss.
Equipment
- Slow Cooker
Ingredients
- 4 -5 pound whole chicken giblets removed Place a whole chicken as the centerpiece of the recipe, providing the primary protein and structure for slow cooking; its bones and skin yield flavorful juices and tender meat over long, gentle heat. Keep giblets removed to avoid off-flavors and ensure even cooking throughout the cavity.
- 1 tablespoon olive oil Coat the chicken skin lightly to help seasonings adhere and promote browning while keeping meat moist during slow cooking. Olive oil also adds subtle fruitiness and healthy fats that enhance mouthfeel in the finished dish.
- 1 teaspoon paprika Add a warm, smoky-sweet color and mild heat to the chicken surface to deepen overall flavor as it simmers. Paprika helps create visual appeal and a gentle aromatic layer that complements the other spices.
- 1 teaspoon garlic powder Provide concentrated savory garlic aroma and umami that penetrates the meat during the long cook, boosting overall depth. Garlic powder disperses evenly for consistent seasoning and melds into the cooking juices.
- 1 teaspoon onion powder Introduce sweet, savory onion notes that complement garlic and build complexity in the slow-cooked juices. Onion powder integrates smoothly into rubs and marinades, enhancing the backbone of the seasoning mix.
- 1/2 teaspoon dried thyme Contribute an earthy, slightly floral backbone that pairs well with poultry and other Mediterranean herbs. Dried thyme releases its flavor gradually in low-and-slow cooking, supporting long braising times without becoming bitter.
- 1/2 teaspoon dried rosemary Offer piney, resinous hints that bring a rustic, aromatic quality to the chicken when used sparingly. Dried rosemary withstands slow heat and infuses the meat with savory depth without overwhelming delicate flavors.
- 1/2 teaspoon dried basil Bring sweet, slightly peppery herbal notes that soften richer flavors and add brightness to the overall herb mix. Dried basil melds with thyme and rosemary to round out the herbaceous profile of the dish.
- salt and pepper Season to taste with salt and pepper to enhance natural chicken flavors and balance the herb and spice blend. Salt helps proteins retain moisture and flavors, while pepper adds a mild heat and aromatic lift.
Instructions
- In a small bowl, combine the dry rub ingredients: paprika, garlic powder, onion powder, thyme, rosemary, and basil.: The aroma of these dried spices mingling is the first sensory cue that the meal will be layered in flavor, with herbaceous notes from the thyme and rosemary and savory warmth from the garlic powder and onion powder . As you whisk or stir the mix, notice how the paprika colors the blend, offering visual confirmation the rub will tint the chicken nicely when applied. This step matters because a uniform rub ensures every bite has balanced seasoning, avoiding spots that taste flat. A common mistake is mixing directly on a damp surface or adding salt too early if you plan to brine separately; keep the bowl dry and measured. If your spices have been open a long time they may smell weak, so fresh spices yield the best fragrance and taste. Take a moment to breathe in the mixture, and adjust small amounts only if one note feels missing, being careful not to overdo any single spice.
- Place trivet in the slow cooker, and then place the chicken in the slow cooker over the trivet. Drizzle with olive oil then apply the dry rub all over the chicken. Truss the chicken legs with kitchen twine and place the chicken breast side up.: When you set the chicken on a trivet, you allow air and heat to circulate, which promotes even cooking and prevents the bottom from stewing in rendered juices. As you drizzle the olive oil , the skin will glisten, giving you a tactile confirmation that the surface is ready to accept the rub; running your fingertips lightly over the skin should leave a thin, even coating. Applying the spice mix by massaging it into the skin and cavity ensures the flavors penetrate and season the meat, not just the surface. Trussing the legs produces a compact shape that cooks consistently, and positioning the bird breast side up protects the breast meat from drying while the darker meat cooks. Listen for the quiet settling of the chicken as it nestles on the trivet, and watch for even contact points so nothing hangs over the edge. One common error is over tightening the twine which can compress the bird and impede hot air circulation; tie snugly yet comfortably. If the bird seems unevenly shaped, tuck any loose wings so they do not char when finishing under the broiler. This step pays off with balanced doneness and a pleasant presentation.
- Cover and cook for 4 hours on high or 6 hours on low. The chicken is ready when the internal temperature reaches 165°F (74°C) when checked using an instant read thermometer.: As the cooker hums, the aroma of herbs and roasted meat will build slowly, filling the kitchen with a mellow, roasted perfume. The low, steady heat breaks down connective tissue and keeps the meat moist, producing a tender texture that practically yields to a fork. Using an instant read thermometer gives you a reliable visual and numeric confirmation: the probe entering the thickest part of the thigh should read 165°F or 74°C . That temperature ensures safe cooking while maintaining juicy meat. Avoid relying on time alone because slow cooker temperatures and bird size vary; the thermometer is the trusted indicator. A frequent mistake is checking too early, which releases heat and may add cooking time; instead check near the end of the suggested window. If the temperature is shy of the target by a few degrees, continue cooking and recheck after 10 to 15 minutes. On opening the lid expect a momentary rush of steam and a deeper scent, which signals the Maillard reactions and herb infusions have been working. This step ensures the interior is safe and succulent.
- If you wish to crisp up the skin after slow cooking, place on a baking sheet and drizzle with olive oil and place under the broiler for 5-10 minutes or until the skin is crispy.: The broiler transforms the soft skin into a crisp, golden finish, offering a delightful contrast to the tender meat beneath. As you transfer the bird, notice the release of savory juices and the sheen of rendered fat; a light drizzle of olive oil helps promote even browning. Under the broiler, the surface will begin to blister and sizzle, sending up an irresistible roasted aroma and turning an ember brown color where the spices deepen. Watch closely and stay near the oven because broilers work fast and can shift from perfect to overdone in moments. One common misstep is leaving the bird unattended under the broiler which risks burning; check every 2 minutes, rotating the pan if your broiler has hot spots. When the skin reaches a crispness that yields a pleasant crackle when prodded, remove it and rest for a few minutes so juices redistribute. This final step elevates texture, making each bite satisfy both in flavor and mouthfeel.
Notes
- Herb forward rub: Increase the dried herb quantities slightly, focusing on extra thyme and rosemary, to push an aromatic profile that pairs well with roasted vegetables.
- Spiced up: Add a pinch of warm spices such as a small amount of smoked paprika to deepen color and add a subtle smokiness without changing the cooking method.
- Broil finish: For extra crispness, broil the bird skin for a shorter time at higher rack position, watching carefully to avoid burning and rotating if needed.
- Leftover uses: Shred the remaining meat for sandwiches, tacos, or mixed into salads, making the recipe stretch into multiple meals.
- Gravy add on: Use the pan scrapings and cooking liquid to make a quick gravy thickened with cornstarch slurry, adjusting salt and pepper to taste.