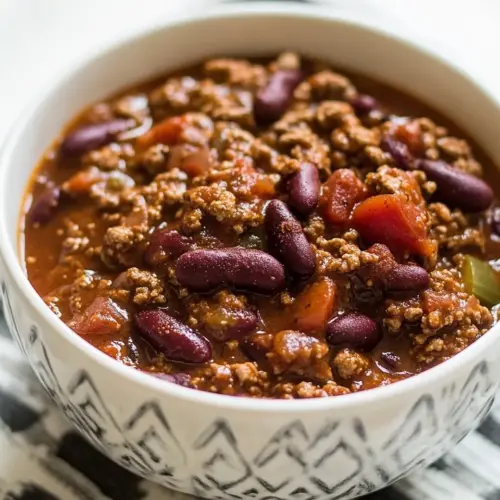
Slow Cooker Chili
Slow Cooker Chili delivers rich, savory comfort with tender beans, browned ground beef, and a mellow spice blend. This easy weeknight dinner simmers into a hearty, crowd pleasing meal that’s perfect for winter evenings. Hearty, warming, and forgiving, it’s a great choice when you want big flavor with minimal hands on time, and it’s easy to scale when feeding a group.
Equipment
- Large Skillet
- Spatula
- 6-qt Slow Cooker
Ingredients
- 2 lb lean Ground Beef, (90/10 or 93/7) Brown and crumble to develop rich savory flavor and provide the meat base for the chili; drain excess fat if desired to keep the dish lean. Season while cooking to build depth and allow the beef to absorb spices evenly. Use a clean sweep of high heat initially to promote browning without stewing.
- 1 large onion, diced Dice finely and sauté until translucent to add natural sweetness and aromatic depth that balances the tomato and spice elements. Cook sufficiently to soften and meld into the chili, releasing moisture and flavor. Add early so onion flavors diffuse through the slow-cooked mixture.
- 3 garlic cloves, minced Mince and add to release pungent, aromatic oils that complement the savory profile of the chili; incorporate after the onion to prevent burning. Use fresh garlic for a brighter, more complex taste that intensifies during slow cooking. Adjust quantity to taste for subtle heat and fragrance.
- 2 tsp cumin powder Measure and sprinkle to lend warm, earthy notes and a subtle smoky nuance that anchor the chili's flavor profile. Add with other dried spices to bloom and infuse evenly throughout long cooking. Adjust slightly depending on preferred cumin prominence.
- 2 tbsp chili powder Spoon in to provide the primary chili flavor and depth, combining heat and smoky sweetness; use the amount to control overall spiciness. Mix well with meat and tomatoes early so the powder rehydrates and flavors distribute evenly. Consider adjusting for milder or hotter preferences.
- 1 tsp garlic powder Dust in as an extra layer of concentrated garlic flavor that supports fresh garlic and enhances umami perception. Use sparingly to avoid overpowering other spices, especially during a long simmer. Add alongside other dried seasonings for consistent seasoning distribution.
- 1 tsp dried oregano Stir in to contribute subtle herbal, slightly peppery notes and Mediterranean aromatics that complement the chili spices. Add during the cooking process so the dried leaves rehydrate and release flavor slowly. Use the measured amount to avoid overpowering with herbal tones.
- 1 1/2 tsp salt, or to taste Measure and add to season the chili and enhance all other flavors; adjust to personal taste as salt levels in canned ingredients vary. Distribute evenly during cooking to ensure consistent seasoning throughout. Taste near the end and correct if necessary.
- 1/2 tsp black pepper Sprinkle to provide background heat and a slight bite that sharpens the overall flavor profile without overwhelming the dish. Add cautiously and taste as the chili simmers, increasing only if more peppery notes are desired. Balances saltiness and acidity from tomatoes.
- 15 oz can black beans, drained and rinsed Drain, rinse, and add to contribute creamy texture, added fiber, and earthy bean flavor while reducing sodium from the canning liquid. Incorporate near the end of cooking to preserve shape and prevent over-softening, or earlier for more melded texture. Beans boost heartiness and protein content.
- 30 oz kidney beans, two 15oz cans, drained and rinsed Drain, rinse, and combine to supply bulk, contrasting texture, and additional protein and fiber; two cans offer a generous bean component for a hearty chili. Add during the simmering phase to allow flavors to meld without turning beans mushy. Rinsing reduces excess sodium and can remove canning liquids.
- 30 oz diced tomatoes, with their juice Pour in with its juice to provide acidic brightness, fresh tomato flavor, and liquid for the chili base that helps meld spices and other ingredients. Use diced tomatoes for texture and bite; the juices balance thickness when combined with tomato sauce. Adjust simmer time to integrate flavors.
- 10 oz diced tomatoes and green chilis, with their juice Add with its juice to impart a mildly spicy, savory tomato component with bits of green chiles that contribute subtle heat and complexity. Combine with other tomato products to layer flavors and add variety in texture. Keep juice to maintain desired chili consistency.
- 30 oz tomato sauce Pour in to create a smooth, concentrated tomato base that thickens the chili and carries seasonings throughout the dish. Use measured amount to achieve desired viscosity and tomato intensity; simmer to blend fully with other ingredients. Tomato sauce provides consistent color and mouthfeel.
Instructions
- Place a large skillet over medium-high heat and sauté beef until it releases fat (4-5 minutes), breaking it up with a spatula.: You will hear a steady, confident sizzle as the Ground Beef hits the hot pan, and the aroma will turn from raw to nutty as browning occurs. As you break the meat into pieces, look for those browned edges and little fond bits clinging to the skillet, these are flavor gold. The visual cue is a mix of browned and slightly pink pieces as moisture renders away, and the smell should shift from metallic to savory and roasted. Why this matters is simple, browning builds umami and depth that a slow cooker alone cannot fully create. A common mistake is crowding the pan which causes steaming, not browning, so work in batches or use a sufficiently large skillet to maintain contact with the heat.
- Add onion to the skillet and sauté until tender (4-5 minutes). Add minced garlic and seasonings: cumin, chili powder, garlic powder, dried oregano, salt and pepper. Cook another 30 seconds stirring constantly. Transfer to a 6 Qt slow cooker.: cumin, chili powder, garlic powder, dried oregano, salt and pepper. Cook another 30 seconds stirring constantly. Transfer to a 6 Qt slow cooker : As you add the onion , listen for the sputter settling into a gentle bubble, and watch the edges turn translucent and show a hint of gold, which signals they are tender and sweet. When you fold in the minced garlic and dried spices, inhale the immediate lift as aromatic oils release, perfume the pan, and begin to coat the meat and onions. That 30 seconds of constant stirring is about blooming the spices so they become fragrant rather than raw; burnt spices will taste bitter, so keep them moving. Transferring this mixture to the slow cooker is transferring all those concentrated flavors, which is why I do the browning first rather than skipping straight to raw assembly. Avoid letting the garlic sit too long on high heat, which can scorch it and introduce bitterness.
- Add remaining ingredients into the slow cooker: rinsed and drained beans, diced tomatoes with their juice, diced tomatoes and green chilis with juice and tomato sauce. Stir to combine and cook on high for 3-4 hours or on low for 6-8 hours. Season to taste if desired and serve warm.: rinsed and drained beans, diced tomatoes with their juice, diced tomatoes and green chilis with juice and tomato sauce : When you add the canned black beans and kidney beans , notice their matte, dense texture before they soften further in the slow cooker. The bright, wet consistency of the diced tomatoes and the silky sheen of the tomato sauce will marry together into a unified liquid that carries the spices. Stir gently so everything combines and the spices distribute evenly, taking care not to smash the beans. This step shapes the structural body of the chili, since the liquids determine final thickness and the beans contribute toothiness. A frequent error is over stirring canned tomatoes so they disintegrate too early; a few gentle folds preserve pleasant tomato chunks.
- Stir to combine and cook on high for 3-4 hours or on low for 6-8 hours: As the chili simmers, you will notice layers of scent evolving from the initial spice bloom to a deep, rounded aroma where tomato, meat, and beans sing together. On high setting the surface will bubble gently and steam will carry most of the scent away; on low the kitchen fills slowly with a mellow, richer perfume. The long, low heat allows connective flavors to meld and the beans to soften without falling apart. This slow integration is why the dish tastes deeper than when all ingredients are cooked quickly. A common mistake is lifting the lid too often to check, which lets heat escape and lengthens the cook time, so trust the timer and peek only when necessary.
- Stir and season to taste if desired and serve warm: At the finish, the chili should look cohesive with a glossy sauce and tender, intact beans. When you stir, listen for a thicker, more viscous sound compared to early simmering, and observe how the sauce clings to the spoon. Taste for final seasoning, adjusting salt or pepper sparingly, since canned components add sodium already. Serving warm helps the aromas bloom and the texture settle, creating a comforting mouthfeel. One mistake to watch for is adding salt all at once without tasting, which can push the flavor out of balance; instead, add in small increments and taste after each adjustment.
Notes
- Brown the beef well: Achieve deep flavor by letting the meat develop brown edges rather than crowding the pan. If the skillet is overcrowded, the beef will steam and not produce the fond that enriches the chili.
- Bloom your spices: Toast cumin and chili powder briefly with the onion and garlic to release their essential oils, which makes the overall flavor more vibrant and layered.
- Control salt late: Add most salt toward the end of cooking because canned ingredients can contain variable sodium, and slow cooking concentrates flavors over time.
- Keep beans intact: Stir gently after adding canned beans to preserve their texture; over stirring can turn them mushy and change the mouthfeel of the chili.
- Make ahead friendly: Chili often tastes better the next day after flavors have had time to settle, so consider making it a day ahead for deeper complexity.