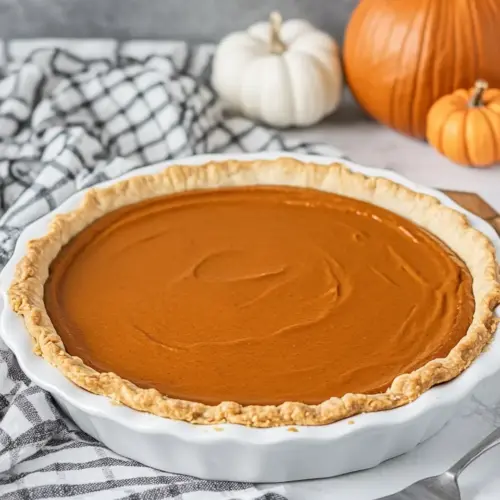
Sheet Pan Pumpkin Pie
Sheet Pan Pumpkin Pie is a creamy, crowd pleasing fall dessert that uses simple pantry ingredients for a quick and impressive result. With a flaky refrigerated crust and a silky pumpkin filling spiced with cinnamon and pumpkin pie spice, this easy recipe is perfect for holiday gatherings and potlucks. Make it for an effortless, nostalgic treat everyone will reach for.
Equipment
- Jelly Roll Pan
- Rolling Pin
- Nonstick spray
- Whisk
- Can opener
- Measuring Cups and Spoons
Ingredients
- 3 rolled refrigerated pie crusts (14-15 ounces each) Rolled and chilled for easy handling, provides the buttery, flaky base and edges for each mini pie. Keeps consistent thickness across sheet pan portions and browns nicely under high heat, creating structure to hold the pumpkin filling.
- 2 cans 100% pure pumpkin puree (15 ounces each) Chilled and smooth canned pumpkin contributes the signature pumpkin flavor and dense, moist texture to the filling. Blends easily with eggs and spices to create a stable custard that sets when baked on the sheet pan.
- 4 large eggs Beaten to incorporate air and bind the filling, adds richness and helps the custard set evenly without cracking. Eggs also contribute color and a silkier mouthfeel to the finished pumpkin pies.
- 2 cans sweetened and condensed milk (14 ounces each) Thick and sweet condensed milk supplies sweetness, creaminess, and body to the filling while eliminating the need for additional sugar. Combines with pumpkin and eggs to create a custardy, caramel-tinted interior that bakes to a smooth finish.
- 2 teaspoons ground cinnamon Warm and aromatic ground cinnamon adds a familiar, sweet-spicy note that enhances the pumpkin's natural earthiness. Used in small measure to layer flavor without overpowering the overall spice blend.
- 3 teaspoons pumpkin pie spice Pre-blended autumn spice mix brings complex flavors like cinnamon, ginger, nutmeg, and cloves to create the classic pumpkin pie profile. Measured in teaspoons to evenly season the filling and ensure consistent flavor across the sheet pan pies.
Instructions
- Preheat the oven to 400 degrees Fahrenheit. Spray a 15 x 10 x 1-inch jelly roll pan with cooking spray and set aside.: The kitchen fills with a dry warmth as the oven ramps up, and you may notice a faint metallic hum if it is an electric oven, or a whoosh if gas. A fully preheated oven ensures the crust begins to set immediately, yielding a flakier bottom and crisp edges. This higher starting temperature helps the crust brown nicely while the filling bakes without overcooking the edges. A frequent mistake is not allowing the oven to fully preheat, which can lead to uneven browning and a longer bake time than expected. Use an oven thermometer for accuracy and resist the temptation to slide the pie in early.
- Lightly flour a work surface. Unroll the pie crusts on top of each other on the prepared work surface. Roll crusts into a 20×14-inch rectangle.: The spray creates a thin, invisible barrier so the crust releases cleanly after baking. When I coat the pan I wipe excess with a paper towel to avoid pooled oil, which can fry the bottom of the crust. Pressing the crust later will be much easier when the pan surface is evenly greased. One common oversight is using too much spray, which leads to greasy edges; apply a light, even coating only.
- Place the crust on the prepared pan. Firmly press the crust into the pan. Focus on the bottom, corners, and sides to prevent bubbling. Crimp or flute the edges. Set aside.: The dry dusting of flour prevents the chilled crusts from sticking while you roll them out. You will feel the dough slide rather than tear when the surface is prepared correctly. Too much flour can dry the pastry, so I shake off excess before rolling. A mistake I see is using a wet surface or none at all, which causes the crust to stick and tear when stretching to size.
- Whisk the pumpkin puree, eggs, sweetened and condensed milk, cinnamon, and pumpkin pie spice together in a large bowl until smooth. Make sure the eggs are well mixed in so the pie bakes evenly.: Layering the three crusts helps you build a single, continuous sheet easily. You will notice the texture change as you smooth them together; the seams will press down and blend. Take care to align edges so the final rectangle is even. Forgetting to overlap evenly can create weak spots that tear when transferring to the pan, so check alignment before continuing.
- Pour the filling into the crust. Bake for 30 minutes in preheated oven at 400 degrees Fahrenheit. The center of the pie may still be slightly jiggly, but that’s ok.: As you roll, the crust becomes thinner and more pliable, and you will hear a soft creaking as the dough stretches. Roll in one direction to keep thickness consistent, and turn the dough periodically to maintain shape. The goal is a large, uniform rectangle that will cover the pan without folds. A common error is over rolling, which makes the crust too thin and prone to holes; stop when it reaches the target dimensions.
- Cool the pie completely before slicing and serving with whipped topping.: The transfer is a tactile moment, feeling the dough settle into the pan. Lay it gently and use your fingers to nudge it into the corners so there are no air pockets. The crust should sit flat with even contact across the bottom to prevent bubbling during baking. If you discover air bubbles after placing it, dock lightly with a fork. One mistake is pushing too hard and tearing the dough, so use steady, gentle pressure.
- Firmly press the crust into the pan: Pressing ensures the crust adheres to the pan and forms a defined edge. You will feel the dough compress at the corners and sides, which later supports the filling. Focus on sealing the bottom, corners, and sides to prevent bubbling and leaking. If the dough resists, let it rest for a few minutes to relax gluten. Pressing unevenly can create thin spots that brown too quickly, so check for consistency.
- Focus on the bottom, corners, and sides to prevent bubbling: When the base is well seated, you will notice fewer large air pockets when the filling is added. Use a gentle thumbs down motion to compact the dough along edges. This firm anchoring keeps the filling from seeping under the crust and producing steam pockets. A typical mistake is ignoring the corners, which can lift and cause filling to seep under the crust during baking.
- Crimp or flute the edges: Crimping gives the pie a finished look and strengthens the rim so it holds the filling. The texture of the crimp should be uniform, and you will see a slightly thicker edge that browns attractively. If you prefer a simpler finish, pressing with the tines of a fork works well too. Overly tight crimps can shrink as the crust bakes, so aim for a balanced, even pattern.
- Set aside: Allowing the crust to rest briefly stabilizes it before the filling arrives. This pause prevents the dough from shrinking as it warms and gives you a moment to prepare the filling without rushing. Leaving it too long at room temperature can make the dough soft and sticky, so keep this rest short if your kitchen is warm.
- Whisk the pumpkin puree, eggs, sweetened and condensed milk, cinnamon, and pumpkin pie spice together in a large bowl until smooth: As you whisk, the mixture will transform from thick and lumpy to glossy and velvety, and you may smell the spices blooming. The eggs emulsify the liquid ingredients, giving structure and silkiness to the custard. Mixing thoroughly ensures the filling bakes evenly without streaks of unmixed egg. A common error is under whisking, which can leave lumps or uneven cooking, so whisk until entirely smooth and homogenous.
- Make sure the eggs are well mixed in so the pie bakes evenly: Properly incorporated eggs create a uniform set, and you will see the color and texture even out as you beat. This step reduces the chance of curdled pockets or a patchy bake. If the eggs are cold, they can clump, so bring ingredients closer to room temperature for smoother blending. Rushing this step often leads to inconsistent texture and a less pleasant mouthfeel.
- Pour the filling into the crust: The filling will flow thickly and settle into the pan, and you should see the surface smooth out as it levels. Pour steadily to avoid splashing the edges, and use a spatula to coax any remaining bits from the bowl. The contrast between the pale crust and the warm orange filling is satisfying and reassuring. Overfilling can cause spillover, so leave a small margin below the rim.
- Bake for 30 minutes in preheated oven at 400 degrees Fahrenheit: During baking the aroma of pumpkin and cinnamon will intensify and the filling edges will begin to set first, showing a slight rise and a gentle jiggle in the center. The crust will turn a warm golden tone while the filling firms. Baking at this temperature gives structure quickly while preventing the crust from overbrowning. A common problem is opening the oven too often, which causes temperature swings; try to check only near the end of the time.
- The center of the pie may still be slightly jiggly, but that’s ok: That gentle movement means the custard is not overbaked, and it will continue to set as it cools. Expect residual warmth to finish the cooking process, and resist the urge to return it to the oven unless it is visibly liquid. Over baking will yield a dry, rubbery texture, so err on the side of slight jiggle for a tender slice.
- Cool the pie completely before slicing and serving with whipped topping: Cooling allows the custard to firm and the flavors to settle, and you will notice the aroma mellow into a comforting depth. When fully cool, slicing yields clean edges and consistent portioning. If you slice too soon the filling can smear and collapse. A tip is to chill briefly if you need neat slices sooner, but full cooling at room temperature gives the best texture.
Notes
- Make it spicier by adding a pinch more pumpkin pie spice if you prefer a bolder profile, but add gradually so it does not overpower the natural pumpkin flavor.
- Crust finish try brushing the edges lightly with a thin wash of milk before baking for a slightly glossier, more golden rim that looks polished on the table.
- Slice presentation use a sharp, warm knife for cleaner cuts; run the blade under hot water and dry between slices to keep edges neat.
- Pack for serving if you are transporting slices, place parchment between layers to prevent sticking and keep slices stable during travel.
- Freezing method freeze individual slices flat on a tray, then wrap to maintain shape and prevent freezer burn, thawing overnight in the fridge before serving.