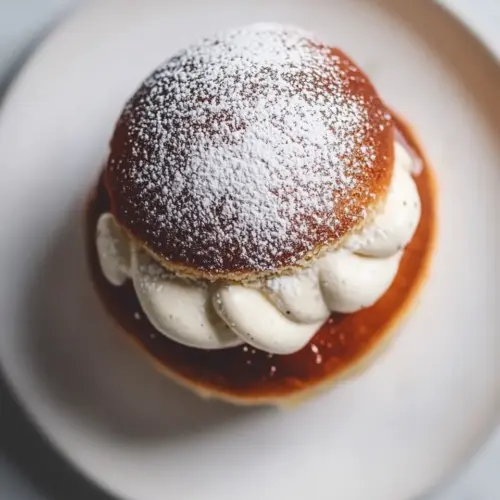
Semlor
Semlor are pillowy cardamom buns filled with a creamy almond paste and whipped cream, offering a soft, fragrant, and slightly crunchy bite. This classic winter treat is creamy, aromatic, and perfect for a relaxed brunch or festive gathering, making it an easy weeknight indulgence or a special host favorite. Try them for a cozy reason to slow down and savor a moment.
Equipment
- Stand mixer
- Paddle attachment
- Dough Hook
- Baking Sheets
- Parchment Paper
- Food Processor
- Wire Rack
- Pastry bag and tip
- Serrated Knife
Ingredients
- 1/2 cup (120 grams) warm whole milk (110°F/41°C to 115°F/43°C) Warm and milky, provides the lukewarm liquid needed to activate yeast and hydrate the dough; maintain temperature between 110°F and 115°F to avoid killing the yeast while ensuring proper fermentation. Adds tenderness and flavor to the enriched semla dough, contributing to a soft crumb when baked.
- 1 tablespoon (9 grams) active dry yeast Active and granular, serves as the primary leavening agent to create lift and airy structure in the enriched dough; dissolve in warm milk for optimal activation. Ensures proper rise and lightness characteristic of traditional semlor when combined with sugar and time.
- 1/4 cup plus 2 tablespoons (74 grams) granulated sugar Sweet and crystalline, supplies sweetness to the dough and feeds the yeast for fermentation; measure accurately to balance sweetness and yeast activity. Contributes to browning during baking and helps create a soft, slightly sweet bun interior.
- 1 large egg (50 grams), room temperature Large and room-temperature, acts as an enriching binder that adds moisture, structure, and tenderness to the dough; bring to room temperature to blend smoothly with other ingredients. Enhances browning and contributes to a richer, more cohesive texture.
- 1 tablespoon (6 grams) freshly ground cardamom seeds Aromatic and freshly ground, imparts warm, floral spice characteristic of Scandinavian semlor; grind seeds fresh for optimal potency and fragrance. Enhances overall flavor, balancing sweetness and providing the traditional cardamom note.
- 2 cups (333 grams) all-purpose flour, plus more for dusting Starchy and versatile, forms the bulk of the dough and provides gluten for structure and chew when mixed and kneaded; keep extra for dusting to prevent sticking. Determines the dough’s texture and crumb, affecting how well it traps gas during proofing.
- 1 1/2 teaspoons (7.5 grams) baking powder Light and chemical, provides an additional lift and slight tenderness when combined with yeast for the enriched dough; measure precisely to avoid over-leavening. Helps create a finer crumb and supports consistent rise during baking.
- 1/2 teaspoon (1.5 grams) fine sea salt Fine and salty, enhances overall flavor and strengthens gluten structure slightly when dissolved into the dough; use measured amounts to avoid over-salting. Balances sweetness and brings out other flavors like butter and cardamom.
- 1 cup plus 2 tablespoons (104 grams) salted butter, cubed and softened Rich and softened, contributes fat for tenderness, flavor, and richness in the enriched dough; cube to reach room temperature for even incorporation. Produces a soft, tender crumb and enhances mouthfeel of the finished buns.
- 3/4 cup (106 grams) whole almonds Crunchy and nutty, used to create the almond-based filling when ground or chopped; toast lightly for added depth of flavor before processing. Adds texture and a classic almond flavor essential to semla marzipan-like filling.
- 1/2 cup (100 grams) granulated sugar Sweet and granular, used specifically in the almond filling to sweeten and bind ground almonds into a paste; combine with milk and salt for smooth consistency. Helps create a balanced, paste-like filling that complements the cardamom-scented buns.
- 1 cup plus 1 tablespoon (95 grams) whole milk Milky and neutral, used to moisten and bind the ground almond and sugar into a smooth filling; warm slightly for easier incorporation. Adjusts filling consistency and adds a touch of dairy richness to the almond mixture.
- 1/2 teaspoon fine sea salt Fine and savory, balances sweetness in the almond filling and rounds out flavors; add sparingly to avoid overt salinity. Enhances depth and brings contrast to the sweet nut paste, making flavors more pronounced.
- 1/2 teaspoon freshly ground cardamom seeds Fragrant and mild, provides an extra hint of cardamom to the almond filling for continuity of flavor with the buns; grind fresh for best aroma. Reinforces the characteristic spice profile and ties the filling to the dough.
- 1 1/2 cups (360 grams) cold heavy whipping cream Cold and aerated, whips into stiff peaks to create the light, creamy filling and topping for the buns; keep cold for stability and volume. Adds a luscious, airy texture that pairs with the almond paste and soft bun.
- Confectioners’ sugar, for dusting Powdery and sweet, used to dust the finished semlor for an attractive presentation and a touch of extra sweetness; sift lightly before serving. Provides a classic, delicate finish and enhances visual appeal.
Instructions
- In the bowl of a stand mixer, stir together warm milk and yeast by hand; let stand until foamy, about 5 minutes. Add granulated sugar, egg, and cardamom; using the paddle attachment, beat at low speed until combined.: You will notice the surface of the milk shimmer as the yeast dissolves and then form small bubbles that show the yeast is active. That brief foaming gives me confidence the rise will be strong, and the aroma is slightly sweet and yeasty which is always reassuring. After the foam appears, folding in the sugar , room temperature egg , and fresh cardamom releases a warm, spicy perfume. The paddle at low speed brings everything together without overspreading flour, creating a cohesive wet base. A common misstep here is using water that is too hot, which kills the yeast , so check temperature carefully. If it smells sharply alcoholic or fails to foam, discard and start with fresh yeast .
- In a medium bowl, whisk together flour, baking powder, and salt. Add 1 cup (125 grams) flour mixture to yeast mixture; beat on low speed until combined, stopping to scrape bottom and sides of bowl. Gradually add remaining flour mixture to yeast mixture, beating on low until a shaggy dough forms. With mixer on medium-low speed, add butter, one cube at a time, beating until fully incorporated after each addition. Scrape down paddle and bottom and sides of bowl.: As you whisk the dry ingredients, their neutral aroma will be punctuated by the sharpness of the baking powder and the saline bite of the salt . Adding the first portion of the dry mix converts the liquid into a tacky, shaggy dough that pulls away slightly from the bowl. Gradually adding the rest keeps gluten development controlled, producing an elastic but tender dough. When you incorporate the butter cube by cube, you will see small ribbons of fat vanish into the dough, creating a glossy mouthfeel and richer flavor. If you dump all the butter at once, it can clump and leave greasy pockets, so patience here pays off. Scrape the bowl frequently to ensure even hydration and prevent dry pockets that would yield uneven crumb.
- Switch to the dough hook attachment. Beat at low speed until a smooth, soft, slightly tacky dough forms, about 20 minutes, stopping to scrape bottom and sides of bowl and dough hook. Cover and let stand for 10 minutes.: As the dough hook works, the dough will transform from a ragged mass into a cohesive, slightly tacky ball with a satin sheen. You will hear a soft thrum as gluten forms, and the dough will begin to climb the hook slightly before settling back. This long gentle mixing develops structure without making the final crumb tough, and the resting period that follows lets the gluten relax so you can shape easily. A typical slip-up is under-mixing; the result is dense buns. Over-mixing at high speed can heat the dough and make the texture tight, so keep the speed low and trust the clock.
- Line baking sheets with parchment paper.: Lining pans creates a nonstick, even baking surface and keeps the bottoms from browning too quickly. The muted smell of warm paper is faint but practical, and it makes transferring baked buns painless. Skipping parchment can lead to buns sticking or bottoms burning, so take this simple step to avoid frustration and uneven baking.
- Turn out dough onto a lightly floured surface; divide dough into 9 portions (about 75 grams each). Using floured hands, cup your hand around each dough portion on surface, and shape in a circular motion until a smooth, shiny ball forms. Place about 3 inches apart on prepared pans. Loosely cover and let rise in a warm, draft-free place (75°F/24°C) until doubled in size, 2 to 2 1/2 hours.: As you work with the dough, the feel should be supple and slightly tacky, and as you roll each piece the surface becomes taut and glossy. The action tightens the gluten and creates a beautiful domed top that browns evenly. Spacing them allows air to circulate and helps the buns expand without touching. The long rise at a gentle, consistent warmth is important for flavor complexity and a light crumb. Avoid placing them in a cold or drafty spot, which slows fermentation, or in a place that is too hot, which can cause overly quick rise and poor texture.
- Preheat oven to 400°F (200°C).: Preheating ensures the oven environment is ready to give the buns a quick initial lift and set the crust. You should feel the humid heat at the oven door and smell the residual warmth of metal as it reaches temperature. If you slide raw buns into an oven that is not hot enough, they will spread rather than rise, creating a denser end product, so give the oven the time it needs to reach temperature.
- On a small rimmed baking sheet, spread almonds in single layer.: Toasting the whole almonds in a single layer ensures even browning and consistent aroma. The surface of the nuts will turn from pale to warm gold and release a toasty, nutty scent that signals readiness. Crowding the sheet traps steam and prevents proper toasting, so use a rimmed pan to keep them separated and allow air circulation.
- Bake until lightly browned and fragrant, 8 to 10 minutes. Let cool completely. Increase oven temperature to 450°F (225°C).: As the almonds bake you will notice a fragrant, toasty perfume and a subtle deepening of color. Cooling them prevents overcooking when you process them later and preserves crunchy texture. Raising the oven temperature after toasting primes it for a quick, hot bake of the buns, which encourages even browning and a tender interior. If you allow the almonds to sit in the hot pan, residual heat will carry them from golden to burnt, so transfer them to a cool plate promptly.
- Bake buns until golden brown, 8 to 10 minutes. Remove from pans, and let cool completely on a wire rack.: During this brief bake the domes should puff and the tops develop a warm golden color while the centers set. You may hear a soft crackle as the crust forms. Transferring to a wire rack stops residual heat from steaming the bottoms, preserving tender crumb and crisp tops. A common error is leaving buns on the hot pan, which can lead to soggy bottoms and overbrowning.
- Coarsely chop 2 tablespoons (20 grams) toasted almonds; reserve in a medium bowl. In the work bowl of a food processor, process granulated sugar, milk, salt, cardamom, and remaining whole toasted almonds until almonds are finely chopped. Stir almond mixture into reserved chopped almonds; refrigerate until ready to use.: You will smell the intensified almond aroma as the almonds are processed with cardamom and milk , producing a rich, nutty paste with flecks of texture. The reserved coarsely chopped almonds add a pleasant crunch contrast when folded in. Chilling the mixture helps it firm slightly so it holds shape when filled into the buns. A typical mistake is over-processing the nuts into a paste; keep some texture for interest.
- Using a serrated knife, cut off top of cooled buns; reserve. Using a spoon, hollow out center of buns to create a well; reserve removed bread.: The act of slicing reveals the airy interior and the sound of the serrated blade through the crust is satisfying. Hollowing creates space for the filling without undermining the bun structure; keep a rim to support the piped cream . Save the removed crumbs for mixing into the filling, rather than discarding. Be careful not to scoop too aggressively, which can create thin walls that collapse under the filling.
- In a large bowl, beat cold cream with a mixer at medium-high speed until medium-stiff peaks form. Transfer whipped cream to a pastry bag fitted with a large star piping tip.: Cold cream whips into glossy peaks that hold their shape and provide a light, airy counterpoint to the dense almond mixture. Listen for the gentle change in mixer sound as the cream thickens and smell the clean dairy freshness. Overwhipping can lead to a grainy texture and eventual separation, so stop at medium-stiff peaks when the tips gently hold their form. Chilled utensils make this step much easier.
- Crumble reserved bread, and stir into filling; spoon filling into well of buns. Pipe whipped cream onto buns; add top of buns. Dust with confectioners’ sugar.: The crumbled interior folded into the almond mixture creates a spreadable filling that has body and a satisfyingly nutty aroma. Spoon it into each hollowed bun until you reach a balanced mound, then pipe the light cream so it peaks beautifully against the bun top. Adding the reserved top like a little hat finishes the silhouette, and a dusting of confectioners’ sugar gives a festive, snowy finish. Avoid overfilling which will cause the buns to be messy to eat; aim for a harmonious proportion.
- Serve immediately.: The final pleasure is immediate, as the textures and aromas are at their peak right after assembly. You will notice the gentle crunch of toasted almonds , the softness of the bun, and airy cream in each bite. If you wait too long, the whipped cream can soften and the bun may absorb moisture from the filling, so serve shortly after assembly for the best experience.
Notes
- Scale your timing: If you need to split the work, make the dough the day before and refrigerate it overnight, then shape and proof the next day, which can deepen flavor and make scheduling easier.
- Grind cardamom fresh: Grinding whole pods just before use keeps the bright, floral notes vibrant and makes the spice more pronounced in both dough and filling.
- Control sweetness: Taste the almond filling before adding all of it to the buns and adjust sweetness with a touch more granulated sugar if needed, but remember the dusting of confectioners’ sugar adds more sweet finish.
- Work cold for cream: Ensure your cream and equipment are cold to speed whipping and prevent overworking, which preserves a glossy smooth texture in your piped peaks.
- Texture variation: Reserve a portion of chopped toasted almonds to fold into the filling for a pleasing contrast against the smooth cream.