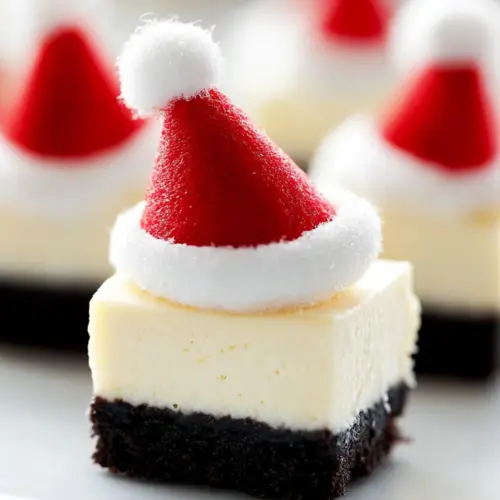
Santa Hat Cheesecake Bites
Santa Hat Cheesecake Bites are creamy, festive little treats with a crunchy Oreo crust, silky white chocolate cheesecake filling, and bright fresh strawberries on top. These easy to serve bites bring a sweet balance of textures and holiday charm, making them ideal for parties and gatherings. Try them for your next celebration for a crowd pleasing dessert that looks impressive with minimal fuss.
Equipment
- 8 by 8 inch baking dish
- Aluminum Foil
- Mixing Bowls
- electric hand mixer
- Food processor or rolling pin
- Measuring Cups and Spoons
- Microwave-safe Bowl
Ingredients
- 18 Oreos, finely crushed to about 1 3/4 cups Finely crushed to about 1 3/4 cups and used as the crunchy base for the cheesecake bites, providing texture and chocolate flavor that holds together when mixed with melted butter.
- 2 1/2 tbsp butter, melted and divided Melted and divided to bind the Oreo crumbs for the crust and to lightly brush or moisten components, adding richness and helping the crust set firmly in the pan or molds.
- 2 (8 oz) pkg cream cheese, softened Softened and beaten until smooth to create the creamy cheesecake filling, supplying body, tang, and structure when combined with sugar and eggs for a silky texture.
- 1/4 cup + 2 Tbsp granulated sugar Measured as 1/4 cup plus 2 tablespoons and incorporated to sweeten the cheesecake mixture evenly, balancing the cream cheese tang without overpowering the white chocolate.
- 2 large eggs Beaten into the cream cheese mixture to provide lift and structure, helping the filling set properly while contributing to a tender, cohesive texture.
- 1/2 tsp vanilla extract Added for flavor to enhance the sweetness and round out the filling, giving a subtle warm, floral note that complements the white chocolate and strawberries.
- 1 1/3 cups white chocolate chips Melted together with a portion of the heavy cream to create a smooth white chocolate ganache that enriches the filling and helps stabilize the cheesecake bites.
- 1/2 cup + 1/3 cup heavy cream, divided Divided into 1/2 cup and 1/3 cup and used partly to make the white chocolate ganache and partly to adjust the filling consistency, adding creaminess and smooth mouthfeel.
- 25 (fairly small) fresh strawberries Selected fairly small and topped on each cheesecake bite after trimming to resemble Santa hats, providing fresh acidity, color contrast, and a juicy finish.
- 2 tbsp powdered sugar Sifted or dusted lightly over the trimmed strawberries or finished bites to add a touch of sweetness and a snowy decorative effect that complements the Santa hat theme.
Instructions
- Preheat oven to 325 degrees. Line an 8 by 8-inch baking dish with two large sheets of tinfoil (one going horizontally and one over the top of the other vertically).: The kitchen should smell faintly of warm oven when it's ready, and a consistent oven temperature ensures even baking. Preheating prevents the cheesecake from baking unevenly, which can cause cracking or undercooked centers. A common mistake is placing the pan into an oven that is still heating, which alters rise and texture. If your oven runs hot or cold, use an oven thermometer to verify the 325 degrees reading before sliding the pan in.
- Make sure your sheets are long enough that you'll have an overhang of foil over the edges of the pan. Also, be sure to mold it well to the pan). Brush foil with 1/2 tbsp melted butter.: Properly lining the dish creates an overhang that makes lifting the chilled cheesecake effortless. The foil should feel snug against the pan and smooth so the crust presses evenly with no gaps. If the foil wrinkles excessively, it can create thin spots in the crust that tear during removal. Take a moment to press the foil into corners to avoid folds that trap batter.
- In a mixing bowl, using a fork blend together crushed Oreos and 2 Tbsp melted butter until mixture is well combined and evenly moistened.: Brushing the foil with a small amount of butter prevents sticking and imparts a subtle richness to the underside of the crust. You should feel the slight slick of fat as you brush, and the foil will gleam where the butter adheres. If you skip this step, you might struggle to release the cheesecake cleanly from the pan later. Use a pastry brush or clean finger to spread the butter evenly so no dry patches remain.
- Press mixture firmly into the bottom of the prepared baking dish (the bottom of a flat measuring cup or glass works well for pressing crust), set aside.: The mixture should look uniformly dark and slightly glossy, coating together like damp sand. The aroma of Oreos and warm butter will be comforting and chocolate forward. The reason for even moisture is to ensure the crust binds when pressed, preventing it from falling apart when cut. If the crumbs are still powdery, add a touch more melted butter , a quarter teaspoon at a time, until they hold together when pinched.
- In a large mixing bowl, using an electric hand mixer set on medium-low speed, blend together cream cheese and granulated sugar until mixture is smooth, about 30 seconds.: Press until the crust is compact and even, and you will hear a faint scraping sound as the cup compresses the crumbs. A firmly packed crust holds its shape and offers a satisfying contrast to the creamy filling. If you press too lightly, the crust will crumble; if you press too hard, it becomes overly dense. Aim for firm but slightly springy when tapped with your fingertip.
- Add in eggs and vanilla extract and mix until well blended. In a separate microwave safe bowl, heat white chocolate chips with 1/3 cup heavy cream on 50% power in 30 second intervals, stirring after each interval until melted and smooth.: As you mix, the texture will transition from lumpy to velvety and glossy, and you will see the batter lighten slightly. This initial blending dissolves the granulated sugar into the cream cheese , avoiding gritty bits in the finished cheesecake. Overbeating can whip in too much air, which increases the chance of cracks. Keep your speed moderate and stop as the mixture looks homogenous.
- Pour melted white chocolate mixture into cream cheese mixture and blend on low speed until combined. Tap bowl against counter top about 30 times to release some of the air bubbles then pour mixture over prepared crust in baking dish.: The filling will smell creamy and sweet once the white chocolate is melted; stirring between intervals ensures even melting and prevents scorching. Temperatures that are too high can make white chocolate seize, turning it grainy. If that happens, gently stir in a touch more warm cream to smooth it. When incorporating eggs, mix until just blended to avoid creating excess bubbles that can lead to uneven texture.
- Bake in preheated oven for 40 minutes then turn oven off and without opening oven door allow cheesecake to rest in warm oven for 15 minutes.: After combining, the batter should be glossy and uniform in color, and tapping helps settle it so air pockets rise and pop, which reduces cracking. The aroma will be sweet and creamy, with white chocolate notes. If you skip the tapping, trapped air can expand and cause fissures during baking. Pour gently to avoid splashing crumbs into the filling and smooth the surface with a spatula for an even top.
- Remove from oven and let rest at room temperature for 30 minutes, then cover with plastic wrap and freeze for 3 hours or refrigerate for 6 hours.: While baking, watch for the edges to set and the center to slightly wobble like a jello jiggle, not liquid. The room will fill with a warm, sweet scent. Allowing it to rest in the warm oven finishes the set gently, which prevents sudden temperature shocks that cause cracks. Opening the door too early releases heat and can make the center sink; be patient and resist peeking.
- Once cheesecake is fully chilled and set, remove from freezer or refrigerator and lift cheesecake out of pan using the foil overhang.: After the oven, the cheesecake should cool gradually; you may notice steam evaporating and the surface losing sheen. Chilling firms the filling so clean squares are possible. Rapid cooling can lead to condensation and a soggy surface, so follow the resting times. If you need it sooner, freeze the pan for firmer cutting, but be aware freezing changes texture slightly.
- Cut cheesecake into squares (I'd recommend cutting them just a bit larger than the width of your strawberries. Also it's nice to keep some clean paper towels close by to clean your knife while cutting squares).: Use the foil overhang to lift confidently, feeling the weight and the firmness of the set cheesecake under your hands. The underside should be even and hold together cleanly. If the cheesecake feels too soft, chill longer before attempting to lift to avoid tearing. Sliding a thin spatula under the foil can help if it seems stuck.
- In a mixing bowl, using an electric hand mixer set on high speed, whip remaining 1/2 cup heavy cream until soft peaks form, then add powdered sugar and mix until stiff peaks form.: A warm, clean knife will glide through the chilled cheesecake and give glossy edges, revealing the creamy interior against the dark crust. Wiping the knife between cuts prevents ragged edges and ensures each square looks tidy. If your knife drags or crumbles the crust, chill the cheesecake a bit longer and warm the knife under hot water, drying it thoroughly before slicing.
- To assemble: cut a flat top off of each strawberry and lay flat side down over top of cheesecake. Fill a pastry bag (or Ziploc bag and cut a small tip of corner) with sweetened whipped cream and pipe around strawberry then finish with a small amount over the top of the "hat".: You will hear a soft whir and see the cream thicken, changing from liquid to billowy peaks. The whipped heavy cream should hold its shape but remain light and airy; the powdered sugar helps stabilize those peaks. Overwhipping can turn the cream grainy and eventually into butter, so stop as soon as stiff peaks hold their shape but still look glossy.
- Serve immediately (for do ahead- you can make cheesecake the day before then assemble within an hour of serving the following day). Store in refrigerator in an airtight container.: cut a flat top off of each strawberry and lay flat side down over top of cheesecake. Fill a pastry bag (or Ziploc bag and cut a small tip of corner) with sweetened whipped cream and pipe around strawberry then finish with a small amount over the top of the "hat". : As you assemble, the contrast of the red strawberry and white cream is striking, and piping gives a neat, polished look. Pressing the flat top of the berry creates a stable base so the whipped cream sits neatly. If strawberries are wet, pat them dry to prevent the cream from sliding; wet fruit is the main culprit when hats topple.
- Don't use Doublestuff Oreos. I processed the Oreos in a food processor but if you don't have one you can place them in a large Ziploc bag, seal bag and finely crush with a rolling pin.: Serving straightaway preserves the whipped cream's texture and the strawberry's fresh pop. If making ahead, assembly close to serving time ensures the hats remain pristine. Leftovers keep well refrigerated, but assembled bites may soften over time as fruit releases moisture, so store the components separately when possible.
- Don't use Doublestuff Oreos. I processed the Oreos in a food processor but if you don't have one you can place them in a large Ziploc bag, seal bag and finely crush with a rolling pin.: Regular Oreos give the right crumb and fat balance; double stuff varieties add too much filling which changes texture and sweetness. Crushing in a processor yields the most consistent crumb size, while the rolling pin method is a solid fallback. If your crumbs are uneven, sift or pulse again to prevent large pieces in the crust.
Notes
- Chill fully before slicing: Allowing the cheesecake to chill for the recommended time firms the filling so your cuts are clean and the toppings sit neatly on each square.
- Even crust consistency: Pulse Oreos in a food processor for uniform crumbs, which pack together better than unevenly crushed cookies and prevent crumbling when served.
- Gentle mixing: When combining eggs into the filling, mix at low speed to prevent incorporating excess air, which can cause cracks during baking.
- Warm the knife between cuts: Run a knife under hot water, dry it, and slice, wiping the blade after each cut to maintain glossy edges on every square.
- Pipe with confidence: Use a small Ziploc corner if you lack a pastry bag for more control when pipinging the whipped cream around the strawberries.
- Make ahead strategy: Bake and chill the cheesecake the day before, then assemble the strawberry hats within an hour of serving to keep them looking fresh and vibrant.