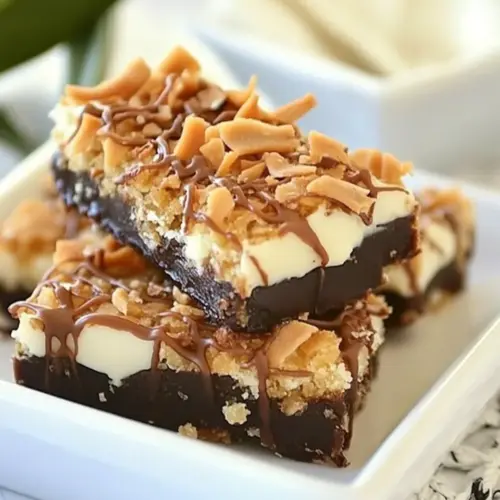
Samoas Bars
Samoas Bars are chewy, toasty, and chocolate coated, blending toasted coconut, gooey caramel, and a tender cookie base into one irresistible bar. This easy nostalgic treat is perfect for gatherings or an indulgent weeknight dessert, delivering a mix of textures and rich flavors you will want to make again and again.
Equipment
- 9 x 13 inch baking dish
- Parchment Paper
- Hand Mixer
- Microwave safe dish
- Baking Sheet
- Zip-lock bag
Ingredients
- 1/2 cup granulated sugar Sweeten the dough and provide structure by caramelizing slightly during baking, enhancing overall flavor and balancing richness in the bars.
- 3/4 cup unsalted butter, softened Creamy and rich for tenderizing the crust; contributes moisture and helps create a soft, spreadable texture when beaten with sugar.
- 1 large egg Bind the dough components together and add moisture; contributes to leavening and helps create a cohesive crumb in the bar base.
- 1/2 teaspoon vanilla extract Flavor the dough with warm, aromatic notes; enhances sweetness and complements the caramel and coconut layers.
- 2 cups all-purpose flour Form the bulk of the base, supplying structure and tenderness; combines with fat and egg to create the shortbread-like foundation.
- 1/4 teaspoons salt Season the dough to enhance flavors and balance sweetness; helps sharpen and round out the overall taste profile.
- 3 cups shredded coconut Provide chewy texture and toasty flavor when toasted; forms the coconut layer that pairs with caramel for the signature Samoas profile.
- 12 ounces chewy caramels Create the sticky, gooey caramel layer when melted; melds with coconut to form the characteristic sweet and chewy middle layer.
- 1/4 teaspoons salt Adjust seasoning for the caramel-coconut layer and overall balance; ensures savory contrast to the sweet components.
- 3 tablespoons whole milk Loosen and smooth melted caramel for easier spreading and to achieve a creamier consistency in the coconut layer.
- 20 ounces chocolate chips Coat and finish the bars with a chocolate layer; melts to a glossy exterior that seals and complements the caramel-coconut center.
Instructions
- Preheat an oven to 350 degrees Fahrenheit and line a 9 x 13-inch baking dish with parchment paper.: Warmth fills the kitchen as the oven comes to temp, and that initial whoosh of heat sets expectations for a golden crust. Lining the pan ensures the bars lift out cleanly and slice neatly, which matters for presentation. A common mistake is skipping parchment, which can cause sticking and tearing when you try to remove the bars. If your oven runs hot, check for hot spots by rotating the pan halfway through preheating to ensure even color.
- To make the cookie base, using a hand mixer, whisk together the butter and sugar until creamy and light.: You should hear a gentle whir and see glossy, pale butter transforming into a velvety texture, signaling trapped air that will lighten the base. Creaming well prevents a dense crust, which is essential so the bar is tender yet holds the topping. Avoid over mixing, because the mixture can deflate and become oily. If your butter is too cold, let it soften a few minutes more so it creams smoothly with the sugar.
- To the butter mixture add the eggs and vanilla, then add the flour and salt until combined. The mixture will be crumbly.: After adding the egg and vanilla, the aroma becomes rounder, and once you fold in the flour you ll notice the dough turn from glossy to crumbly, which is expected. The crumbly texture is the right stage for pressing into the pan, it prevents toughness and keeps the base crisp enough to support the topping. A frequent error is overworking the dough, which develops gluten and yields a tougher base. Use gentle folding and stop as soon as everything is incorporated.
- Press the cookie dough base in the bottom of the prepared pan, bake for 20-25 minutes, and allow it to cool.: Pressing the dough evenly ensures a uniform bake, and you ll watch the edges go light golden while the center firms slightly. The smell of butter and toasted sugar will rise, letting you know it s close to done. Letting it cool completely is critical; cutting into warm bars will cause the topping to slide. A misstep here is pressing unevenly, which creates thin spots that brown too quickly. Use a flat spatula or the back of a measuring cup for an even layer.
- Toast the coconut by laying it on a baking sheet and baking while the crust cools, tossing occasionally for 10-15 minutes until the tops are slightly golden. Remove from oven and set aside.: Toasted coconut sings with a fragrant, nutty smell and crunchy edges, a dramatic upgrade from raw coconut. Stirring occasionally prevents burning and ensures even color. Watch closely during the last few minutes because coconut can shift from golden to burnt very fast, which would introduce bitter notes. If some flakes darken too much, salvage the rest by removing the pan promptly.
- Unwrap your caramels and put them into a microwave-safe dish. Add the milk and salt. Microwave in 30-second intervals, stirring well between each heating.: When the caramels begin to melt, they lose their firmness and slowly transform into a viscous, glossy sauce, while the added milk makes it spreadable. The aroma will be deep and buttery, signaling readiness. Microwaving in short bursts prevents scorching and keeps texture silky. Overheating will cause the caramel to seize and become grainy, so stir frequently and stop heating once smooth and pourable.
- Once the caramel mixture is melted, stir in the toasted coconut and spread over the cookie base. Allow to cool completely.: Stirring develops a homogeneous caramel that is shiny and free of lumps, and you ll notice the mixture thinning as the milk integrates. The consistent stirring also lets you detect small signs of burning before it becomes a problem. A common mistake is using long microwave bursts which create hot pockets that burn. If you see any dark specks, discard and start fresh, it means the sugar has started to scorch.
- Remove the bars from the pan and cut into the desired shape. Melt the chocolate in the microwave in 30-second intervals, and dip the bottom of each square in the chocolate.: The moment you fold the warm coconut into the caramel, the aroma becomes layered and rich, and the mixture gains texture and chew. Spreading it evenly gives each bar a consistent bite and prevents clumps that might slide off. If the caramel cools and firms before you spread it, it becomes hard to work with, so move briskly but carefully. If it seems too runny, cool it slightly before spreading so it adheres better to the base.
- Lay the chocolate-dipped bars onto a parchment-lined baking sheet.: As the caramel sets, the whole pan takes on structure, and the kitchen quiets as the glossy topping loses tackiness. Cooling ensures clean cuts and prevents the filling from oozing out when sliced, which is important for presentation. Rushing this step often leads to sticky, messy bars that do not hold their shape. For best results, chill briefly in the refrigerator if your kitchen is warm, but avoid freezing as that can crack the chocolate later.
- Put the remaining chocolate in a zip lock bag and snip the corner. Pipe lines of chocolate on each square. Refrigerate until the chocolate hardens and serve!: The act of cutting releases a toasted, buttery aroma and the edges should show a clear separation between base and topping. Clean, decisive cuts produce squares that stand proud on a serving platter. Dull knives will compress and tear the layers, creating ragged edges. Wiping the blade between cuts keeps slices neat and prevents dragging caramel across the surface.
- Melt the chocolate in the microwave in 30 second intervals, and dip the bottom of each square in the chocolate: Melted chocolate chips should be glossy and smooth, and dipping the bars creates a shiny seal that contrasts the chewy topping. The reaction of warm chocolate against cool caramel creates a delightful snap once hardened. Overheating chocolate will dull its sheen and may seize, so stop heating as soon as it s mostly melted and finish stirring off heat. If your chocolate thickens, add a few drops of neutral oil to loosen it gently.
- Lay the chocolate dipped bars onto a parchment lined baking sheet: Placing the dipped squares on parchment prevents sticking and preserves the glossy finish, and you can rearrange them easily to get an even set. The quiet clink of chocolate cooling is oddly satisfying and signals the final stage of assembly. Avoid stacking bars before the chocolate fully sets, or the finish will be ruined. If you need them to set faster, pop the tray in the refrigerator briefly, but not so long that condensation forms.
- Put the remaining chocolate in a zip lock bag and snip the corner Pipe lines of chocolate on each square Refrigerate until the chocolate hardens and serve: Using a snipped bag to pipe is a small flourish that elevates presentation, producing tidy lines that weave across each square. The cool, firm chocolate provides contrast to the chewy center, and chilling helps those lines keep their shape. A sloppy or overly warmed bag can create uneven lines, so keep the chocolate at a workable temperature. Once set, the bars are ready to plate, and the combination of glossy drizzle, toasted coconut, and caramel invites immediate tasting.
Notes
- Adjust sweetness: If you prefer a less sweet finish, choose a bittersweet or dark chocolate chips variety for dipping and piping, which adds pleasant contrast without changing the topping.
- Control chewiness: For chewier bars, reduce oven time on the base by a minute or two and ensure the caramel is slightly undercooked so it remains pliable when set.
- Ensure even toasting: Spread coconut in a single layer and stir every few minutes to avoid hot spots, producing consistently golden flakes.
- Work with caramel: If your caramel firms too quickly, warm it gently in short bursts while stirring so it remains spreadable without overheating.
- Neat slicing: Run a sharp knife under hot water, dry it, then slice for smooth edges; wipe between cuts to prevent dragging sticky filling.