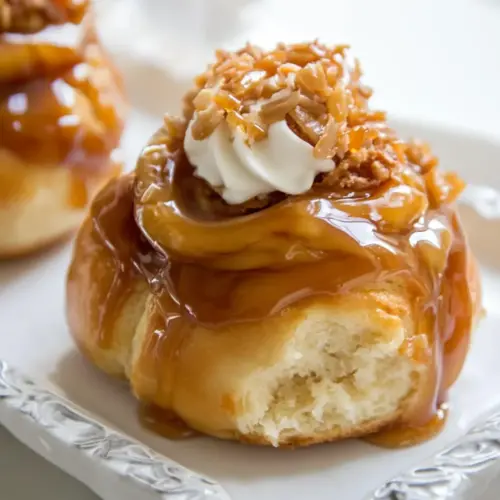
Salted Caramel Sticky Buns
Salted Caramel Sticky Buns are soft, pillowy rolls drenched in glossy brown sugar caramel and finished with tangy cream cheese frosting and toasted pecans. The recipe yields sweet, slightly salty, and warmly spiced buns that are perfect for an easy weekend brunch or holiday morning. Make them for a crowd and enjoy the irresistible aroma and melt in your mouth texture.
Equipment
- Stand mixer
- Dough Hook
- 9 x 13-inch baking pan
- Candy thermometer
- Mixing Bowls
- Rolling Pin
Ingredients
- 1 teaspoon canola or vegetable oil Lightly coat the pan with oil to prevent sticking and help dough slide smoothly during initial proofing or frying; suitable neutral oil like canola or vegetable provides high smoke point. Use sparingly so it doesn't affect dough texture or flavor; apply with a brush or paper towel for even coverage.
- 3 and 1/2 cups all-purpose flour Provide structure and bulk to the buns by supplying gluten and starch; all-purpose flour creates a tender yet resilient crumb when properly kneaded and rested. Measure by spooning into the cup and leveling for accuracy to ensure dough hydration and rise are consistent.
- 1/3 cup granulated sugar Add crystalline sweetness and assist in browning and yeast feeding; granulated sugar helps create a lightly sweet dough and encourages caramelization during baking. Dissolve into the liquid ingredients so it integrates evenly, supporting flavor balance without overwhelming the filling.
- (1) 0.25 oz package rapid rise yeast Activate the dough's rise quickly as a fast-acting leavening agent; rapid rise yeast shortens proofing time and produces a reliable, airy texture in enriched doughs. Bloom in lukewarm liquid if instructed to verify activity, and keep away from high salt or hot temperatures that can kill the yeast.
- 1/2 teaspoons salt Enhance overall flavor depth and balance sweetness by providing a subtle savory contrast; salt also regulates yeast activity in the dough for controlled fermentation. Use the specified amount to avoid underseasoning or overly inhibiting the rise, distributing thoroughly during mixing.
- 1/4 teaspoon ground nutmeg Impart warm, aromatic notes that complement the sweet and spiced elements; ground nutmeg adds subtle complexity to the dough's flavor profile. Use sparingly to avoid overpowering, and mix evenly so small quantities are apparent in every bite.
- 1 large egg, at room temperature Bind and enrich the dough while contributing to tenderness and color; a room-temperature egg helps incorporate fat and protein smoothly into the mixture. Beat or temper the egg if adding to warm liquids to prevent curdling, and ensure even distribution for consistent crumb.
- 3/4 cup milk Provide moisture and richness to the dough with dairy fat and proteins; milk contributes to tenderness, browning, and a softer crust. Warm to lukewarm when combining with yeast to encourage activation, but avoid overheating which can kill the yeast.
- 1/4 cup water Adjust dough hydration and temperature while helping to activate the yeast; water dilutes the dough and creates the proper consistency for kneading. Use the specified amount and temperature guidance to maintain yeast viability and achieve the intended dough texture.
- 1 teaspoon vanilla extract Introduce aromatic sweetness and depth to both dough and fillings; vanilla extract rounds flavors and enhances caramel and butter notes. Add during mixing to distribute its aroma uniformly or reserve a bit for finishing touches to amplify the final scent.
- 5 tablespoons unsalted butter, very soft Soften and enrich the dough or fillings with creamy fat that enhances tenderness and mouthfeel; very soft unsalted butter blends easily without creating lumps. Use unsalted to control sodium precisely, and incorporate at the stated softness level for proper integration.
- 1 stick (8 tablespoons) unsalted butter Provide a larger quantity of butter for filling and caramel preparation, contributing richness and a silky texture; keeping it at standard stick firmness allows for measured melting or softening as needed. Use unsalted to manage salt levels elsewhere and measure by tablespoon or weight for accuracy.
- 1 cup light brown sugar, packed Create a sticky, caramel-like topping component by combining with butter to form a sweet, moist layer; packed light brown sugar contributes molasses notes and moisture. Press into the pan or combine with butter on heat to produce the gooey base that coats buns after baking.
- 1 teaspoon flaky sea salt Deliver crunchy bursts of briny contrast to sweet caramel when sprinkled; flaky sea salt elevates flavors and highlights the buttered caramel notes. Apply delicately atop the finished buns to provide a textural and taste counterpoint without overwhelming sweetness.
- 2 tablespoons honey Add floral sweetness and help thin the caramel for a glossy finish; honey contributes both flavor complexity and humectant properties to the topping. Stir gently into warm mixtures so it dissolves evenly and enhances stickiness without crystallizing.
- 2 tablespoons heavy cream Enrich the caramel for creaminess and stability while reducing crystallization; heavy cream produces a smooth, luxurious texture when cooked into sugar. Add cautiously while tempering hot sugar to avoid sputtering, stirring continuously to integrate fully.
- 1/3 cup granulated sugar Supply additional granular sweetness and assist in caramelization control when making sauces or toppings; granulated sugar can be melted or combined for texture adjustments. Use measured amounts to balance with brown sugar and dairy for correct sweetness and set.
- 1/3 cup light brown sugar, packed Contribute molasses richness and moisture to fillings while deepening brown sugar flavor; packed light brown sugar blends well with butter for an even, spreadable filling. Press into the rolled dough to form layers of sweet, sticky interior that caramelizes on baking.
- 1 and 1/2 teaspoons ground cinnamon Impart warm spice that complements brown sugar and butter, creating classic cinnamon-sugar layers; ground cinnamon provides uniform flavor distribution when mixed into the filling. Adjust slightly for personal preference but maintain the specified amount for the intended profile.
- 5 tablespoons unsalted butter, melted Add melted butter to the filling to help sugar and spices adhere to the dough and create a tender, flavorful interior; melted unsalted butter soaks into layers for richness. Pour and spread evenly to ensure every roll contains a moist, caramelized swirl of flavor.
- 8 ounces of full-fat cream cheese, very soft Provide tangy richness and creamy body to a frosting or filling component; very soft full-fat cream cheese creams smoothly with sugar for a luscious topping. Bring to room temperature for easier mixing and to avoid lumps for a silky, even spread on cooled buns.
- 1 teaspoon vanilla Enhance the cream cheese layer with aromatic sweetness and depth; vanilla amplifies the overall flavor and rounds out tangy notes. Add during creaming to distribute flavor uniformly without creating pockets of extract.
- 2 tablespoons heavy cream Adjust frosting consistency and add extra richness; heavy cream loosens the cream cheese mixture for a spreadable texture and adds silkiness. Add gradually to reach the desired drape that complements the sticky buns without making the topping runny.
- 1/3 cup confectioners' sugar Sweeten and lightly thicken the cream cheese frosting while providing a smooth, dusted finish; confectioners' sugar dissolves quickly for lump-free icings. Sift before measuring to prevent clumping and ensure an even, glossy coating.
- 1/4 teaspoons salt Provide a small measure of savory balance to frostings or fillings to accentuate sweetness and enhance flavor complexity; a pinch of salt sharpens the overall taste. Dissolve thoroughly into wet components so the salt is indistinguishable yet effective.
- Candy thermometer (see post for recommendation) Monitor sugar temperatures precisely when creating caramel to achieve specific stages like soft-ball or firm-ball; a candy thermometer prevents under- or overcooking and yields reliable caramel texture. Clip to the pot away from the bottom for accurate readings and clean after use promptly.
- 1 cup toasted pecans, chopped Contribute to texture and nutty flavor within the topping by adding toasted, chopped pecans for crunch and aroma; toasting intensifies their natural oils and taste. Chop uniformly for even distribution so each bun receives a consistent nutty bite.
- extra salted caramel sauce Provide an optional extra drizzle for serving that intensifies sweetness and adds visual appeal; additional salted caramel sauce boosts flavor and stickiness to taste. Warm slightly before spooning so it pours easily and complements the buns without hardening too quickly.
Instructions
- Lightly grease a large bowl with oil; set aside.: Your senses will register a faint sheen on the bowl, which signals a nonstick surface that helps the risen dough release easily. I like using just enough canola or vegetable oil to coat the interior, wiping away any excess so it does not pool. Why this matters: a lightly greased bowl ensures the dough expands without sticking, preserving the gluten structure you worked to develop. Troubleshooting: if the bowl looks overly slippery or oily, the dough can slide and not rise properly, so keep the coating light and even.
- In the bowl of a stand mixer fitted with the dough hook attachment, combine the flour, sugar, yeast, salt, and nutmeg; mix on low speed for 1-2 minutes, or until thoroughly combined. Keeping the mixer speed on low, add in the egg, milk, water, vanilla, and butter; beat for 3-4 minutes, or until the dough begins to form a ball around the hook. Increase the speed to medium and continue beating for 8 minutes, or until the dough is smooth and shiny. Transfer the dough into the prepared large bowl, turning it once to lightly coat it in oil. Cover the bowl with saran wrap and set aside in a warm place for 2 hours, or until it doubles in size.: Right away you will hear the quiet whirl of the mixer and see powdery ingredients begin to marry into a uniform blend. The aroma of the nutmeg will be faint but inviting, signaling spice folded into the base. Why this matters: even distribution of dry ingredients prevents pockets of salt or yeast and sets up a consistent rise. Troubleshooting: If you spot clumps of flour, pause and scrape the bowl to ensure an even mix before adding liquids.
- In a medium-sized saucepan combine the butter, sugar, honey, and cream; bring to a simmer over medium heat, stirring almost constantly until the butter is completely melted and the sugar is dissolved. Increase the temperature to medium-high and boil, stirring occasionally, until the mixture reaches 230 degrees (F). Remove from heat and pour the caramel into the bottom of a 9 x 13 inch baking pan. Set aside.: At this stage, the mixture transitions from dusty to cohesive; you will notice the dough start to cling to the hook and pull away from the bowl. The scent shifts, becoming richer as the butter and vanilla integrate. Why this matters: gradual incorporation prevents overworking and helps hydrate the flour evenly. Troubleshooting: If the dough seems overly wet, add a tablespoon of flour at a time; if too dry, add a teaspoon of water.
- In small bowl combine the granulated sugar, brown sugar, and cinnamon; mix well to combine and set aside.: During this longer knead you'll notice the dough turn elastic; when you stretch a bit, it should not tear easily. The surface becomes smooth and slightly glossy, which is the sign of well-developed gluten. Why this matters: adequate kneading creates structure and chew without toughness. Troubleshooting: underkneaded dough will be shaggy and tear; overkneaded dough can feel tight and resist stretching, so hit that sweet spot where it is pliable and springy.
- Lightly punch down the risen dough and transfer it to a generously floured work surface. Lightly dust the top of the dough with a little flour, then, using a lightly floured rolling pin, roll the dough out into an 18 x 10 inch rectangle. Brush the melted butter evenly over the dough, then sprinkle cinnamon sugar mixture over the dough.: As you lift the dough, you will feel its weight and resiliency. Turning it to coat ensures an even film of oil on the outside, preventing a crust during rising. Why this matters: a lightly oiled exterior keeps the dough soft while it expands. Troubleshooting: do not press the dough flat now, you only want to shape it into a smooth ball so the rise is uniform.
- Starting with the long side closest to you, roll the dough up like a jelly roll, keeping it as tight as possible. Lightly pinch the seam to seal the dough and turn the dough so it's seam side down. Using a piece of plain dental floss or a sharp knife, cut the roll into 12 equal pieces. Arrange the buns in the salted caramel sauce coated baking pan, placing them in four rows of three.: Over the next hour or two you will smell a gentle yeasty sweetness as the dough breathes and expands. The surface will appear puffy and domed, and when gently poked, the indentation should spring back slowly. Why this matters: a full rise gives the final buns their light, tender crumb. Troubleshooting: if your kitchen is cool, place the bowl near gentle warmth, but avoid direct heat that could dry or kill the yeast.
- Cover the baking dish with saran wrap and set aside in a warm area for 1 hour, or until the buns have doubled in size.: As the mixture heats, you will hear a steady, gentle simmer and see the liquids coalesce into a glossy pool. The scent becomes deep and caramel like. Why this matters: dissolving the sugar before boiling prevents grainy texture in the final caramel. Troubleshooting: don’t step away here; sugar can scorch quickly if left unattended.
- 30 minutes before baking, preheat the oven to 375 degrees (F).: The mixture will bubble more vigorously and deepen in color as water evaporates. At 230 degrees the caramel has a soft ball characteristic that yields a tender set once cooled. Why this matters: temperature control determines whether the caramel will be pourable yet set later. Troubleshooting: without a candy thermometer it is easy to overshoot; if it darkens too quickly, reduce heat and remove it from the burner briefly.
- Remove saran wrap and place pan in the preheated oven. Bake for 25-30 minutes, or until the buns are golden brown and the caramel is bubbling, rotating the dish halfway through to ensure even baking.: You’ll see the caramel spread into a glossy sheet, and the pan will reflect a warm amber tone. Work carefully so you don’t drip on your hands, because it is very hot. Why this matters: an even layer ensures each bun picks up caramel during baking, creating that classic sticky underside. Troubleshooting: if the caramel begins to thicken before pouring, gently warm it to loosen, but don’t boil again.
- Remove the pan from the oven and let the buns cool in the pan for 10 minutes. After 10 minutes invert the baking dish onto a large serving platter, unmolding the buns with the salted caramel side up. Cool for another 10 minutes.: The sugar-scent here is bright and spicy, and the granular texture is apparent when you rub a bit between your fingers. Why this matters: this filling mixture melts into the butter layer, creating ribbons of cinnamon sweetness. Troubleshooting: measure sugars by gently packing light brown sugar to avoid excess moisture in the filling.
- In the bowl of a stand mixer fitted with the paddle attachment, beat the cream cheese on medium speed until smooth. Add in the vanilla, cream, sugar, and salt; beat smooth until all of the ingredients are fully incorporated. Spread the icing on top of the warm buns, top with toasted pecans and extra caramel sauce, if using, and serve warm.: The risen dough will sigh as you deflate it slightly, releasing air pockets. The surface should feel soft and slightly tacky, but not sticky. Why this matters: deflating gives uniform texture and makes rolling easier. Troubleshooting: avoid over punching which can deflate too much and lead to dense buns.
- Lightly dust the top of the dough with a little flour, then, using a lightly floured rolling pin, roll the dough out into an 18 x 10 inch rectangle.: Rolling produces a smooth sheet; you should see an even thickness and an edge that is not ragged. The dough will resist slightly, then yield under pressure. Why this matters: getting a consistent rectangle ensures uniform rolls that bake evenly. Troubleshooting: if the dough springs back, let it rest for five to ten minutes to relax the gluten before continuing.
- Brush the melted butter evenly over the dough, then sprinkle cinnamon sugar mixture over the dough.: The butter will shine over the surface and the sugar will glitter, creating a fragrant, buttery canvas. Why this matters: the butter acts as an adhesive and flavor carrier for the filling. Troubleshooting: too much butter can cause sliding layers that do not adhere, so brush evenly and sparingly.
- Starting with the long side closest to you, roll the dough up like a jelly roll, keeping it as tight as possible.: Rolling should feel controlled; you will hear a soft friction as the dough layers tuck together. Aim for a tight spiral so each bun has distinct rings of filling. Why this matters: a tight roll creates compact swirls that hold the filling during baking. Troubleshooting: if the seam does not seal, moisten the edge with a dab of water to help it stick.
- Lightly pinch the seam to seal the dough and turn the dough so it's seam side down.: Pinching the seam secures the roll, and placing it seam side down stabilizes the log for cutting. Why this matters: sealing prevents the roll from unwrapping during slicing and proofing. Troubleshooting: if you skip sealing, pieces can unravel and lose their spiral shape while baking.
- Using a piece of plain dental floss or a sharp knife, cut the roll into 12 equal pieces.: Using floss provides a clean cut that does not compress the roll, while a knife can compress slightly more. You should see neat, spiraled cross sections when each piece is separated. Why this matters: equal sizes promote even rising and baking. Troubleshooting: if your cuts are uneven, rotate and adjust to keep similar diameters for uniform bake times.
- Arrange the buns in the salted caramel sauce coated baking pan, placing them in four rows of three.: As you set each bun, the caramel will nestle around the base, and you may see it shift slightly. The buns should sit snugly but not squashed. Why this matters: arranging them closely helps them rise into each other and produce soft sides. Troubleshooting: if they are too cramped they can fuse into one giant loaf, so leave slight room for expansion.
- Cover the baking dish with saran wrap and set aside in a warm area for 1 hour, or until the buns have doubled in size.: In this second rise you will notice the buns swell and the caramel may rise slightly around the edges. The tops should look puffy and soft to the touch. Why this matters: a full second proof ensures tender interior and proper oven spring. Troubleshooting: if the second rise is rushed, the centers will be dense rather than airy.
- 30 minutes before baking, preheat the oven to 375 degrees (F).: The oven will take on a warm glow and you may smell residual warmth if it was recently used. Preheating ensures immediate oven spring and even browning. Why this matters: putting buns into a hot oven sets the structure quickly and encourages the caramel to bubble. Troubleshooting: do not skip preheating, or the buns may bake unevenly and the caramel may not bubble properly.
- Remove saran wrap and place pan in the preheated oven.: As the pan enters the heat, you will begin to hear faint bubbling from the caramel and see the tops of the buns start to color. The kitchen scent intensifies into rich, browned butter notes. Why this matters: the initial minutes of baking set the crust and start caramelization. Troubleshooting: if the tops brown too quickly, tent with foil to prevent excessive color while the centers finish baking.
- Bake for 25 to 30 minutes, or until the buns are golden brown and the caramel is bubbling, rotating the dish halfway through to ensure even baking.: During baking the buns develop a golden hue and emit a warm, toasty perfume. The caramel should be actively bubbling and syrupy. Why this matters: even color and bubbling caramel indicate the buns are cooked through and the caramel has reached proper texture. Troubleshooting: underbaked centers will feel doughy to the touch; if unsure, test one in the middle to confirm doneness.
- Remove the pan from the oven and let the buns cool in the pan for 10 minutes.: Cooling briefly lets the caramel settle slightly so the buns hold together when inverted. You will feel the steam fade and the caramel thicken a touch. Why this matters: waiting prevents a dangerous, molten caramel from sliding off and allows safer handling. Troubleshooting: do not wait too long, or the caramel will set completely and resist releasing cleanly from the pan.
- After 10 minutes invert the baking dish onto a large serving platter, unmolding the buns with the salted caramel side up. Cool for another 10 minutes.: As you flip the pan, the caramel will cascade over the buns, coating them in a glossy finish. The buns will settle into a warm, inviting presentation. Why this matters: flipping showcases the caramel and ensures each bun gets a sticky top. Troubleshooting: if the caramel sticks in places, use a thin spatula to coax it free while warm.
- In the bowl of a stand mixer fitted with the paddle attachment, beat the cream cheese on medium speed until smooth.: Beating the cream cheese creates a soft, silky base for the frosting; you will see lumps disappear and the texture become velvety. Why this matters: smooth cream cheese mixes uniformly with sugar and cream for a glossy finish. Troubleshooting: if the cream cheese is cold, the frosting will be lumpy, so always work with very soft cheese.
- Add in the vanilla, cream, sugar, and salt; beat smooth until all of the ingredients are fully incorporated.: The mixture will thicken and take on a pale sheen as the confectioners' sugar dissolves. The scent becomes tangy sweet, and the frosting loosens to a spreadable consistency. Why this matters: balanced sweetness and slight tang cut through the caramel’s richness. Troubleshooting: if the frosting is too thin, add more confectioners' sugar a tablespoon at a time; if too stiff, thin with a little cream.
- Spread the icing on top of the warm buns, top with toasted pecans and extra caramel sauce, if using, and serve warm.: Spreading the frosting yields gentle ribbons that soften into the warm surface, while the toasted pecans add a crisp, nutty finish. The glossy caramel drizzle creates an irresistible shine. Why this matters: warm buns with softened frosting provide the ideal textural contrast between cool tang and warm gooey sweetness. Troubleshooting: serve within a few hours for best texture, as prolonged storage softens the crunch of the pecans and can alter the frosting texture.
Notes
- Swap nuts carefully: If you prefer texture variation, try toasted walnuts in place of pecans for a slightly earthier crunch that still complements the caramel.
- Boost the salt profile: Add a sprinkle of flaky sea salt to the top after unmolding to heighten contrast between sweet and savory notes.
- Make ahead strategy: Prepare through the second proof, then cover and refrigerate overnight, bringing to room temperature before baking to preserve fresh rise.
- Caramel thickness control: If you like a thicker set, cook the caramel a touch longer but watch color closely to avoid bitterness; use the thermometer as your guide.
- Frosting texture tweak: For a lighter spread, increase the heavy cream in the cream cheese icing by small increments until it reaches your preferred consistency.