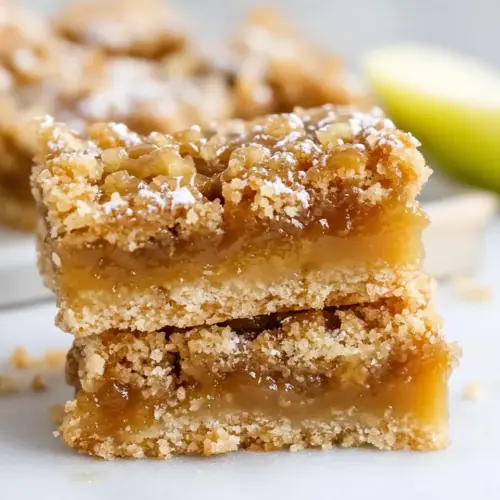
Salted Caramel Apple Butter Bars
Salted Caramel Apple Butter Bars are rich, buttery bars with a tender shortbread base, a gooey caramel and apple filling, and a hint of coarse sea salt for balance. These easy fall dessert bars combine creamy caramel, bright apple notes, and a slightly crisp topping for a crowd pleasing treat perfect for bake sales and holiday gatherings.
Equipment
- 9x13 pan
- Parchment Paper
- Mixing Bowl
- Microwave
- Measuring Cups
Ingredients
- 2 cups butter softened Creamy and softened to create a tender, melt-in-your-mouth shortbread base; provides rich fat that helps bind dry ingredients and carries flavor throughout the bar layers. Work at room temperature so it creams smoothly with sugars for even texture and structure.
- 1 cup white sugar Sweet and granulated to help aerate and tenderize the dough; contributes straightforward sweetness that balances the butter and salt. Incorporate with butter until light to ensure a delicate crumb in the crust and edges.
- 1 and 1/2 cups powdered sugar Fine and powdered to produce a silky, fine texture in the dough; helps create a tender, slightly meltaway shortbread consistency when combined with butter and flour. Use sifted if lumpy to ensure smooth incorporation and uniform sweetness.
- 1 tablespoon vanilla Fragrant and concentrated to add warm, rounded aromatics that enhance the overall flavor profile; provides depth and a home-baked scent to both the crust and caramel layers. Add during creaming so its volatile aromas distribute evenly throughout the batter.
- 4 cups flour Sturdy and all-purpose to form the structural framework of the bars; gives body to the shortbread crust and holds the apple and caramel toppings. Measure carefully and mix just until combined to avoid developing excessive gluten, which would toughen the bars.
- 2 medium apples chopped (I used Granny Smith) Crisp and chopped to introduce tender fruit texture and bright, slightly tart flavor that contrasts the sweetness of the caramel; contributes moisture and natural pectin to the filling. Use a firm variety like Granny Smith to maintain shape during baking and provide a pleasant bite.
- 11.4 ounce bag caramels (unwrapped or 11 oz unwrapped Caramel Bits work great) Chewy and sweet to create a sticky, caramel layer that melts down into a rich topping; unwrapped caramels or bits provide convenience and consistent melting. Gently melt with cream over low heat to avoid scorching and to achieve a smooth drizzleable caramel.
- 1/3 cup whipping cream Velvety and rich to loosen and emulsify the melted caramels into a pourable sauce; adds a creamy mouthfeel and helps achieve a glossy, spreadable consistency. Warm slightly before adding to caramels so it blends smoothly without seizing.
- 1/2 teaspoon vanilla Fragrant and mellow to round out the caramel sauce with a secondary layer of warm flavor; small quantity intensifies the overall aroma without overpowering the apples. Stir in near the end of caramel cooking to preserve its delicate notes.
- 2 teaspoons coarse sea salt Briny and coarse to create a pronounced contrast against the sweet caramel, offering bursts of savory crunch that enhance flavor complexity; sprinkling on top brightens and balances the bars. Use coarse sea salt sparingly and evenly for the best salt-sweet interplay.
Instructions
- Preheat oven to 325 degrees Fahrenheit. Line a 9×13 pan with parchment paper or aluminum foil. Lightly spray with cooking spray.: The room begins to warm and you’ll smell the faint toasty hint when the oven approaches 325 degrees Fahrenheit . Proper pan lining ensures clean removal and even edges, which matters when you slice into neat bars. If the pan isn’t lined well, the crust can stick and break apart, so take the extra moment to tuck the parchment into corners. A common mistake is skipping the spray under the parchment; this can let the paper shift during baking. You want the pan solidly prepared so the crust bakes evenly without trapped air pockets.
- In a large mixing bowl cream together butter, sugar, and powdered sugar. Add vanilla and beat until combined. Mix in the flour and combine until it forms a soft dough.: As you cream butter with white sugar and powdered sugar , you’ll notice a pale, fluffy mixture forming, and the aroma sweetens the air. This aeration contributes to a tender texture, so beat until smooth but not greasy. When you add vanilla , the fragrance blossoms, signaling balance. Stirring in flour transforms the mix into a cohesive dough; look for a soft, slightly tacky feel that holds together when pressed. Overworking after adding flour develops gluten, which can make the crust tough, so stop once the dough binds. A typical pitfall is using too warm butter , which can create a greasy dough that spreads too much; keep the butter at room temperature but not melted.
- Press half of the dough in the bottom of a 9×13 dish and place the other half of the dough into the refrigerator. Bake in preheated oven for 15 minutes.: Pressing the dough evenly into the pan makes a uniform base that will support the filling without sagging. I press with the back of a measuring cup to get an even thickness, watching for a smooth surface. Chilling the remaining dough keeps it firm so it can be crumbled later without melting into the filling. While baking for 15 minutes , the edges will start to set and take on a pale golden hue. Don’t let it brown too much; you want it slightly set but still pale so the shortbread remains tender. A common error is pressing too thin a layer, which can result in a crust that disappears under the filling, so aim for an even, moderate thickness.
- Remove the pan from the oven and melt the caramels, heavy cream, and 1/2 teaspoon vanilla in the microwave for 1 minute. Stir together until smooth. Stir in the chopped apples. Pour evenly over the hot crust. Lightly sprinkle the coarse sea salt over the crust. I didn’t end up using the entire tablespoon. I just lightly sprinkle it evenly on top. You don’t want them too salty.: When the crust comes out hot, it creates an ideal surface for the warm caramel to spread and adhere. As you melt the caramels with whipping cream and vanilla , the mixture becomes glossy and fragrant, and you’ll hear a gentle simmer as trapped steam escapes. Stirring until smooth is crucial; any unmelted pieces will create grainy pockets. Folding in the chopped apples adds fresh texture and a burst of brightness, and the heat slightly softens them so they integrate without turning to mush. Pour the filling carefully so it spreads uniformly across the crust. When sprinkling coarse sea salt , go sparingly; large flakes can dominate, so aim for an even dusting that enhances but does not overwhelm. A mistake here is overheating the caramel, which can darken it and impart a bitter note, so use short bursts in the microwave and stir frequently.
- Take the remaining dough out of the refrigerator and crumble it over top of the caramel. Return the pan to the oven and bake for 25-30 minutes until the filling is bubbly and the top is firm. Let them cool completely before cutting.: Crumbling chilled dough over the warm filling creates a rustic top that bakes into a golden, slightly crisp layer. As the pan returns to the oven, the sweet scent intensifies and you’ll see the filling bubble gently around the edges, an excellent visual cue that it is setting. The 25 to 30 minute bake time allows the caramel to thicken and the top to firm without overbrowning. After removing from the oven, patience is necessary; letting the bars cool completely ensures they slice cleanly and the filling finishes setting. Cutting too soon will cause the caramel to ooze, while leaving them to cool fully yields tidy squares. A frequent mistake is trying to speed the process by refrigerating immediately, which can make the filling very stiff and alter the texture; instead, cool at room temperature for a more even set.
Notes
- Soften butter properly Make sure your butter is at room temperature meaning it yields to gentle pressure but is not greasy. This ensures proper creaming with sugars for an airy crust.
- Measure flour carefully Spoon the flour into the cup and level it to avoid packing, which can lead to a dry, dense crust. If you have a scale, weigh for consistency.
- Choose the right apples I recommend tart, firm apples like Granny Smith for structure and brightness; softer apples can break down and add too much moisture.
- Melt caramels gently Use 20 to 30 second microwave bursts and stir between each burst to prevent burning. A double boiler works well if you prefer stovetop control.
- Test for doneness Look for bubbling along the edges and a firm top to know the bars are set. If the center still jiggles, give them a few more minutes.
- Cool fully before slicing Allow the pan to rest at room temperature until the caramel firms, then refrigerate for easier slicing if desired. Cutting warm will cause the filling to ooze.