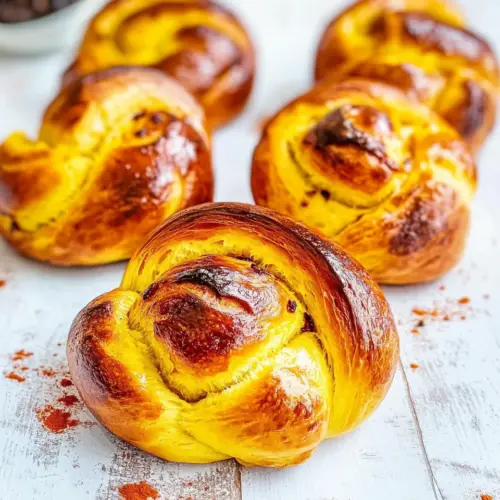
Saffron Buns
Saffron Buns are golden, aromatic enriched rolls with a tender, buttery crumb and sweet pockets of raisins. With a fragrant saffron infused milk and warm cardamom notes, these buns make an easy weekend breakfast or special teatime treat. Light, soft, and visually charming, they are perfect for sharing and sure to impress at brunch or holiday mornings.
Equipment
- KitchenAid Artisan 5 Quart Stand Mixer
- Instant-read meat thermometer
- Basting and Pastry Brush
- Large Baking Sheet
Ingredients
- 1 cup milk Heat and enrich the dough by warming milk to lukewarm; provides liquid for hydrating yeast and flour while adding tenderness and mild creaminess to the buns.
- 1 teaspoons saffron Impart floral, aromatic flavor and vivid color by steeping saffron in warm milk; enhances traditional saffron bun character with delicate, distinctive perfume.
- 3/4 cups sugar Sweeten and tenderize the dough by dissolving sugar into the warm milk; balances saffron bitterness and feeds yeast for proper fermentation and browning.
- 6 tablespoon butter (unsalted) Enrich and soften crumb by melting unsalted butter into the warm mixture; contributes to tender texture, richer flavor, and improved shelf life without added salt.
- 2 1/2 teaspoon active dry yeast Leaven and aerate the dough using active dry yeast; activate in warm liquid to create carbon dioxide for rise, structure, and lightness in the buns.
- 3 1/2 cups all-purpose flour (to 4 cups) Form structure and body by gradually incorporating all-purpose flour; provides gluten to trap gases, creating chew and shape while allowing optional extra for firmer dough.
- 1/2 teaspoons salt Season and balance sweetness by adding salt; enhances overall flavor complexity and regulates yeast activity for controlled fermentation.
- 1 teaspoon cardamom (ground) Enhance warm spice profile with ground cardamom; delivers fragrant, citrusy-spicy notes that complement saffron and add traditional Nordic flavor.
- 2 large eggs Bind and enrich the dough through whole eggs; add moisture, fat, and protein to strengthen structure, improve color, and contribute to a tender crumb.
- 1/4 cups sour cream Add fat and slight tang by folding in sour cream; increases moisture, richness, and tenderness while contributing gentle acidity to balance flavors.
- 3/4 cup raisins Provide bursts of chew and sweet contrast by mixing in raisins; offer texture variation and concentrated sweetness throughout the buns when plumped or soaked.
- 1 egg (for egg wash) Create glossy finish and promote golden color by brushing with an egg wash; enhances appearance, helps toppings adhere, and contributes to a shiny crust.
Instructions
- In a small sauce pan heat the milk, saffron, 1/4 cup of the sugar and butter together until the butter melts, but do not boil the milk, it just needs to be warm.: The room fills with a sweet, floral steam as the saffron releases its color into the milk , producing a pale amber liquid that smells almost honey like. You want the butter to melt and the mixture to be warm enough that it would feel comfortably hot on your wrist, not scalding, because overheating will dull the saffron and risk killing the yeast . Stir gently so the saffron disperses and a thin film of butter may float on top, signaling readiness. A common mistake is bringing it to a boil which dissipates aroma and harms yeast later, so keep your heat low and patient.
- Add the yeast to the warm milk and let it sit a bit so that the yeast dissolves. You don't want the milk too warm because it will kill the yeast.: Dropping the yeast into the warm saffron milk should produce a faint foaming at the surface if the temperature and yeast are right, a soft sign of life. Let it rest for a few minutes, watching for tiny bubbles or an airy cap, which tells you fermentation has begun. If nothing happens by ten minutes, your yeast may be inactive and you’ll need fresh packets. Avoid stirring vigorously which can break delicate foam and delay activation.
- In the bowl of your mixer, mix the flour, salt, cardamom, remaining 1/2 cup sugar and salt.: As you sift together the dry components, the scent of cardamom brightens the air, citrus and warm spice mingling with flour dust. Combining them evenly prevents clumps of spice and ensures consistent flavor. Take a moment to press the mixture between your fingers to feel for lumps, a tactile check that helps the dough form smoothly. Too much mixing at this stage is unnecessary, but uneven dry mixes lead to pockets of salt or cardamom in the finished buns.
- To your mixer bowl, add milk mixture, 2 eggs, sour cream and raisins. Using the hook attachment mix well until dough is smooth.: Pouring the warm saffron milk over the dry mix, then adding the room temperature eggs , tangy sour cream , and plump raisins , the dough comes together into a glossy mass as the hook turns. You will smell the dairy and spice deepen, while the texture transitions from shaggy to elastic. Stop once the dough pulls away cleanly from the bowl and springs back slightly when poked, that elasticity means the gluten developed properly. Avoid over kneading which can make the crumb tight and dry.
- Place the dough in an oiled bowl, cover with plastic wrap and place in a warm spot until it doubles in size.: Greasing the bowl keeps the dough from sticking and lets you gently track its rise, which you can see as it fills the space and forms domed peaks. The dough will feel pillowy and buoyant when ready, and pressing a finger leaves a slight indentation that slowly bounces back. If your kitchen is cool, create a warm environment by placing the bowl near a gently warmed oven, but do not place it directly on a heat source which can overproof and collapse the structure.
- Preheat oven to 400℉. Prepare a large baking sheet with parchment paper.: The oven heat readies the environment for immediate oven spring, where the buns puff and set quickly. Lining a sheet with parchment prevents sticking and promotes even browning. You want consistent hot air so the buns develop a golden crust without burning; positioning the rack in the middle helps distribute heat evenly. A common oversight is preheating too late, which shortens oven spring and leads to denser buns.
- Sprinkle some flour over your counter and turn the dough on the counter. Divide into 12 pieces.: The dough feels soft and slightly tacky as you turn it out. Dust the surface sparingly, because excess flour will dry the exterior. Use a bench scraper to divide the dough into twelve even portions by weight if possible, uniform pieces bake evenly and present consistently. Watch the texture, it should be supple; if it seems stiff you may have over floured during dividing and should handle gently to avoid toughening the pieces.
- Roll each piece into a rope about 8 inches long and shape them into the letter 'S'.: Rolling produces a smooth rope that yields a glossy exterior once formed, and you’ll feel the gluten relax under your palms as the rope becomes taut. Shaping into the letter S is tactile and satisfying, the ends tucking neatly to create the classic look. Keep motions gentle to preserve the interior air pockets. A pitfall here is rolling too tightly which compresses the crumb and reduces fluffiness after baking.
- Place the rolls on the baking sheet, cover with plastic wrap and let them rest for another 30 minutes until they have doubled in size. Brush the buns with egg wash. Place a single raisin in the center of each of the swirls.: During this final rise the buns soften and expand, the surface turning smooth and glossy as trapped gases swell. When brushed with the beaten egg , they take on a rich sheen and the little raisins press into place, anchoring a jewel like accent in each swirl. You want them visibly puffed, about double, and springy to the touch. Avoid skipping the egg wash which results in a pale crust, and don’t press the raisins too deep which can tear the surface.
- Bake for about 10-12 minutes or until golden brown.: The oven fills the kitchen with a warm, spiced aroma as the buns color to a deep golden hue and the crust becomes slightly crisp. Watch for an even bronze across the tops and a hollow sound if you tap gently at the base, signals they are done. Let them cool briefly on the sheet to set the crumb before transferring to a rack. Overbaking dries the interior, while underbaking leaves a gummy center, so err toward the lower end and check visually and by touch.
Notes
- Yeast care: Ensure your yeast is fresh by proofing it in the warm saffron milk with a pinch of sugar. It should show tiny bubbles or foam within five to ten minutes, a sure sign of activity. If no foam appears, replace the yeast as it may be expired. Using inactive yeast ruins the rise and yields dense buns.
- Milk temperature: Aim for about 110°F, warm to the touch but not hot. This temperature lets the saffron infuse while keeping the yeast safe. If the liquid is too hot, it will kill the yeast, halting fermentation and leading to poor rise. If too cool, the dough will take much longer to proof.
- Flour handling: Start with 3 1/2 cups of flour and add up to 4 cups only as needed; the dough should be slightly tacky and elastic. Adding too much flour makes the crumb heavy, while too little yields a slack dough that is hard to shape. Adjust by feel rather than strict measurement.
- Raisin distribution: Toss your raisins lightly in a teaspoon of flour before adding to the dough to minimize them sinking to the bottom. This helps them stay suspended throughout the bun and ensures each roll has a balanced number. Don’t overflour the raisins which can leave dusty pockets in the crumb.
- Egg wash timing: Brush just before baking to preserve the final rise. Brushing too early can deflate the buns or cause an uneven gloss. A thin, even layer will give a deep golden finish and help raisins adhere.