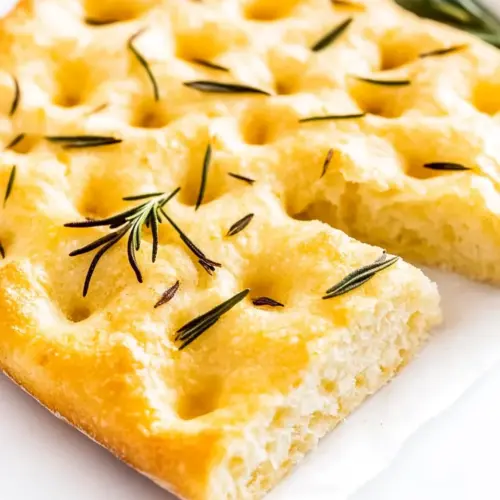
Rosemary Focaccia
Rosemary Focaccia is an airy, golden bread with a crisp crust and olive oil kissed crumb, infused with fresh rosemary and finished with flaky sea salt. This easy, shareable bread offers a tender interior and herb forward aroma, perfect for casual dinners or gatherings. Make it for an effortless, crowd pleasing addition to any meal.
Equipment
- Kitchen Scale (optional)
- Stand mixer
- Baking Sheet
Ingredients
- 1 3/4 cups water 397 grams, warm (105-110°F) Provide warm liquid necessary for hydrating flour and activating yeast; maintain temperature between 105–110°F to ensure proper fermentation and dough development. Contribute to dough consistency and final crumb texture while controlling yeast activity and gluten formation.
- 2 1/4 teaspoons active dry yeast 7 grams (1 packet) Activate fermentation and leavening by converting sugars to carbon dioxide; sprinkle into warm water to proof or mix directly into flour for even distribution. Determine rise time and oven spring, so measure precisely to avoid under- or over-proofed dough.
- 1 tablespoon granulated sugar 13 grams Feed yeast and aid browning by offering a readily fermentable sugar source; dissolve into warm water or sprinkle over yeast to kickstart activity. Influence crust color and subtle sweetness in the finished focaccia without overpowering savory flavors.
- 5 cups all-purpose flour 625 grams Form the structural matrix of the dough by supplying proteins (gluten) and starches that trap gas and create chew; use measured cups or grams for consistent results. Affect hydration level and dough handling characteristics, so combine gradually with liquids until a smooth, elastic dough forms.
- 1 tablespoon kosher salt 9 grams Enhance flavor balance and strengthen gluten structure by regulating fermentation and seasoning the dough; dissolve into flour evenly to avoid concentrated salty pockets. Influence yeast activity subtly and improve overall taste and crust development when properly measured.
- 1 cup extra-virgin olive oil 200 grams, divided Provide abundant fat for tenderness and rich mouthfeel while also being used to oil the pan and top the dough; reserve some for incorporating into the dough and some for drizzling during baking. Promote crisp, golden crust and desirable olive oil aroma when distributed between dough and pan.
- 2 sprigs fresh rosemary leaves removed from the stems, but not chopped Offer aromatic, resinous flavor and visual appeal when leaves are left whole; remove from stems and scatter across the dough to infuse fragrance during baking. Contribute a savory herbal note and enhance the focaccia's signature Mediterranean character without overpowering other ingredients.
- Sea salt flakes for topping (such as Maldon) Add bright, flaky crunch and finish to the baked surface providing contrast to the soft crumb; sprinkle lightly over the oiled dough before baking. Elevate flavor perception and deliver a professional, textured topping that complements the olive oil and rosemary.
Instructions
- In a liquid measuring cup or small bowl, whisk the water, yeast, and sugar together. Set aside for 10 minutes and let the yeast activate. It should be frothy and fragrant.: You will notice the mixture become bubbly and smell faintly sweet and yeasty, signaling active fermentation. This scent is delicate, like fresh bread starting to wake up. If the surface remains still and glassy after 10 minutes, the yeast may be inactive, which leads to a dense dough. One common mistake is using water that is too hot which kills the yeast, so check that the temperature feels warm to the wrist. Gently tapping the bowl will reveal tiny bubbles and a soft fragrance, reassuring signs that the yeast is functional.
- In the bowl of a stand mixer fitted with the dough, whisk the flour and salt together by hand to combine.: When you mix flour and salt , you are creating an even base so the salt does not interfere with yeast pockets. The dry ingredients should look uniform, with no streaks of salt. The texture will be powdery and slightly aromatic from the salt. A common slip up is uneven measuring, which causes pockets of salt or dry flour, so take a moment to whisk thoroughly.
- Add in 1/2 cup of olive oil and the activated yeast mixture. Using the dough hook, mix on low until the dough comes together. You may need to scrape down the sides and bottom of the bowl once or twice to fully incorporate the flour.: As the wet meets the dry, the bowl will sound different, a muffled stir instead of loose flour noise, and the dough will begin to cling to the hook. The aroma shifts toward warm oil and yeast. It is normal for the dough to look shaggy at this stage. A frequent oversight is not scraping the bowl, which leaves dry pockets; scrape gently, ensuring all bits are incorporated.
- Increase the speed to medium and knead the dough for 5-6 minutes. The dough will be tacky and loose, but you should be able to pick it up out of the bowl.: Proper kneading develops gluten so the dough stretches without tearing. The surface becomes smoother and slightly glossy, and the dough springs back gently when pressed. If you end up with a sticky puddle, you likely under kneaded or used too much water; dusting a little extra flour can help, but avoid making the dough dry. Over kneading in a heavy mixer is rare here because the dough remains fairly soft, but keep an eye on elasticity to avoid a tight crumb.
- Dust your work surface with flour and knead the dough a few more times until it comes together and is less sticky. Dust with more flour as needed.: This tactile step lets you feel the dough’s readiness. The dough should feel springy and hold shape, while still retaining some tack for a light crumb. You will hear soft thumps as you fold and press, and see a slightly smoother surface. A mistake to avoid is adding too much extra flour , which yields a dry, heavy focaccia; instead add small amounts until the dough is manageable.
- Coat a large bowl with oil and transfer the dough to the bowl. Cover with plastic wrap or a clean kitchen towel and let rise in a warm place until it has doubled in size, about 60 minutes.: During this bulk ferment you will see the dough expand and the surface smooth into a domed shape, and the aroma will deepen into a yeasty, slightly tangy scent. Protecting the dough from drafts ensures an even rise. A common mistake is placing the dough somewhere too cold, which slows yeast activity and produces underproofed structure. A warm, cozy spot is ideal for that full, billowy rise.
- Coat a rimmed baking sheet with 1/4 cup of the remaining oil. Use a pastry brush to make sure it is coated on the bottom and up the sides of the pan.: The oil does more than prevent sticking, it fries the outer layer slightly during baking, yielding a crisp, golden edge and a tender interior. Brush until you see a glossy sheen on the pan. If the oil is uneven, parts of the crust may stick or brown inconsistently, so take time to coat thoroughly. The scent of warm oil will be present as you prepare the pan.
- Transfer the dough to the pan and use your hands to press and stretch the dough until it fits the pan.: Pressing the dough is tactile therapy, and you will feel it relax and spread under your palms. The surface might resist at first, then slowly stretch; this tells you the gluten has developed properly. If it springs back immediately, let it rest for five minutes then continue. Avoid forcing it thin too quickly, which can tear the dough and produce uneven thickness.
- Use your fingers to “dimple” the dough by pressing down and creating deep holes. It’s okay if the holes go all the way through the dough!: Those dimples trap pools of olive oil and make room for rosemary and sea salt . As you press, you will hear soft popping as air pockets flatten and feel small resistances give way. If your dimples spring back, the dough may be too tight; resting for a short while helps. Rushing this stage will produce a smoother top but will lose the classic focaccia texture, so be generous with the dimples.
- Cover loosely and set aside to rise until doubled in size, about 60 minutes.: The second rise puffs the dough and softens the interior, creating those signature irregular holes in the crumb. Visually, the dough should become pillowy and slightly domed. If the dough overproofs it will collapse and lose structure, so keep an eye on it and don’t exceed the recommended time excessively. Lightly touch the surface; it should spring back slowly, not vanish entirely.
- Preheat the oven to 425°F.: A hot oven is essential for immediate oven spring and a crisp crust. You will feel the warmth when opening the door and smell a faint dry heat. If you bake at a lower temperature, the focaccia will take longer and may not brown properly. Ensure the oven is fully preheated for even color and texture.
- Once risen, drizzle the remaining oil all over the dough. Top with rosemary and flaky sea salt.: As oil hits the warm dough, it glistens and highlights the dimples, and the aroma of fresh rosemary becomes bold. Those oil pools help create a beautiful crust and carry flavor into the crumb. Overloading with toppings can weigh the dough down, so distribute evenly. The contrast of the shiny oil and matte herbs is a good visual guide.
- Bake for 25-30 minutes until golden brown.: In this bake you will see a deepening color and will smell a toasty, herby aroma as the crust forms. The surface should be a rich golden brown with crisp edges and a slightly softer center. If the top browns too quickly, tent loosely with foil to prevent burning while the interior finishes. Underbaking results in a doughy center, so confirm with a light tap which should sound hollow when done.
- Let cool before slicing and serving.: Cooling lets steam escape, stabilizing the crumb and making clean slices easier. You will notice the aromas mellow slightly and the crust firm a touch. Slicing too hot can compress the crumb and produce gummy texture, so wait at least 10 to 15 minutes for best results. A short rest also allows flavors to settle, making each bite more balanced.
Notes
- Garlic infusion: Add minced garlic to your final quarter cup of olive oil and let it steep for a few minutes before drizzling over the dough for a gentle, aromatic garlic note.
- Herb swap: Try sage, thyme, or oregano if you want a different herbal profile, placing the leaves in the dimples so they roast and release aroma without burning.
- Pan size guide: Use a rimmed baking sheet for a thinner focaccia, or a 9 by 13 inch pan if you prefer a thicker, sandwich friendly loaf, adjusting bake time by a few minutes accordingly.
- Olive oil quality: Choose a rich extra virgin olive oil for finishing, as its flavor is prominent on the crust and makes a big difference in the final taste.
- Yeast check: If the yeast does not foam during activation, test with a fresh packet; working with inactive yeast is the most common reason for a failed rise.
- Make ahead: You can refrigerate the dough after the first rise for up to 24 hours to develop flavor slowly, then bring it to room temperature before shaping and second rise.
- Parbake for sandwiches: For sturdier sandwich bread, bake until just set, cool, then slice and toast briefly before assembling sandwiches.
- Salt finishing: Use flaky sea salt sparingly so that each bite has a bright contrast without being overwhelmingly salty.