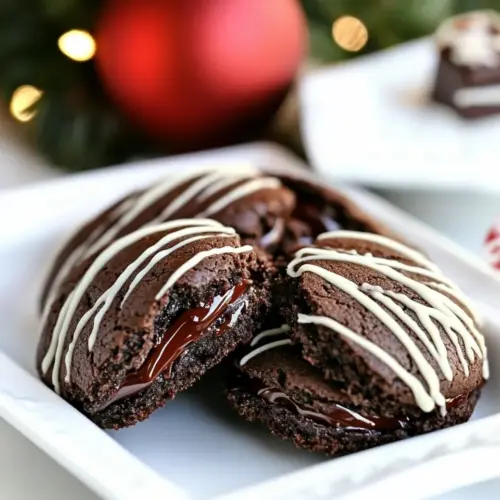
Rolo Stuffed Chocolate Cookies
Rolo Stuffed Chocolate Cookies are fudgy, gooey, and irresistibly chocolaty, with a surprise molten caramel center. These cookies combine deep cocoa, brown sugar warmth, and a playful caramel core for an easy holiday treat that impresses at cookie exchanges. Make a batch for festive gatherings or an indulgent weeknight dessert that everyone will ask you to bring again.
Equipment
- Mixing Bowls
- Electric Mixer
- Measuring Cups
- Wire Rack
- Cookie Sheets
Ingredients
- 2 1/2 cups all-purpose flour Provide structure and bulk to the cookie dough, absorbing fats and liquids to create a tender crumb; sifted for uniform texture and to prevent lumps. Balance with other dry ingredients to ensure proper rise and chewiness when baked, and measure accurately for consistent results.
- 3/4 cup unsweetened Scharffen Berger Cocoa Powder Impart rich chocolate flavor and deep color while contributing to the dry matrix of the dough; unsweetened cocoa intensifies cocoa notes without adding sweetness. Sift together with flour to distribute evenly and avoid clumps that could create dry pockets in the cookies.
- 1 teaspoon baking soda Leaven the dough by releasing carbon dioxide when activated, helping cookies spread and puff slightly; evenly distributed for consistent rise across the batch. Combine with acidic components in the dough to balance texture and prevent overly dense cookies.
- 1 cup sugar Add sweetness and contribute to cookie spread and crisp edges by dissolving into the dough; sugar also aids browning through caramelization. Measure and cream with butter to incorporate air for a lighter texture.
- 1 cup firmly packed brown sugar Provide moisture, chewiness, and deeper caramel-like flavor while promoting a soft, tender crumb; brown sugar’s molasses content helps cookies remain soft. Pack firmly for accurate measurement and cream with butter to create a cohesive dough.
- 1 cup butter softened Create richness, tenderness, and flavor while helping leavening agents work by trapping air when creamed with sugars; softened butter ensures even incorporation. Use at room temperature for smooth creaming to produce a light, well-textured cookie.
- 2 teaspoons pure vanilla extract Contribute aromatic sweetness and enhance other flavors while rounding out the chocolate and caramel notes; vanilla adds complexity to the overall flavor profile. Add during creaming to distribute flavor evenly throughout the dough.
- 2 eggs Provide moisture, structure, and binding by coagulating proteins during baking to set the cookie’s interior; eggs also contribute to richness and leavening. Beaten before mixing for uniform incorporation and consistent texture across cookies.
- 48 Rolo® Chewy Caramels in Milk Chocolate; unwrapped Offer a gooey, caramel-filled surprise at the cookie center when unwrapped and pressed into dough, adding rich, chewy pockets of caramel and chocolate. Place chilled Rolos into dough centers before baking to prevent excessive melting while ensuring a molten core.
- 4 oz . vanilla-flavored candy coating optional Add optional coating and visual contrast by enrobing cooled cookies in a smooth, sweet vanilla-flavored candy shell; melts and sets to form a glossy finish. Use sparingly for added sweetness and decorative appeal, tempering or melting gently to avoid graininess.
- vanilla fleur de sel; optional Provide a final finishing touch with a delicate salty crunch that enhances sweetness and intensifies chocolate and caramel flavors; sprinkle lightly for balance. Use optional fleur de sel to create a sophisticated flavor contrast without overpowering the cookie.
Instructions
- In medium bowl, combine flour, cocoa and baking soda; mix well.: As you combine the all-purpose flour , unsweetened Scharffen Berger Cocoa Powder , and baking soda , you will notice a dusty, deep brown mixture with a faint cocoa aroma. Rubbing the dry ingredients together with a whisk helps break any small lumps and ensures uniform leavening, which translates to even rise and consistent texture across cookies. The dry mixture should look homogenous, without streaks of flour or cocoa. If you skip thorough mixing, some cookies may be paler or have pockets of unblended cocoa; to avoid this, sift or whisk until evenly colored. Common mistake: adding the dry mix directly to wet without preblending can create uneven chocolate intensity.
- In large bowl, combine 1 cup sugar, brown sugar and butter; beat until light and fluffy. Add vanilla and eggs; beat well. Add flour mixture; blend well. If necessary, cover with plastic wrap; refrigerate 30 minutes for easier handling.: When you beat the sugar , brown sugar , and softened butter , the change is dramatic; the mixture turns paler, airy, and slightly ribbon like, which traps tiny air pockets that help the cookies have tender crumb and slight lift. You should hear a faint whir from the mixer and see a change in texture from glossy to matte. This aeration matters because it balances density from the flour and supports the caramel center without collapsing. If the butter is too cold, it will not cream properly, leaving small butter bits that create uneven spread. A common error is overbeating past the light and fluffy stage, which can break down the structure, so stop once you see volume increase.
- Preheat oven to 375°F. For each cookie, with lightly floured hands, shape about 1 tablespoon dough around 1 caramel candy, covering completely. Place dough balls 2 inches apart on ungreased cookie sheets.: Adding the vanilla extract and eggs introduces moisture and emulsifiers that bind the sugar butter mixture. You will smell the sweet, warm notes of vanilla as the bowl turns glossy again and the batter smooths out. The mixture should flow slightly but hold gentle peaks when lifted. If you add eggs one at a time and beat until incorporated, you ensure an even emulsion, preventing a curdled appearance. If the butter was too warm, adding eggs cold can cause the mixture to separate; to fix this let the bowl sit briefly or beat at low speed until smooth. Avoid adding all eggs at once, which stresses the emulsion.
- Bake at 375°F for 7 to 10 minutes or until set and slightly cracked. Cool 2 minutes; remove from cookie sheets. Cool on wire rack for 15 minutes or until completely cooled.: Folding in the dry mix transforms the batter into a dough with a rich chocolate color and slightly stiff texture. The tactile cue is a dough that pulls away from the bowl sides and holds shape when scooped. Mixing until just combined preserves tenderness; overmixing develops gluten, yielding chewier cookies rather than tender ones. Use a spatula and scrape the bowl often to ensure even distribution of cocoa and baking soda. A sign of overmixing is a shiny, elastic dough; if that happens, stop immediately to keep the cookies soft.
- Melt candy coating in the microwave according to package directions. Drizzle over cookies and sprinkle with vanilla fleur de sel.: Chilling the dough firms the butter so dough is easier to shape and prevents excessive spread while baking. The chilled dough feels cool and slightly stiff, and it becomes much simpler to wrap around each candy without tearing. This step also helps the flavors meld, deepening the chocolate notes. Common slip: skipping the chill when ambient temperature is warm leads to sticky, unmanageable dough and flatter cookies. If you forget to chill, you can briefly freeze dough balls for about 10 minutes as a rescue.
- Preheat oven to 375°F.: Preheating to 375°F ensures the oven environment is ready so cookies set quickly, capturing the crackled top while allowing the interior to soften. You should see the oven reach temperature and the metal racks hot to the touch if you carefully test them. An accurately preheated oven creates that immediate burst of heat that lifts and cracks the cookie surface. If the oven is not fully preheated, cookies will spread more and not obtain the desired cracks. Use an oven thermometer if your appliance runs hot or cold.
- For each cookie, with lightly floured hands, shape about 1 tablespoon dough around 1 caramel candy, covering completely.: As you shape, the dough will be cool and slightly tacky; a light dusting of flour on your hands prevents sticking and helps you form neat spheres. Press the dough completely around each unwrapped Rolo so no candy peeks through, otherwise the caramel may leak during baking. The shaped balls should be smooth and uniform in size so they bake evenly. A common mistake is using too much flour during shaping, which dries the outside and creates a doughy interior after baking. Aim for gentle, even pressure when enclosing the candy.
- Place dough balls 2 inches apart on ungreased cookie sheets.: Spacing is crucial; set the dough balls roughly two inches apart so they can spread into rounded cookies without fusing. On ungreased sheets, cookies develop slightly crisper bottoms, and the contact sound is a soft thud as you place each ball. If you overcrowd the pan, cookies will merge into oddly shaped clusters, so bake in batches if necessary. Uneven spacing is a frequent oversight that leads to inconsistent edges and doneness.
- Bake at 375°F for 7 to 10 minutes or until set and slightly cracked.: During baking you will notice a toasty chocolate scent that deepens as sugars caramelize. Around seven minutes look for the tops to firm and develop characteristic cracks while the centers remain soft. The edges should be set but not overly brown; overbaking dries the interior and defeats the gooey Rolo center. If you see too much spreading early, reduce oven temperature slightly next time or chill dough longer. A failure mode to watch for is underbaking fully, which makes cookies collapse when removed; ensure the tops are set.
- Cool 2 minutes; remove from cookie sheets.: Letting cookies rest on the hot sheet for two minutes helps them finish setting while the caramel inside remains molten. You will feel the heat through the sheet and the cookie bottoms will firm slightly, making them easier to transfer. If you try to move them immediately, they may break or smear; leaving them too long, however, can cause overcooking from residual heat. A good trick is to time the two minutes with a glance at the cookie bottoms; they should hold shape when nudged.
- Cool on wire rack for 15 minutes or until completely cooled.: Transferring cookies to a wire rack allows air to circulate underneath so they cool evenly and the caramel centers stabilize just enough to be handled. You will notice the aroma lighten and the cookie exterior set to a pleasant chew. If you stack them while warm they will stick, so patience is the reward. A common mistake is packaging or storing warm cookies which traps steam and softens textures; cool completely before storing or decorating.
- Melt candy coating in the microwave according to package directions.: As you melt the vanilla-flavored candy coating , it should become glossy and pourable without lumps. Use short bursts and stir between intervals to prevent overheating and graininess. A silky coating will glide off a spoon and set with a gentle snap. If the coating becomes too hot, it may seize or burn; gently stirring and using lower power fixes this. If you do not use coating, skip to the next step.
- Drizzle over cookies and sprinkle with vanilla fleur de sel.: The final drizzle adds visual polish and an extra layer of texture, while a tiny pinch of vanilla fleur de sel enhances the chocolate and caramel contrast. You should see shiny ribbons of coating on the cookies, and the salt crystals will glint. Apply sparingly, as a heavy drizzle can drown the cookie shape, and too much salt overwhelms the sweet profile. A common misstep is sprinkling salt before the drizzle dries, which can cause the salt to sink; wait a moment so the coating holds the crystals.
Notes
- Adjust chilling time If your kitchen is warm, extend the refrigerator rest to forty five minutes to ensure the dough is firm enough to shape without tearing. A firmer dough reduces spreading in the oven and helps you form neat, even balls around each candy.
- Measure flour correctly Spoon the all-purpose flour into your measuring cup and level it off rather than scooping, which prevents a dense dough. Slightly less flour yields a softer cookie while more flour produces a sturdier shape.
- Watch your bake time Aim for the lower end of the seven to ten minute range for a softer center and more molten caramel. If you prefer a set center, increase baking toward the upper end, but monitor closely to avoid a dry cookie.
- Use quality cocoa A high grade unsweetened cocoa powder enhances the chocolate depth, making the caramel feel balanced rather than cloying. Dutch processed or single origin cocoas bring slightly different flavor notes to explore.
- Finish with restraint A light drizzle of candy coating and a tiny pinch of vanilla fleur de sel go a long way to elevate presentation and flavor; overdoing either can mask the cookie base.
- Make ahead and freeze Arrange unbaked, filled dough balls on a tray and freeze until solid, then store in a sealed bag. Bake from frozen with an extra minute or two added to the time for fresh results on demand.
- Batch baking logistics Bake one sheet at a time for the most consistent results, and allow the oven to return to 375°F between pans if it drops significantly with door openings.