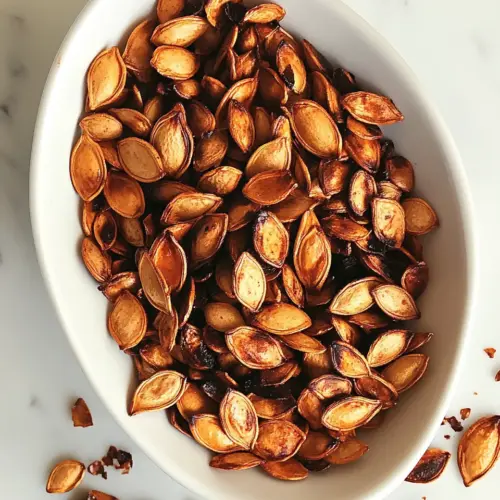
Roasted Squash Seeds
Roasted Squash Seeds are a crunchy, slightly sweet snack with warm notes of cinnamon and a bright finish from fine sea salt. This easy, pantry friendly recipe turns leftover seeds into a crispy topping or quick nibble, perfect for cozy fall afternoons and simple entertaining. Make a batch to keep on hand for salads, grain bowls, or a healthy snack.
Equipment
- Oven
- Baking Sheet
- Parchment Paper
- Fine mesh sieve
- Small Bowl
Ingredients
- 1 cup raw squash seeds Coats seeds lightly to help spices adhere and promotes even roasting for a crisp, golden texture; contributes subtle richness without overpowering the flavor profile. Use sparingly to avoid oily seeds and toss thoroughly for uniform coverage.
- 1 teaspoon extra-virgin olive oil Adds gentle sweetness and helps caramelize during roasting to create a delicate, toffee-like coating on the seeds; balances savory and spiced elements. Measure carefully to prevent burning and stir occasionally while roasting for even color.
- 2 teaspoons coconut sugar Provides mild caramelized sugar flavor and supports browning for a warm, sweet accent; dissolves easily and blends with spices to create a consistent glaze. Sprinkle evenly and adjust amount based on desired sweetness level.
- 1/4 teaspoon cinnamon (or pumpkin pie spice) Imparts warm, aromatic notes that enhance the seeds with cozy spice; cinnamon (or pumpkin pie spice) complements the sugar and salt to create a balanced flavor profile. Use a light hand so the spice enhances rather than overwhelms the roasted seeds.
- 1 teaspoon fine sea salt Seasoning that enhances and balances sweetness and spice while highlighting the natural nuttiness of the seeds; helps draw out flavor during roasting for a savory finish. Dissolve against oil and sugar to ensure even distribution across all seeds.
Instructions
- Preheat the oven to 350ºF and line a baking sheet with parchment paper to prevent the seeds from sticking to the pan.: As the oven warms, you will notice a gradual rise in ambient heat that readies the surface for even toasting, which prevents hotspots from burning the seeds. The parchment paper not only keeps sticking to a minimum, it makes cleanup effortless. A common mistake is skipping the lining and then chasing stuck seeds off the pan with a spatula, which can break them and cause uneven browning. If your oven has uneven spots, rotate the pan halfway through roasting so all seeds get similar exposure.
- Remove any squash pulp from the seeds and transfer them to a fine mesh sieve. Rinse them well with water.: Right away you will see the clinging strings of pulp that can trap moisture, and rinsing in a sieve lets you dislodge them thoroughly. The water will carry away the fibrous bits, leaving behind clean seeds that will roast crisply. Leaving pulp attached often causes steam pockets and uneven cooking, so take the extra moment to clean them well. If the pulp seems stubborn, gently rub the seeds between your fingers under running water until the fibers come away.
- Transfer the seeds to a towel and pat dry, removing as much moisture as you can. Add the dried seeds to a small bowl, and toss with the olive oil, coconut sugar, cinnamon or pumpkin pie spice, and salt.: The rinse removes residual pulp and any slimy film, and you may feel the seeds rub together between your fingers as you swirl them, which is normal. Freshly rinsed seeds will look glossy and will smell faintly of squash. Do not be tempted to rush to the oven while they are still wet, because trapped moisture will steam the seeds rather than toast them, producing a softer texture. Instead, spread them on a towel and press gently to remove excess water.
- Pour the coated seeds on the prepared baking pan, and spread them out into a single layer. Roast for 10 minutes, then remove the pan and stir the seeds. The ones towards the edge of the pan will cook faster than the ones in the middle, so it's ideal if you can help them switch positions for more even cooking. Then return the pan to the oven and bake until the seeds smell like popcorn and look darker, about 5 to 10 more minutes. The seeds won't crisp up until they cool, so it's okay if they don't look crispy right away.: When you pat them, you will notice damp patches disappear and the seeds will lose their sticky feel, which is important for even roasting. Moist seeds can steam on the baking tray and fail to crisp, so thorough drying sets you up for success. A frequent error is overcrowding the towel and not giving seeds space to breathe while drying, which leaves moisture in pockets; spread them out for best results.
- Cool completely on the pan, then serve them as a snack or salad topping. If you're not going to use the seeds right away, store them in an airtight container in the fridge. They will start to become sticky if they sit out at room temperature for too long, but they stay crisp when you store them in the fridge. Leftovers can be stored for up to 1 week when chilled.: As you toss, the oil will slick the seeds and the sugar and spices will cling, creating a fragrant coating that smells sweet and warm. This step builds flavor and promotes caramelization in the oven. Be mindful of coating evenly because clumps of sugar can burn, so shake the bowl and use a spoon to separate seeds as needed. If the mixture looks too wet, add a tiny pinch more seeds to absorb excess oil.
- Pour the coated seeds on the prepared baking pan, and spread them out into a single layer: Spreading into a single layer ensures direct contact with hot air and consistent browning, and you will see the seeds settle into neat little islands across the parchment. Crowding leads to steaming rather than roasting, so resist piling them up. If you notice seeds overlapping, use your fingers or a spatula to nudge them apart so each seed can brown evenly.
- Roast for 10 minutes, then remove the pan and stir the seeds: During the initial roasting you will hear subtle crackling and begin to catch a toasty aroma, signals that the seeds are developing color. Stirring at this point equalizes exposure since seeds at the edges heat faster than those in the center. A common misstep is skipping this stir and ending up with burnt edges and pale middles; gently toss the seeds to redistribute them without smashing them.
- The ones towards the edge of the pan will cook faster than the ones in the middle, so it's ideal if you can help them switch positions for more even cooking: When you rearrange the seeds, you will notice some already sporting a light golden hue while others are still pale, and moving them evens out the final color. This attention to placement prevents overcooking and ensures a uniform texture. Avoid using tongs roughly, because seeds can scatter and overlap, defeating the single layer you created.
- Then return the pan to the oven and bake until the seeds smell like popcorn and look darker, about 5 to 10 more minutes: Around this stage the kitchen fills with a warm, almost corn like scent and the seeds take on deeper color. That popcorn aroma is the best cue you have that they are nearly done, and watching for it prevents overroasting. A common error is leaving them too long in the belief they will crisp more; in reality they crisp as they cool, so pull them as soon as they hit that toasty smell and light brown shade.
- The seeds won't crisp up until they cool, so it's okay if they don't look crispy right away: After removing them from heat, the seeds will firm as they cool and the surface sugars will set, so allow them time on the pan to reach the right texture. You'll notice a transformation from slightly soft to satisfyingly crisp as they drop to room temperature. The biggest mistake here is sampling too early and thinking they are underdone, leading to extra roasting that can burn them; patience pays off.
- Cool completely on the pan, then serve them as a snack or salad topping: As they cool, the aroma deepens and the texture finalizes, making them perfect to sprinkle over greens or enjoy straight from a bowl. If you plan to store them, transfer to an airtight container and chill, because refrigeration helps them stay crisp up to a week. Leaving them at room temperature too long can lead to stickiness, so be mindful of storage to preserve the crunch.
Notes
- Adjust sugar to taste, because 2 teaspoons coconut sugar gives a subtle caramel note; increase slightly if you prefer a sweeter snack but watch closely to avoid burning.
- Use fine salt for even seasoning, sprinkling 1 teaspoon fine sea salt ensures every seed gets some seasoning without large salty pockets.
- Try pumpkin pie spice for depth, swapping the cinnamon for a blend will introduce nutmeg and cloves for a fuller autumn profile without extra effort.
- Keep batches small, roasting one cup at a time helps maintain an even single layer so seeds toast uniformly rather than steaming in a crowded pan.
- Recrisp if needed, if seeds become a bit soft from sitting out, pop them back in a 300ºF oven for a few minutes to revive crunch, watching carefully so they do not burn.