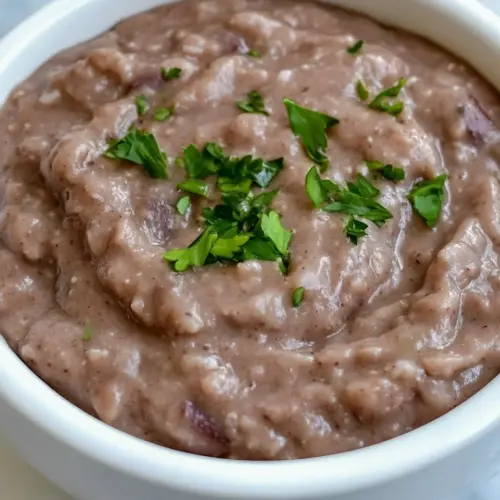
Refried Beans
Refried Beans are creamy, savory, and easy to make for an easy weeknight dinner or snack. This skillet method yields a rich, slightly rustic texture with warm cumin and a glossy finish, perfect for tacos, bowls, or as a dip. Quick to prepare and frugal, these beans are a dependable side that elevates simple meals and invites customization.
Equipment
- Large Skillet
- Potato Masher
- Wooden Spoon
Ingredients
- 2 cups cooked pinto beans, drained with cooking liquid reserved or 1 (15-ounce) can Provide creamy body and authentic flavor, using cooked pinto beans either homemade with reserved cooking liquid or from a 15-ounce can; mash or blend to achieve desired texture and incorporate cooking liquid to adjust thickness while preserving starchiness and fiber.
- 1 tablespoon olive oil Add a subtle fruity richness and help sauté aromatics without burning; heat the olive oil gently to release flavors from onion and garlic and to create a smooth base for frying the mashed beans for better mouthfeel.
- 1/2 cup chopped onion, optional Contribute sweet-savory aromatic notes and soften when cooked; sauté until translucent to build depth, then mash into the beans so the softened onion integrates and enhances overall savory complexity.
- 2 cloves garlic, minced, optional Provide pungent, savory aroma and a layer of depth when minced and briefly cooked; add toward the end of sautéing to avoid bitterness and to release its essential oils into the beans for fuller flavor.
- 1 teaspoon ground cumin Lend warm, earthy, and slightly smoky undertones that complement beans; measure precisely to avoid overpowering, and toast briefly in the pan if desired to amplify its fragrance before mixing into the mash.
- 1 1/2 teaspoons kosher salt Enhance overall seasoning and bring out natural flavors; dissolve evenly into the beans to season throughout, using kosher salt for its clean taste and ease of control when adjusting final seasoning.
- 1 teaspoon ground black pepper Introduce bright, sharp heat and subtle bitterness to balance richness; grind freshly or use pre-ground to finish seasoning, adjusting to taste to create contrast with the creamy beans and salty notes.
Instructions
- Add the olive oil to a large skillet set over medium heat. Add the onion and garlic and saute until tender and translucent. Add beans, cumin, salt, and pepper to the skillet. Add reserved liquid a little at a time until beans are at desired consistency and not dry. Cook until beans are heated throughout. Mash beans with a potato masher or the back of a wooden spoon to your desired texture. Remove from heat and serve.: As the oil warms, you should notice it shimmer slightly and spread easily across the pan surface, which indicates the skillet is ready. The oil functions as the flavor carrier, delivering heat to the onion and garlic while preventing sticking. If the oil smokes, the pan is too hot, so reduce to medium, because overheating will burn delicate aromatics and create bitter flavors. Listen for a very light sizzle when you add aromatics, it tells you the temperature is right. A common mistake is heating the oil too high which leads to rapid browning, instead allow a gentle heat so the vegetables soften slowly and release sweetness.
- Add the onion and garlic and saute until tender and translucent: During this stage, the onion should go from opaque to translucent and the aroma should shift from sharp to sweet and mellow; the garlic will perfume the air. Stir frequently so the pieces cook evenly and no spots brown prematurely. Visually, you want the onion strands to be glossy and soft, not browned or crisp. If the garlic begins to brown quickly, lower the heat and stir, because burnt garlic will add bitterness. A good signal you're doing it right is a gentle, steady sizzling and a rounded aromatic lift without any burnt notes.
- Add beans, cumin, salt, and pepper to the skillet: As you add the pinto beans , you'll hear a soft settling sound and see the beans coat with the oil and spices. The cumin should become fragrant, releasing a warm, earthy scent as it meets the heated oil and beans. Salt will draw moisture from the bean surfaces, slightly loosening them, while black pepper adds a bright bite. Stir to combine so the spices distribute evenly; if the mixture looks dry right away, reserve liquid will be needed. Avoid adding too much salt at once, taste as you go to prevent oversalting.
- Add reserved liquid a little at a time until beans are at desired consistency and not dry: Introduce the reserved cooking or can liquid in small splashes, watching how it changes the texture; the beans will go from clumpy to spoonable and glossy. Stop once you reach a spreadable yet substantial texture, because adding too much liquid will make them soupy and dilute flavor. The right consistency is when a wooden spoon drags through the mixture leaving a visible trail but the beans still hold some body. A frequent error is pouring all the liquid at once, which removes control, so add gradually and pause to assess.
- Cook until beans are heated throughout: Keep the skillet over medium to medium low heat while the beans warm through, and watch for gentle bubbling around the edges which signals even heating. This step helps flavors meld and allows moisture to integrate, improving mouthfeel. Smell and appearance are good guides, you should get a warm, savory aroma and glossy surface without rapid bubbling. Avoid prolonged vigorous boiling because it can break down texture excessively and make the beans gummy; maintain a gentle simmer instead.
- Mash beans with a potato masher or the back of a wooden spoon to your desired texture: As you mash, note the change from whole to creamed, and listen for the soft tearing of beans which indicates tenderness. Mashing by hand gives you tactile control over chunkiness, creating anything from rustic lumps to a smoother spread. The action also incorporates any remaining liquid so the texture becomes cohesive. If you find the mash too stiff, add another splash of reserved liquid, but if too loose, cook a bit to reduce. A common misstep is overmashing which can produce an overly pasty feel; stop when the texture pleases you.
- Remove from heat and serve: Once removed, the beans will continue to settle and thicken slightly as they cool, so serve while warm to retain that soft, glossy quality. Spoon them into a bowl or plate and note the surface sheen, which signals proper oil integration. If holding briefly, cover to keep heat and moisture, because uncovered cooling can form an undesirable skin. Avoid serving them cold right away unless you intend a chilled preparation, because the flavors and mouthfeel are best when the beans are warm and freshly mashed.
Notes
- Control the texture by adding the reserved cooking or can liquid one tablespoon at a time, stopping when the beans reach a spoonable yet substantial consistency.
- Mind the aromatics by cooking onion and garlic gently until translucent and fragrant, because rushed browning creates bitter notes.
- Adjust seasoning last since reduction during cooking concentrates salt, so taste toward the end and correct gradually to avoid oversalting.
- Make ahead by preparing the beans fully and refrigerating, then rewarm them gently with a splash of reserved liquid to revive their creaminess before serving.
- Storage tip store cooled beans in an airtight container for up to four days in the refrigerator, and freeze portions for longer keeping, thawing slowly in the refrigerator before reheating.