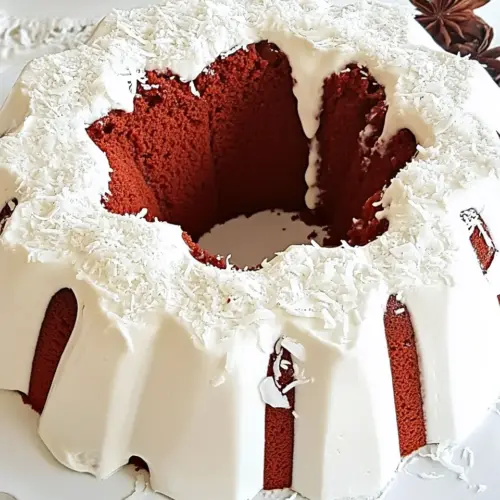
Red Velvet Angel Food Cake with Coconut Cream Cheese Glaze
Red Velvet Angel Food Cake with Coconut Cream Cheese Glaze is a light and airy dessert with a delicate cocoa note and a tangy, creamy coconut glaze. The feather like egg whites create a soft crumb while the cream cheese coconut topping adds rich contrast, making it perfect for celebrations or easy weeknight desserts. Try it for a show stopping yet surprisingly light cake you will want to bake again.
Equipment
- Stand mixer or hand mixer
- 9.5 to 10 inch angel food cake pan
- Sieve
- Spatula
- Mixing Bowls
Ingredients
- 1 cup AP flour Provide structure and tenderness by forming the cake's base; sifts easily and combines with cocoa to create the light crumb of the angel food-style cake. Measure accurately to maintain the delicate balance between dry and whipped components, ensuring proper rise and texture.
- 3 tablespoons unsweetened cocoa powder Add deep chocolate flavor and enhance the red velvet profile while keeping the batter light; whisk with flour to distribute evenly. Use unsweetened cocoa to avoid extra sweetness and preserve the cake's characteristic subtle chocolate note.
- 1 1/2 cups sifted granulated sugar Sweeten and stabilize the whipped egg whites while contributing to tenderness; sift to remove lumps for a smooth incorporation. Gradually beat into whites to create glossy, stable peaks that trap air and support the cake's airy lift.
- 1 1/2 cups egg whites at room temperature (10-12 eggs) Provide the aeration and lift essential for an angel food-style cake, supplying volume when whipped to stiff peaks. Use room-temperature whites for maximum expansion and better foam stability during whipping and folding.
- 1/2 teaspoons salt Enhance flavor and strengthen meringue stability slightly; dissolve into the egg whites for balanced seasoning. Keep quantity precise to avoid altering the egg white foam's ability to form firm peaks.
- 1 teaspoon vanilla extract Impart warm, fragrant flavor and subtle sweetness while complementing cocoa and coconut notes; fold into the meringue gently. Use a measured amount to avoid overwhelming the delicate angel food texture.
- 1 teaspoon cream of tartar Stabilize beaten egg whites and help achieve firm, glossy peaks that maintain structure during baking; add early in whipping. Maintain accurate measurement to prevent an overly firm or grainy foam.
- 1 teaspoon cinnamon Introduce a warm, aromatic undertone that complements cocoa and cream cheese elements; sprinkle into the dry mix or meringue as directed. Use modestly to avoid dominating the cake's subtle flavor balance.
- 1 -2 tablespoons red food coloring Provide the classic red hue associated with red velvet while contributing a touch of acidity; mix into batter until color is uniform. Adjust amount to achieve desired shade without affecting the cake's consistency.
- 4 oz . cream cheese, softened Add rich, tangy creaminess to the glaze, lending body and a slight savory balance to the sweet coconut cream; soften for smooth blending. Beat until creamy to ensure a silky glaze that complements the cake's lightness.
- 1 can FULL FAT coconut milk refrigerated at least 24 hours, (I recommend Chaokoh) Contribute thick, coconut-rich liquid when chilled, producing a creamy, dairy-free alternate to heavy cream for the glaze. Refrigerate to separate solids for a whipped, luscious coconut cream component that enhances tropical flavor.
- 1 teaspoon vanilla extract Enhance vanilla notes and round out the glaze with sweet, floral aroma; blend into the cream cheese–coconut mixture for cohesion. Use measured vanilla for consistent flavor without overpowering the coconut or cream cheese.
- 1 tablespoon lemon juice Add bright acidity to the glaze, cutting richness and preventing blandness while helping the glaze set slightly; whisk into the dairy mixture. Use fresh juice for the best flavor and to balance the sweetness of powdered sugar.
- 1 cup Powdered sugar Sweeten and thicken the glaze while providing a smooth, dust-like texture that dissolves easily; sift if necessary to avoid lumps. Gradually incorporate to reach the desired glaze consistency without becoming overly runny.
- toasted coconut Provide crunchy, toasty garnish and a complementary coconut flavor that echoes the glaze's profile; sprinkle over the finished cake for texture contrast. Toast gently to enhance aroma without burning delicate flakes.
- any fresh fruit such as strawberries, pineapple, blueberries, etc. Offer fresh, bright flavor and optional tartness that balances the sweet, rich cake and glaze; serve as a colorful, aromatic accompaniment. Choose seasonal fruits for best flavor and visual appeal, arranging them attractively on the plate.
Instructions
- Line the bottom of an ungreased 9.5/10-inch 16 cup capacity nonstick angel food cake pan with parchment paper (cutting out the center circle).: The parchment prevents sticking to the center tube while keeping the pan ungreased so the batter can cling to the sides for rise. You'll notice the paper sits like a soft collar on the pan, and once the cake cools the crumb will release cleanly. A common mistake is greasing the pan which prevents proper rise, so resist the urge to butter or oil. If your paper shifts, press it gently to fit the curve, and ensure the center is cut precisely so the cake bakes evenly.
- Preheat oven to 350 degrees F.: Preheating ensures the oven is at a steady temperature the moment the batter goes in, which helps the cake rise quickly and set properly. You’ll hear the oven click and then settle into a soft, steady hum; that steady heat encourages even lift. Avoid opening the door during the first 30 minutes, because sudden drafts can collapse the delicate structure. Use an oven thermometer if you suspect your oven runs hot or cool to avoid over or under baking.
- Whisk together flour, cocoa powder and 3/4 cups sugar in a medium bowl. Set aside.: Combining the all purpose flour , unsweetened cocoa powder , and part of the granulated sugar creates a dry mix that will be folded into the whites without deflating them. Whisk until the color is uniform and you hear a faint rustle of the whisk, indicating the ingredients are well aerated. A lump here will create a streak of flour in the cake, so take the time to sift or whisk thoroughly. Avoid adding this mix directly to the mixer later without sifting, which can cause clumps.
- Add egg whites, salt, vanilla, cream of tartar, cinnamon and food coloring to the bowl of a stand or hand mixer. Beat on medium high speed until soft peaks form, about 5 minutes.: When you whip the egg whites , they transform visually from clear and glossy to thick and pale. The small bubbles become larger then stabilize into soft peaks that hold shape but curl at the tip. You will smell a faint sweetness and the bowl will hum as the mixer spins. If your whites refuse to form peaks, make sure there’s no yolk contamination and that the bowl was spotless; oil residue is a frequent culprit.
- Lower the speed to medium-low and gradually beat in 3/4 cups sugar (NOT the flour/sugar/cocoa mix) 2 tablespoons at a time.: Adding the remaining granulated sugar slowly stabilizes the foam and creates a glossy, satiny meringue. You will see the texture change from frothy to smooth, and the sound of the mixer becomes fuller. Take your time and resist dumping the sugar, because adding it too fast can deflate the air you've built. A common trap is overbeating after sugar addition, which can dry the whites; stop when they look smooth and glossy.
- Turn off mixer and sift about 1/4 of the sugar/flour/cocoa mixture over the egg whites (by holding a sieve over the mixing bowl) and gently fold it into the batter with a rubber spatula. Repeat with remaining mixture 1/4 at a time until it's all incorporated.: Folding carefully keeps the air you’ve whipped into the whites while incorporating the dry mix. The batter will change from fluffy peaks to a slightly thicker ribbon, and you should hear a soft scraping sound as the spatula moves. Work slowly and rotate the bowl with each fold to ensure even distribution. Avoid stirring vigorously which will collapse the foam; if you see streaks of dry flour, continue folding gently until fully blended.
- Pour the batter into your ungreased tube pan, run a knife through the batter, smooth top and tap the pan a couple of times on the counter to release any air bubbles.: As you pour, the batter should glide like satin into the pan. Running a knife or offset spatula through the batter evens the surface and brings trapped bubbles to the top where a gentle tap removes them. You may hear a soft plink as air pockets escape. Over tapping can cause uneven settling, so two or three firm taps are sufficient. If you see large bubbles, pop them with the knife tip and smooth again.
- Bake at 350 F 45 to 55 minutes or until the cake springs back when pressed. Remove the cake from the oven and invert the pan onto its legs. If the pan does not have legs, invert pan over the neck of a sturdy bottle (so the air can circulate and cool the cake). Cool inverted cake for 2-3 hours. When cake is completely cooled, gently run a knife along its edges to loosen.: During baking the kitchen fills with a warm, toasty aroma, and the top will turn matt and set. The spring back test means the cake's surface regains shape with a gentle press. Inverting keeps the cake from collapsing as it cools, and you may hear a faint settling sound as steam escapes. A big error is trying to unmold while warm which can deflate the cake; patience is key. Use a slender knife and run it slowly along the tube and outer edge to release without tearing.
- While the cake is cooling, make the Coconut Cream Cheese Glaze. Scoop the coconut cream that has separated to the top of your coconut milk can (about 1/2 cup) into to the bowl of your hand or stand mixer. Reserve remaining coconut milk. Add remaining Coconut Cream Cheese Glaze Ingredients and beat until smooth. Taste and add additional powdered sugar if you like it more sweet, more lemon, if you like it more tart. Store in the refrigerator while cake cools and it will thicken. When ready to serve, mix in a little reserved coconut milk if you want thinner glaze.: The glaze begins with thick coconut cream that whips into a lush base, and when combined with softened cream cheese it becomes silky and tangy. You will sense a bright lemon lift and a smooth, rich mouthfeel. Chill it to let it set; cold glaze spreads and clings to the cake more attractively. A common issue is over thinning the glaze with too much reserved coconut milk ; add small amounts at a time if you need a looser consistency.
- To serve, either pour Coconut Cream Cheese Glaze over Cake, reserving some glaze to pour on individual servings or pour Coconut Cream Cheese Glaze directly onto individual servings. Garnish cake with fresh fruit and toasted coconut (optional).: The final moment is sensory joy, with the glossy glaze cascading over the aerated crumb and the crunchy toasted coconut adding contrast. Fresh fruit contributes bright accents and juiciness. If you slice too soon you risk smearing the glaze, so let it set briefly in the fridge if you prefer neat slices. For dramatic presentation, reserve extra glaze for individual plates so each serving is glossy and inviting.
Notes
- Increase color intensity Add up to one additional tablespoon of red food coloring if you want a deeper hue, mixing in gradually until you reach the desired shade.
- Adjust glaze sweetness Taste the cream cheese and coconut base and add more powdered sugar in small amounts if you prefer a sweeter glaze, chilling briefly between additions to check texture.
- Make the glaze thinner Stir in a tablespoon of the reserved coconut milk at a time until you reach a pourable consistency, being careful not to overthin which can cause sliding.
- Add fresh fruit accents Top slices with seasonal fruit like strawberries or blueberries for bright flavor contrasts and natural sweetness, arranging them just before serving so they stay fresh.
- Boost toastiness Toast shredded coconut in a dry skillet until golden and fragrant, then sprinkle on top for crunchy contrast and an aromatic finish.