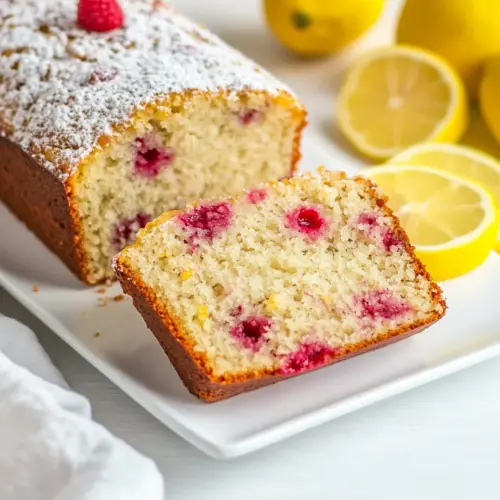
Raspberry Lemon Loaf
Raspberry Lemon Loaf is a bright, tender loaf that balances tangy lemon and sweet raspberries. This easy, moist loaf uses pantry staples and yields a soft crumb with pockets of juicy fruit, perfect for brunch or an easy morning treat. Make it when berries are ripe for a fresh, crowd pleasing bake you're sure to reach for again.
Equipment
- 9×5-inch loaf pan
- Mixing Bowls
- Whisk
- Wire Rack
Ingredients
- 1 3/4 cups all-purpose flour Provides structure and bulk to the loaf, creating the crumb and framework when mixed with liquids and leaveners. Sifts or measures accurately to ensure proper texture and avoid a dense cake. Combines with fats and eggs to form the batter and maintain moisture during baking.
- 1/2 cup granulated white sugar Adds sweetness and helps with browning and tenderizing the loaf by interacting with fats and eggs. Dissolves into the wet ingredients to distribute sweetness evenly without leaving grittiness. Balances the tartness of lemon and raspberries for a pleasant overall flavor.
- 2 teaspoons baking powder Acts as a leavening agent to help the loaf rise by producing gas when heated, lightening the crumb. Measures precisely to avoid over-risen or metallic flavors and to maintain proper texture. Works in combination with baking soda to provide lift at different stages of baking.
- 1 teaspoon baking soda Provides additional leavening and reacts with acidic components to create lift and a tender crumb. Works with yogurt and lemon to activate its rising properties, ensuring an even internal texture. Use the specified amount to prevent an overly soapy or bitter taste.
- 1/2 teaspoon salt Enhances and balances flavors while strengthening gluten formation slightly and controlling yeast and chemical reactions. Helps amplify sweetness and acidity, ensuring the loaf isn’t flat or bland. Use measured amounts to avoid making the batter taste salty.
- 1 cup low-fat lemon yogurt Contributes moisture, tang, and acidity that tenderizes the crumb and activates baking soda for lift. Adds lemon flavor if using lemon yogurt, complementing the lemon zest for a brighter loaf. Incorporate gently to avoid overmixing but ensure even distribution throughout the batter.
- 1/4 cup vegetable or canola oil Provides fat to tenderize the crumb, promote moistness, and aid in a soft mouthfeel without adding dairy. Helps carry flavors and encourages even browning of the crust. Substitute flexibility (vegetable or canola) maintains neutral taste and consistent texture.
- 1 large egg Adds richness, structure, and emulsifying properties that bind ingredients and contribute to a fine crumb. Helps trap air when beaten lightly, improving rise and tenderness. Use whole egg size as specified to maintain proper moisture and consistency.
- 2 large egg whites Contributes additional protein and liquid while reducing fat compared with whole eggs, helping to lighten the loaf and improve structure. Works with the large egg to achieve desired texture without making the batter too dense. Beat slightly before adding to ensure even incorporation.
- 1 teaspoon finely grated lemon zest Provides concentrated lemon aroma and bright citrus oils that intensify the lemon flavor without adding extra liquid. Finely grate to avoid bitter white pith and distribute fragrance evenly through the batter. Use the specified amount to balance tartness from raspberries and yogurt.
- 1 cup fresh raspberries (or frozen) Adds bursts of sweet-tart flavor and moisture pockets that create texture contrast and visual appeal in the loaf. Toss frozen raspberries briefly to remove excess moisture or fold fresh gently to avoid crushing and bleeding color. Distribute evenly to prevent sinking and ensure an even fruit distribution.
Instructions
- Preheat the oven to 350°F. Spray a 9×5-inch loaf pan with non-stick spray and set aside.: As the oven warms you will notice a dry, toasty aroma that signals readiness, and the consistent heat is crucial for an even rise. Preheating ensures the loaf begins cooking immediately, which promotes oven spring and a tender crumb. A common mistake is placing batter into a cool oven, which can lead to a dense center. If your oven runs hot, consider using an oven thermometer to verify the actual temperature.
- In a large bowl, whisk together the flour, sugar, baking powder, baking soda and salt. Set aside.: The dry mixture should look uniformly pale and slightly fluffy, and whisking aerates the flour which improves texture. This step distributes the leaveners and salt evenly so pockets of salty or flat spots don't form. Avoid sifting unnecessarily many times, which can dry the mix; the key is even distribution. If you see clumps of flour , break them up gently with the whisk to avoid dense pockets.
- In a medium bowl, whisk together the yogurt, oil, egg, egg whites, and lemon zest. Add the wet ingredients to the flour mixture and stir just until moistened. Gently stir in the raspberries.: The wet mix will look glossy with tiny flecks of bright lemon zest , and you may catch a fresh citrus perfume as you whisk. Emulsifying the oil into the yogurt first helps it incorporate smoothly, preventing streaks of oil in the batter. A common slip is whisking too vigorously which can create too much air; moderate whisking keeps texture even. If your wet ingredients are cold, let them sit briefly at room temperature so they blend without chilling the batter.
- Pour the batter into the prepared pan and bake for 50 minutes, or until a toothpick inserted in the center of the loaf comes out clean. Cool the loaf in the pan for 10 minutes. Then remove it from the pan to a wire rack, and let it cool completely before slicing.: At this stage you should see the mixture come together into a thick, slightly lumpy batter, with no visible pockets of dry flour . The reason for minimal stirring is to avoid developing gluten, which would make the loaf tough rather than tender. The correct texture will be a soft batter that ribbons slightly when lifted. Overmixing is the most common error here, so stop as soon as streaks disappear.
- Gently stir in the raspberries: The batter will quiet down visually as the berries nestle within it, and you may hear the soft plop of berries settling in the bowl. Be gentle to keep the raspberries intact, preserving little pockets of vibrant color and juiciness. If you crush them while stirring, the loaf will take on a pink hue and lose those satisfying bursts. If using frozen raspberries , fold them in while still slightly frozen to limit bleeding.
- Pour the batter into the prepared pan and bake for 50 minutes, or until a toothpick inserted in the center of the loaf comes out clean: As the loaf bakes, aromas of warm citrus and sugar will rise from the oven, and the top should become golden with a slight crust. The interior sets as moisture evaporates, and the specified time helps ensure an even bake; ovens vary however, so test with a toothpick near the center. Common mistakes are removing the loaf too early or opening the oven repeatedly which causes temperature fluctuations. If the top browns too quickly, tent with foil until the center tests done.
- Cool the loaf in the pan for 10 minutes: During this resting time you will notice the loaf relax slightly and steam escape, which continues the cooking gently and prevents the loaf from falling apart when removed. This short cool down stabilizes the crumb and makes extraction easier. A pitfall is leaving it too long, which can cause condensation on the pan and a soggy bottom; stick to roughly 10 minutes.
- Then remove it from the pan to a wire rack, and let it cool completely before slicing: On the rack the loaf cools evenly and air circulates around it, preventing moisture buildup that can make slices gummy. As it cools you may detect the final perfume of lemon and raspberries , and the crumb firms up for neat slicing. Cutting too early is the usual mistake, which yields a crumb that drags and tears; patient cooling leads to clean, attractive slices.
Notes
- Protect the top: If the loaf begins to brown during baking, cover it lightly with foil until finished, which prevents over darkening while the center continues to bake.
- Frozen berry handling: Use frozen raspberries straight from the freezer and fold them in gently to limit bleeding, preserving the pale crumb and speckled appearance.
- Room temperature ingredients: Bring eggs and yogurt to room temperature before mixing to help the batter come together smoothly and create a more even crumb.
- Measure flour correctly: Spoon flour into the measuring cup and level with a knife to avoid packing, which keeps the loaf tender rather than dense.
- Test for doneness: Insert a toothpick near the center at the suggested time, and if it comes out with a few moist crumbs rather than wet batter, the loaf is ready.