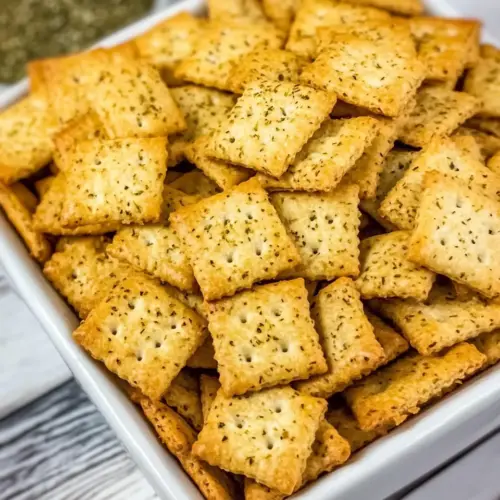
Ranch Crackers with Dill
Ranch Crackers with Dill are a crispy, savory snack that blends four types of crackers with a herby, smoky spice mix. This easy, crowd pleasing snack delivers crunchy texture, bold ranch flavor, and a bright dill finish, perfect for parties or casual nibbling. Make ahead for deeper flavor and a hassle free option for entertaining.
Equipment
- Mixing Bowl
- Measuring Cup
- Whisk
- Rimmed half sheet pan
- Parchment Paper
- Spatula
Ingredients
- 4 cups Cheez-It crackers Provide a crunchy, salty base to the mix and contribute a cheesy flavor that complements the ranch seasoning; break into uniform pieces for even coating and baking.
- 4 cups oyster crackers Add small, airy crunch and mild saltiness that soaks up the seasoned oil for balanced texture throughout the snack mix.
- 4 cups Triscuit crackers, snapped in half (81/2 ounce box, see note) Introduce a hearty, woven-cracker crunch and rustic texture when snapped in half, helping the seasoning cling to irregular surfaces during tossing and baking.
- 3 cups Ritz crackers (about 60 full-sized crackers, 2 sleeves, see note) Provide flaky, buttery layers that absorb the seasoned oil and add a tender, rich bite that contrasts the other crisp crackers.
- 8 tablespoons unsalted butter, melted Bind the seasonings to the crackers while adding a rich, creamy mouthfeel; melt completely to ensure even distribution and prevent sogginess.
- 3/4 cup regular olive oil (not extra virgin) Deliver a neutral oil base that carries the dry seasonings and liquid smoke, enabling even coating without overpowering delicate flavors.
- 2 tablespoons Worcestershire sauce Impart a deep, savory umami note that enhances overall flavor complexity and helps meld the ranch mix with the fats for better adhesion.
- 1 ounce packet ranch seasoning/dressing mix (I use Hidden Valley) Contribute concentrated tangy, herby savory seasoning that defines the ranch flavor profile and seasons the entire cracker mixture evenly.
- 2 tablespoons dried dill weed Provide bright, slightly sweet herbal notes that reinforce classic dill ranch flavors and add an aromatic lift to the snack.
- 1/2 to 1 teaspoon table salt (see note) Allow precise control of overall saltiness; sprinkle according to taste to avoid over-salting the mixed crackers.
- 1/2 to 1 teaspoon garlic powder (depending on how garlicky you want it) Add a warm, aromatic garlic presence; adjust amount to achieve the desired pungency without dominating other spices.
- 1/2 teaspoon onion powder Offer a sweet, savory onion background that deepens overall flavor and supports the ranch seasoning base.
- 2 teaspoons hickory liquid smoke (I use Colgin, see note) Deliver smoky, woody aroma and a barbecued finish that complements the hickory profile and enhances savory depth.
- 1 teaspoon chili powder Add a mild earthy heat and subtle warmth that rounds out the spice mix without overwhelming the ranch seasoning.
- 1 tablespoon crushed red pepper flakes Introduce visible heat and peppery bite with textured flakes that create bursts of spiciness and visual contrast in the snack.
- 1/4 teaspoon ground chipotle powder Provide a smoky, moderately spicy chile note that layers with other peppers to give a rounded, lingering finish.
Instructions
- Preheat oven to 250°F. Line two rimmed half sheet pans with parchment paper and set aside.: Warmth fills the kitchen as the oven comes up to 250°F , and you'll notice the slightly warm, dry air that helps the crackers toast evenly. This low temperature is important because it allows the butter and oil to set into the crackers without scorching them, leading to uniform crispness. A common mistake is preheating to a much higher temperature, which can quickly brown edges while leaving centers underdone. Check your oven thermometer if the heat seems inconsistent, and make sure racks are centered so heat circulates properly.
- Add Cheez-It, oyster, Triscuit, and Ritz crackers to a very large bowl. If you don't have one big enough, split the mixture between two bowls, or work in batches.: The parchment creates a nonstick surface and keeps cleanup easy, and when you spread crackers they'll slide without sticking. Lined pans also reflect heat more evenly under the crackers, preventing hot spots from causing burnt bits. Avoid skipping this step, as crackers can adhere to bare pans and tear when you try to move them, making transfer to storage messy.
- In a medium bowl or liquid measuring cup, whisk together melted butter, olive oil, Worcestershire sauce, ranch seasoning, dill, salt, garlic powder, and onion powder. If you're making the smoky/spicy version, also whisk in the liquid smoke, chili powder, crushed red pepper flakes, and chipotle powder.: When you dump in the mixed crackers , you'll hear a satisfying rustle and see a colorful scatter of shapes. Using a very large bowl gives you room to toss without spilling, which ensures the seasoning coats everything evenly. If your bowl is too small and you cram the crackers, the coating will clump and distribute unevenly, leaving some pieces underflavored. If needed, split the mix between two bowls so you can toss freely.
- Gradually pour the butter mixture over the crackers, tossing gently with a spatula until evenly coated. Be sure to stir the seasonings up from the bottom of the butter mixture before you pour, especially if you're batching or working with two bowls of crackers.: As you whisk, the mixture becomes glossy and aromatic, releasing the herbal scent of dill and the tang from the ranch seasoning . Combining wet and dry in a measuring cup helps the powders hydrate and prevents pockets of seasoning. If you're going smoky or spicy, add the liquid smoke, chili powder , crushed red pepper, and chipotle here so those flavors emulsify into the fat. A frequent error is not whisking long enough, which can leave lumps of seasoning that drop onto crackers in concentrated spots, so whisk until smooth and evenly blended.
- Divide the crackers between the two prepared pans and spread them out evenly. Bake for 30 minutes, stirring every 10 minutes, until lightly golden and fragrant.: Pouring slowly ensures the butter and oil coat each cracker rather than pooling on the bottom. Tossing with a spatula helps lift crackers from the bowl bottom, so the seasoning reaches every piece. You should see a light sheen on the crackers and smell the spices coming alive. One mistake is dumping the fat too quickly, which can saturate the bottom crackers and leave the top ones dry. If working in two bowls, stir the fat before pouring because heavier bits settle at the bottom.
- Let cool completely, then transfer to an airtight container. Store at room temperature for up to 1 week. We find that the flavor of the crackers is best after an overnight rest.: Spread the coated crackers in a single layer or a shallow layer so hot air circulates and each piece gets toasted. When evenly spread, you should see small gaps and a uniform bed of crackers, not crowded piles that steam instead of crisping. This step matters because crowded pans cause uneven texture and some pieces may remain soft. Use two pans rather than piling everything on one to ensure consistent results.
- Bake for 30 minutes, stirring every 10 minutes, until lightly golden and fragrant: The oven will fill with a toasty, herby aroma as moisture leaves the crackers and the coating sets. Stirring every 10 minutes is key, it redistributes the crackers so edges that brown faster move inward and everything finishes uniformly. You are looking for a light golden tint and a pronounced fragrant smell, not deep browning. A common mistake is skipping the stirs, which can leave sections overly brown while others are pale. If you see dark spots, reduce the oven temperature slightly on future batches.
- Let cool completely, then transfer to an airtight container: Cooling allows the coating to firm up and prevents trapped steam from making the crackers soft. As they cool you will notice the crunch tighten under your teeth and the flavors mellow into a cohesive snack. Store at room temperature in an airtight container for best texture. If packed warm, condensation can form and ruin the crispness, so cooling fully is essential for shelf life and crunch.
- Store at room temperature for up to 1 week: Over the first day the flavors continue to meld, often tasting best after an overnight rest. Keep the container sealed and away from humidity to maintain crispness. A typical misstep is leaving the container open or in a humid spot, which causes the crackers to lose texture quickly. For longest freshness, keep them in a cool, dry cupboard.
- We find that the flavor of the crackers is best after an overnight rest: Overnight rest allows aromatic powders to hydrate and the fats to fully set into the crackers, rounding out the seasoning profile. After resting, you'll notice subtler background notes and a more integrated taste compared with right out of the oven. If you serve them immediately, they are still enjoyable, but the flavors will continue to develop, so plan ahead when hosting.
Notes
- Reduce salt if your crackers are already salty, start with 1/2 teaspoon and increase after tasting, because over salting is harder to correct than undersalting.
- Increase garlic by adding up to 1 teaspoon of garlic powder when you want a punchier savory profile, and mix thoroughly so it distributes evenly and does not concentrate.
- Tweak smokiness by starting with 1 teaspoon of liquid smoke if your brand is strong, and add more sparingly, because too much can overpower the other spices.
- Control heat by adjusting the crushed red pepper flakes and chipotle powder, use half the amount first if serving kids or guests with low spice tolerance.
- Make it milder by omitting the chili and chipotle powders, relying on the ranch and dill for flavor balance that remains bright without heat.
- Try different crackers while keeping quantities the same, substitute similar texture crackers but keep the Triscuit like component for that woven hold on seasonings.