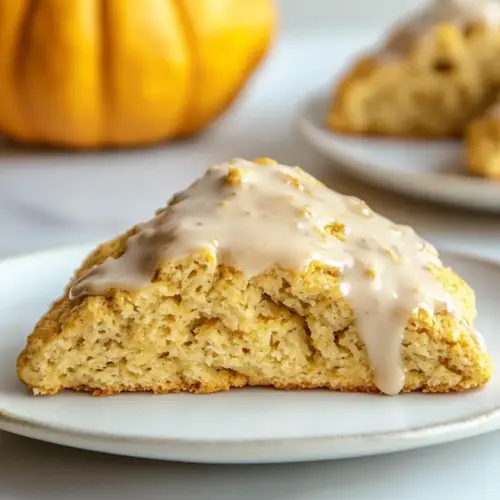
Pumpkin Scones with Espresso Glaze
Pumpkin Scones with Espresso Glaze are tender, warmly spiced scones topped with a bold coffee glaze. The texture is flaky from cold butter, and the espresso cuts through the sweetness for a balanced bite, perfect for an easy weekend brunch or a cozy fall breakfast. Make them for a crowd pleasing treat that feels both rustic and refined.
Equipment
- Baking Sheet
- Parchment Paper
- Large Bowl
- Smaller bowl
- Whisk
- Knife
Ingredients
- 2 cups all-purpose flour Provide structure and bulk to the scones by giving them a tender crumb; sifted or measured properly to ensure even texture and proper hydration.
- 1/3 cup brown sugar Add sweetness and a hint of caramel depth to the dough while also helping with browning; can be packed lightly to avoid over-sweetening.
- 3 teaspoons pumpkin pie spice Impart warm, aromatic flavors of cinnamon, nutmeg, ginger, and cloves to create the signature pumpkin spice profile; distribute evenly throughout the dry mix.
- 1 teaspoon baking powder Leaven the scones gently to produce lift and lightness while working with baking soda for balanced rise; combine with dry ingredients before cutting in the butter.
- 1 teaspoon kosher salt Enhance overall flavor balance and amplify sweetness while also affecting gluten development; use kosher for consistent salinity across batches.
- 1/2 teaspoon baking soda React with acidic components like pumpkin to produce additional lift and tenderize the crumb; ensure even mixing with other dry ingredients.
- 1/2 cup pumpkin puree Provide moisture, pumpkin flavor, and richness while contributing to the tender texture; add to wet ingredients and fold in until just combined.
- 1 large egg, lightly beaten Bind the wet ingredients and add richness for a flaky, cohesive dough while contributing to browning; lightly beaten to distribute yolk and white.
- 2 tablespoons heavy cream Increase tenderness and fat content to make the scones richer and softer; fold into wet mixture or brush for added moisture before baking.
- 2 tablespoons milk Adjust dough consistency and contribute to tenderness without overpowering richness; add with other liquids to reach proper dough texture.
- 3 teaspoons vanilla extract Lend aromatic sweetness and depth to the scone batter and the glaze if used; mix into wet ingredients to evenly distribute flavor.
- 1/2 cup cold unsalted butter, cut into pieces Provide cold fat that, when cut into the flour, creates flaky layers and tenderness in the scone interior; keep cold pieces to promote flakiness.
- 2 tablespoons melted butter, for brushing Brush on top to add a glossy finish, enhance browning, and help coarse sugar adhere; apply immediately after baking for best effect.
- 1 1/2 cups powdered sugar Sweeten the espresso glaze and add a smooth, creamy texture while balancing bitterness; sift to avoid lumps and reach desired glaze consistency.
- 2 ounces freshly brewed espresso Deliver concentrated coffee flavor and a bold, slightly bitter counterpoint to the sweet glaze; cool slightly before mixing with powdered sugar.
- 1 teaspoon milk Thin the glaze slightly and add a touch of creaminess for smoother texture and sheen; stir in small amounts to reach desired pourable consistency.
- 1/2 teaspoon vanilla extract Provide a subtle floral and sweet lift to the glaze, deepening the overall aromatic profile; add after espresso to preserve delicate flavor.
- coarse sugar, for sprinkling on top Add a sparkling, crunchy finish and visual appeal to the scone tops while providing a pleasant textural contrast to the tender interior.
Instructions
- Preheat the oven to 425 degrees F. Line a baking sheet with parchment paper.: Warmth hits first, and you will notice the house feels cozier as the oven comes up to temperature. The initial high heat encourages the scones to puff and develop a light crust while the interior steams and sets. A lined baking sheet prevents sticking and promotes even browning. Common mistake to avoid, do not skip preheating since placing dough in a cool oven leads to dense scones rather than those with lift.
- In a large bowl, whisk together the flour, sugar, pie spice, baking powder, salt, and baking soda.: You will smell the spice right away, and the dry mixture should look uniform with no clumps. Whisking distributes the leaveners and spices evenly so every bite tastes balanced. This step matters because uneven distribution can create salty pockets or uneven rise. A frequent error is failing to break up brown sugar clumps, which can leave sweet dense spots, so take a moment to fluff the brown sugar beforehand.
- In a smaller bowl, whisk together the pumpkin, egg, cream, milk and vanilla extract.: The wet ingredients will form a smooth, slightly glossy mixture with a warm orange hue. Whisking blends the egg and dairy so they incorporate easily into the dry mix, preventing streaks of unmixed pumpkin. This technique helps avoid overworking the dough later. One mistake to watch for is adding too much liquid; the dough should come together but remain slightly shaggy, not sticky.
- Add the small cold butter pieces to the bowl of dry ingredients. Use a fork, pastry cutter or your fingers to cut in the butter until it forms coarse crumbs. You want the butter in small pieces and evenly distributed through the flour.: As you cut in the butter , the mixture will begin to resemble coarse sand with pea sized bits throughout, and those morsels are what create flaky pockets when baked. The visual cue is small lumps of butter no larger than a pea. This matters because warm or overworked butter will melt into the mixture, producing dense scones. Avoid the common error of letting your hands warm the butter too much, use a tool or cold fingers to preserve those pieces.
- Add the wet ingredients. Mix just until a dough forms, bringing it together with your hands. Turn onto a lightly floured surface and knead gently once or twice.: When the wet and dry combine, you will feel the dough come together into a cohesive mass, slightly tacky but not sticky. The gentle knead should be brief, and you will see a smooth surface form; this preserves the flaky texture. The why is simple, over-kneading develops gluten and will toughen the scones, so stop as soon as the dough holds. A usual mistake is working the dough too long because it becomes elastic and loses tenderness.
- Divide the dough in half and pat each into a 6-inch round circle. Brush each scone with melted butter. Cut each round into 4 or 6 slices.: Patting yields even thickness and a neat, bakery style look; you will feel the dough compress into a consistent disc. Brushing with melted butter adds shine and encourages a golden top while also enhancing flavor. Use a sharp knife for clean cuts, pressing straight down to avoid crumbling. Watch out for making the rounds too thin, which results in overbrowned edges, or too thick, which can underbake in the center.
- Bake the scones for 12 to 14 minutes, until the tops are slightly golden. Let them cool for a few minutes, then drizzle with the glaze and top with the coarse sugar. Let the glaze set for 10 minutes, then serve!: As they bake, you will hear a faint hush from the oven and the tops will shift from pale to a warm golden tint, and that visual cue tells you they are ready. Cooling briefly helps the crumb finish setting so the glaze does not sink in. The glaze adds a glossy finish and that bright espresso note, so wait the recommended time before serving. A common pitfall is removing them too early; the centers can collapse if underbaked, so ensure the tops are lightly golden.
- Whisk together the ingredients until a smooth, drippy glaze forms. If the mixture is too thin, you can thicken it by adding a little more powdered sugar. If it seems too thick, add 1 teaspoon of espresso or milk at a time, whisking to combine. Drizzle over the scones.: The glaze should fall in ribbons from your spoon and create an appealing sheen on the scones, carrying the aroma of fresh espresso . Adjusting consistency matters because too thin a glaze runs off and makes the bottoms soggy, while too thick looks clumpy and will not spread. A typical error is adding too much liquid at once when thinning, so always add in tiny increments and taste as you go to balance sweetness with the coffee bite.
Notes
- Measure flour correctly to avoid dense scones, spooning into the cup and leveling off rather than scooping directly with the measuring cup.
- Keep butter cold to create flaky pockets, cutting it into small pieces and returning to the fridge if it softens while working.
- Gentle handling prevents toughness, so mix until just combined and knead only once or twice for a tender crumb.
- Fresh espresso lifts the glaze, so brew and cool it briefly rather than using stale coffee or instant, for a brighter finish.
- Slice cleanly using a sharp knife for even wedges, wiping the blade between cuts if the dough sticks to maintain neat edges.