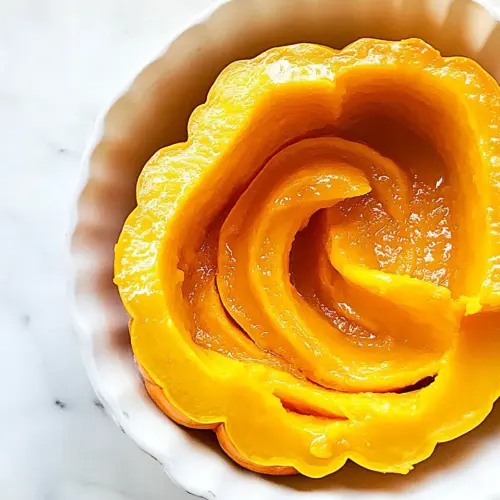
Pumpkin Purée
Pumpkin Purée delivers creamy, naturally sweet roasted pumpkin flavor, perfect for baking and savory dishes alike. This easy method yields silky texture and deep, caramelized notes that canned versions lack, making it ideal for easy weeknight dinners and seasonal baking. Make a batch to freeze for quick recipes and enjoy the richer, fresher pumpkin taste each time you cook.
Equipment
- Oven
- Rimmed Baking Sheet
- Food Processor
- High Speed Blender
Ingredients
- 1 4-6 pound sugar pumpkin Select a firm, 4-6 pound sugar pumpkin for its sweet, dense flesh ideal for smooth purées; it yields the best texture and flavor compared with carving pumpkins. Cut, seed, and roast or steam until tender, then scrape or puree to achieve a creamy consistency. Store leftover purée tightly sealed and refrigerate for up to a week or freeze in portions for longer shelf life.
- 1 tablespoon high-heat oil optional Brush with high-heat oil if roasting to promote even browning and to prevent sticking; using a neutral oil allows the pumpkin’s natural flavor to remain prominent. Apply sparingly to the cut surfaces or pan to encourage caramelization, which enhances sweetness and depth in the finished purée. Omit if steaming or when avoiding added fats, as it is optional for texture and flavor.
- 1 teaspoon salt optional Season with salt optionally to enhance the pumpkin’s inherent sweetness and round out flavors in the purée; a small amount can brighten the overall taste without making it salty. Sprinkle lightly before or after cooking and adjust to taste, keeping in mind that salt amplifies other seasonings and subsequent uses in recipes. Use sparingly when purée will be incorporated into sweet preparations to avoid overpowering delicate flavor.
Instructions
- Preheat oven to 400 degrees and lightly oil a rimmed baking sheet.: The oven should be fully heated so the pumpkin begins to roast immediately, encouraging gentle caramelization on the cut surfaces. As the oven comes to temperature you will notice it warms the kitchen with a dry heat that helps evaporate excess moisture, concentrating flavor. A rimmed baking sheet keeps any juices contained, and a light coating of high-heat oil prevents sticking; it also lets edges brown without burning. Common mistake to avoid here is using a cold oven, which can lengthen roasting time and yield a mushy texture rather than a roasted one.
- Wash the pumpkin to remove any dirt or grit from the outside of the pumpkin.: Cleansing the skin removes dust and any loose fibers that might otherwise transfer into the flesh while cutting and roasting. Rinsing under cool water and scrubbing gently will leave the surface clean and reduce the chance of unwanted grit in your purée. The skin itself is not used, so this step is about hygiene and ease of handling. Avoid leaving the pumpkin wet on the surface when you cut it, as excess water can make the cutting process slippery and less safe.
- Cut the pumpkin in half. It’s easiest to cut through the middle from the bottom of the pumpkin first that way you cut through the stem on the bottom. If the stem is too big, feel free to cut it off beforehand.: Cutting through the middle from the bottom makes the blade pass through the thickest part more safely and evenly, and tackling the stem first can be awkward if it is large. As you slice, you may hear the dull thud of the knife through dense flesh, and the exposed interior will reveal bright orange color and fibrous strands. A common misstep is trying to cut without a stable work surface, so place a damp towel under the board to prevent slipping and use a heavy, sharp knife for controlled cuts.
- Scoop out the pumpkin seeds into a bowl, reserve for another use, or discard.: As you remove the seeds and stringy fibers, you will feel the texture change from dense flesh to loose membranes. The seeds can be cleaned and roasted separately if you like a crunchy snack, or you can discard them if you prefer. Removing all the fibrous strands helps the purée blend to a silky finish, since leftover strings can create fibrous bits. A common oversight is leaving too many raw strands, which can make the final purée less smooth after processing.
- If desired, lightly season with salt. Place on a baking sheet cut side down.: Turning the pumpkin halves cut side down helps protect the exposed flesh from direct heat, encouraging even steaming and roasting at the same time. Lightly seasoning with salt at this stage can coax out additional flavor, and the contact with the hot sheet produces a gentle sear on the outer rim. You will notice steam escaping as the pumpkin roasts; that is normal. Avoid placing the halves too close together on the sheet, which can trap steam and prevent proper browning.
- Bake for 40-45 minutes until fork tender.: During roasting, the kitchen will fill with a sweet, toasty aroma and the flesh will collapse slightly, indicating moisture loss and concentration of flavor. Checking with a fork at about 40 minutes gives you the visual cue of tender flesh that slides away from the skin. This texture is crucial for a smooth purée that does not feel watery. Do not rely solely on time, as oven variations exist; if the fork meets resistance, continue roasting in 5 minute increments rather than undercooking.
- Let cool until safe to handle. Scoop out the tender filling and place in a food processor or high-speed blender and purée for 3-4 minutes until completely smooth.: Cooling is important for both safety and texture. As the pumpkin comes down in temperature the steam dissipates and the flesh firms slightly, making scooping easier and yielding a purée with less steaminess. I usually let mine rest until lukewarm so it is safe to touch but still easy to scoop. A rushed scooping while very hot can result in burns and a wetter purée due to trapped steam release.
- Store in an air-tight container for up to 1 week or store in freezer for up to 3 months.: The sensory shift here is gratifying as the bright orange flesh transforms into a glossy, velvety purée; you will hear the hum of the motor and see the texture change from fibrous to homogeneous. Blending thoroughly removes any remaining strings and helps incorporate air for a lighter mouthfeel. If your purée seems watery, pulse less and strain a little; overblending can also warm the purée too much, so use short pulses if using a powerful blender. A common mistake is assuming brief pulses are enough, leaving small fibrous pieces; aim for a smooth, consistent texture.
- Store in an air-tight container for up to 1 week or store in freezer for up to 3 months.: Proper storage preserves freshness and prevents freezer burn. In the fridge, use an airtight container and press plastic wrap directly onto the surface to limit oxidation. For longer storage, portion the purée into freezer-safe containers or bags, removing excess air. Label with the date so you can rotate stock easily. A typical error is refrigerating in a loosely covered bowl, which shortens shelf life and can introduce off flavors or moisture loss.
Notes
- Pick the right pumpkin: Opt for a sugar or pie pumpkin around 4 to 6 pounds; they have denser flesh and less water than large carving pumpkins, which yields a richer purée.
- Use a rimmed baking sheet: A rimmed sheet traps any juices and allows even roasting. It also prevents spills and helps thin caramelized edges form without burning.
- Check for fork tenderness: Rather than relying only on time, probe the flesh with a fork; it should slide in easily and the flesh should pull away when ready.
- Cool before processing: Allow the pumpkin to cool to lukewarm to reduce steam and make scooping safe and easier; this leads to a better texture.
- Portion and freeze: Freeze in small portions to thaw only what you need. This keeps the purée fresher and prevents waste.