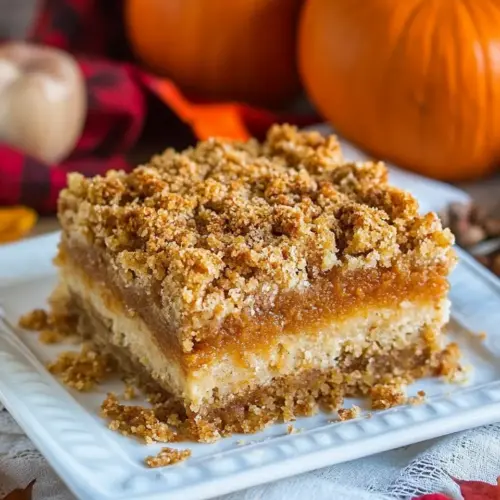
Pumpkin Pie Crumb Bars
Pumpkin Pie Crumb Bars deliver creamy spiced pumpkin tucked under a buttery, oat filled crumb. These easy to slice bars are perfect for fall parties and Thanksgiving gatherings, offering flaky texture and warm aromatics in every bite. Make them ahead for effortless hosting and enjoy a portable dessert that tastes comforting and homemade.
Equipment
- Mixing Bowl
- Whisk
- Spoon
- 8 by 8 inch baking dish
- Oven
Ingredients
- 1 1/4 cups (176 g) all-purpose flour (scoop and level to measure) Provide structure and tenderness to the crumb base, combining with fats and sugars to create a flaky texture when baked; measure by scooping and leveling for accuracy to maintain proper dough consistency.
- 1 1/4 cups (116 g) quick oats (old fashioned works too) Add chew and whole-grain flavor to the crust while absorbing some moisture; old-fashioned oats can be used interchangeably to contribute pleasant texture to the bars.
- 1/2 tsp salt Enhance overall flavor balance and strengthen gluten slightly while controlling fermentation and browning; small amount helps season the sweet components without tasting salty.
- 1/2 tsp baking soda Act as a leavening agent that reacts with acidic components to provide a light lift and prevent overly dense texture in the crumb layers.
- 1/2 cup (105 g) granulated sugar Sweeten the oat-and-flour crust while promoting browning and a crisp bite; granulated sugar also helps with structure and caramelization during baking.
- 1/2 cup (110 g) packed light-brown sugar Bring deeper molasses-like sweetness and moisture to the crust, promoting chewiness and richer flavor when combined with granulated sugar and butter.
- 3/4 cup (170 g) unsalted butter, melted Bind ingredients and add rich flavor and tenderness to the crust when melted and mixed; melted butter helps create a cohesive, crunchy crumble once cooled.
- 1 tsp vanilla extract Give warm, rounded flavor and enhance the baked aromas in the crust; vanilla extract complements both the buttery base and the pumpkin filling.
- 1/4 cup (50 g) granulated sugar Add sweetness to the pumpkin filling and help balance spices; granulated sugar dissolves smoothly into the custard for even sweetness.
- 1/4 cup (55 g) packed light brown sugar Contribute molasses depth and moisture to the filling, supporting creamy texture and enhancing the warm spice blend in the pumpkin layer.
- 1 tsp ground cinnamon Provide warm, aromatic spice that defines the pumpkin-scented profile and complements brown sugar and pumpkin puree in the filling.
- 1/2 tsp ground nutmeg Add nutty, warm complexity with slightly sweet and earthy notes that heighten the autumnal pumpkin flavor in the filling.
- 1/4 tsp ground ginger Deliver a bright, slightly peppery warmth that rounds out the spice mix and adds a subtle gingery lift to the custard.
- 1/8 tsp ground cloves Introduce an intense, slightly sweet and spicy note in tiny amounts to deepen the overall spice profile without overpowering the pumpkin.
- 1/4 tsp salt Balance and enhance the sweetness and spices in the filling while supporting the overall seasoning profile of the bars.
- 1 large egg Contribute richness, structure, and moisture to the filling; whole egg helps emulsify and set the custard during baking for a stable texture.
- 1 large egg yolk Increase richness and help thicken the custard more than a whole egg alone; the additional yolk adds silkiness to the pumpkin layer.
- 1/2 tsp vanilla extract Enhance the overall aroma and flavor subtly in the filling; vanilla extract rounds out the spices and sweeteners for a cohesive taste.
- 1 1/4 cups (296 g) canned pureed pumpkin Provide the primary pumpkin flavor and moisture for the custard, creating the signature color and body of the filling when combined with spices and eggs.
- 1/3 cup (85 ml) evaporated milk or half and half Supply creaminess and a touch of dairy fat to thin and enrich the pumpkin filling, contributing to a smooth, custardy texture.
- Sweetened whipped cream and cinnamon, for serving (optional) Garnish with light sweetness and a hint of spice for serving; whipped cream and a sprinkle of cinnamon complement the bars and enhance presentation.
Instructions
- Preheat oven to 350 degrees. In a mixing bowl, whisk together flour, oats, salt and baking soda for 30 seconds. Add in 1/2 cup granulated sugar and 1/2 cup brown sugar and mix until no clumps remain.: As the oven warms, you will notice a steady, dry heat that ensures even baking, and the preheated environment helps the crust begin to set quickly when it hits the pan. This matters because starting in a hot oven gives the crumb a head start on crisping, which prevents the filling from soaking in too much. A common mistake is not preheating long enough, which can cause uneven texture, so wait until the oven reaches temperature before you slide the pan in.
- Combine melted butter and vanilla and add to mixture, then stir with a spoon until evenly moistened.: Whisking dry ingredients aerates them and evenly distributes the baking soda and salt , which is essential for consistent rise and flavor. You should see a uniform, slightly powdery mix with visible oat flecks; this indicates even distribution. If you skip this step, pockets of leavener can cause uneven texture in the crust.
- Gently press half of the mixture into a greased 8 by 8-inch baking dish (a 9 by 9-inch baking dish would be great too, just reduce the baking time slightly as needed) and bake in preheated oven 15 minutes.: When you incorporate the granulated sugar and light brown sugar , the mixture takes on a slightly granular feel and a warmer color from the molasses. Mixing until no clumps remain ensures even sweetness and prevents dense, sugary pockets. If clumps persist, press them between your fingers to break them up, or sift briefly to avoid chewy spots.
- Meanwhile in a mixing bowl, whisk together 1/4 cup granulated sugar, 1/4 cup brown sugar, cinnamon, nutmeg, ginger, cloves and salt.: Adding the warm melted butter will change the texture to a cohesive, crumbly dough. You should hear a slight softening and see glossy crumbs as fat coats the dry ingredients. This step binds the mixture so it will press into the pan evenly. Avoid adding cold butter, which will not incorporate as smoothly and can lead to pockets of unmixed flour.
- Add in egg, egg yolk and vanilla and stir until blended. Mix in pumpkin then milk.: Pressing half the crumb into the pan creates a sturdy base, and when you bake it briefly the edges will begin to set and brown, giving a foundation that supports the filling. The surface should look slightly firm and pale golden after this bake. A common pitfall is pressing too thinly, which yields a fragile crust that can collapse; press evenly so the base is uniform in thickness.
- Pour mixture over baked cookie portion and return to oven to bake 15 minutes, then remove from oven and sprinkle remaining cookie crumb mixture over top while breaking the crumb into small bits.: Whisking these filling dry ingredients blends the spices so every spoonful tastes balanced; you should smell the warm, layered spice aroma as you mix. A homogeneous spice blend prevents any single spice from dominating a bite. If you measure spices inaccurately, the filling can taste off kilter, so level your spoons carefully.
- Transfer oven rack closer to the top-center (not directly beneath but a few levels below) and return to oven to bake about 20 - 25 minutes longer until golden on top and center only jiggles slightly.: Combining the egg , extra egg yolk , and vanilla first helps create an emulsified base, which then accepts the canned pureed pumpkin smoothly. The mixture should be silky and uniform, with the evaporated milk loosening it into a pourable custard. If the eggs are added cold or not mixed evenly, the filling may develop streaks or an inconsistent set, so stir until very smooth.
- Remove from oven and allow to cool 1 hour at room temperature, then transfer to refrigerator to cool 1 hour longer (or serve warm from the oven like a crumble with ice cream).: As you pour the filling, it should settle into the parbaked crust with a glossy surface; after 15 minutes the edges of the custard will begin to set while the center remains slightly jiggly. Sprinkling the remaining crumb on top creates a rustic, uneven lid that will bake to a golden crisp. If you press the crumb too firmly on top, you will lose that crackly texture, so keep the topping loose.
- Cut into squares and serve with sweetened whipped cream and a light dusting of cinnamon if desired.: Moving the pan upward promotes browning on the crumb topping without overcooking the base, and you want the top to achieve a warm golden color. The jiggle test is your best indicator the filling is set but not dry. Overbaking will yield a dry pumpkin layer, while underbaking leaves it too loose, so watch closely in the final minutes.
- Remove from oven and allow to cool 1 hour at room temperature, then transfer to refrigerator to cool 1 hour longer: Cooling first at room temperature lets the steam escape slowly, and chilling firms the filling so slices come out clean. The aroma at this stage is rich and spiced, with the crumb settling into a pleasant chew. If you try to slice while too warm, the bars will crumble and the filling will smear, so patience is key.
- Cut into squares and serve with sweetened whipped cream and a light dusting of cinnamon if desired: When you slice the chilled bars, you should hear a subtle snap from the crumb and see neat edges with a creamy interior. Serving with a dollop of sweetened whipped cream and a sprinkle of cinnamon adds an airy contrast and a finishing aroma. One mistake is cutting before the bars are fully chilled, which can lead to ragged slices, so use a sharp knife and wipe it between cuts for clean pieces.
Notes
- Measure flour properly by spooning it into the cup and leveling it off to avoid a dry, crumbly base that will not bind correctly.
- Use melted butter at warm, not hot so it incorporates smoothly without cooking the eggs if any warmth transfers during mixing.
- Watch the oven during the final bake as moving the pan closer to the top helps brown the crumb without overcooking the filling, check frequently in the last five minutes.
- Let the bars cool completely before slicing because chilling firms the custard and gives you clean edges when you cut squares.
- Keep the crumb topping chunky by breaking it into varied sized pieces for a rustic look and textural contrast after baking.
- Store chilled in an airtight container so the bars retain their texture for several days, and bring them to near room temperature before serving for the best mouthfeel.