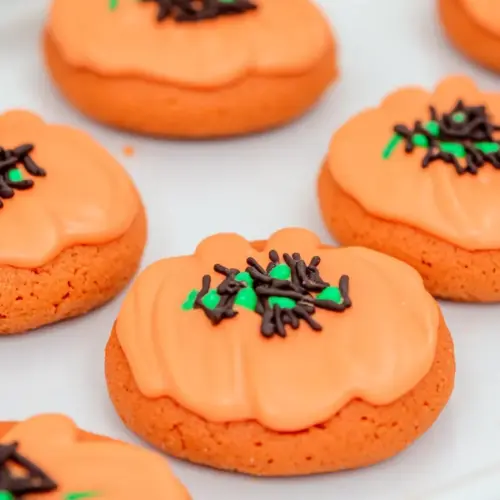
Pumpkin Patch Cookies
Pumpkin Patch Cookies are crispy, colorful, and easy to make for fall gatherings. These bite sized treats combine crunchy Oreo Cookies, glossy white melting chocolate, and a tiny candy pumpkin for a playful finish, perfect for quick holiday parties and school events. They set fast and travel well, making them an ideal no bake sweet to impress guests.
Equipment
- Microwaveable bowl
- Baking Sheet
- Parchment Paper
- Fork
- Ziplock bag or plate for crushing
Ingredients
- 18 Oreo Cookies Golden or Chocolate Crush to fine crumbs to form the cookie base and provide structure for the dipped treats; pressing into clusters helps the coating adhere evenly. Adds familiar chocolate or vanilla sandwich-cookie flavor and a slight crunch contrast to the soft interior.
- 8 ounces white melting chocolate I used two 4-ounce white chocolate baking bars Melt until smooth to create a pourable coating that sets firm around the cookie clusters; tempering slightly or melting gently prevents scorching and graininess. Provides a sweet, glossy shell that can be tinted and holds decorative shapes on the finished cookies.
- Orange food coloring Tint to a bright orange hue to transform the white coating into pumpkin-colored candy coating; start with a drop and blend until uniform for consistent color. Enhances visual appeal and signals the seasonal motif without altering texture when using gel or oil-based color.
- 18 mellowcreme pumpkin candies Press as pumpkin centers or toppers to give each cookie a recognizable seasonal accent and add chewy, fruity sweetness; place onto dipped cookies before coating fully sets. Supplies both decorative detail and a contrasting texture that reinforces the pumpkin theme.
Instructions
- Line a baking sheet with parchment paper and set aside.: The scent of parchment is neutral, and when you smooth it across the baking sheet you create a nonstick surface that lets the chocolate set cleanly without sticking. I press the edges so it does not shift when I place cookies, which makes assembly calmer. This prevents the common problem of cookies adhering to the tray and losing their glossy coating when lifted. If the parchment slides, tuck a small dab of chocolate under the corners to anchor it in place.
- Take 2-3 chocolate cookies and remove the cream from between the cookies. On a plate or in a ziplock bag, crush the cookies until it's a powder.: When I detach the cream, there is a crisp tearing sound and a gentle resistance that tells me the cookies are intact. I reserve the cream or discard it, then crush the cookies into fine crumbs on a plate or in a bag. The powder should look like dark soil, and that visual cue helps when sprinkling. Avoid leaving large chunks, which can make the topping uneven and interfere with the candy pumpkin sitting flat.
- In a small microwaveable bowl, melt the 8 ounces of chocolate (if using a baking bar, break into small pieces). Microwave for 1 minute, stir, then continue cooking in 15 second intervals until melted, stirring in between. Be sure not to overheat the chocolate.: Crushing releases the deep toasted aroma of the cookie, which contrasts nicely with the sweet chocolate coating. I use a ziplock and a rolling pin for control, pulsing until no sizeable pieces remain. The fine texture adheres nicely to wet chocolate. If you end up with coarse bits, sift or press them between fingers to break them down for a cleaner finish.
- Once the white chocolate is completely melted, add the orange food coloring. Add a few drops at a time and stir until the desired color is reached.: As the chocolate warms you will notice a glossy sheen and a silky texture when stirred. I heat in one minute, then in 15 second bursts, stirring between each cycle, so the residual heat completes melting without scorching. Overheating causes a grainy or clumpy texture and can seize the chocolate, which you can often fix by stirring in a tiny neutral oil if needed, but prevention is better than cure.
- Take one chocolate or vanilla cookie at a time and submerge it into the orange colored chocolate. If it's not deep enough to submerge, place one side of the cookie in the chocolate, then flip it over so that both sides are covered. Remove the chocolate covered cookie by scooping it up with a fork. Gently shake the cookie back and forth to remove excess chocolate and to get a smooth surface.: Listen for a soft, steady pop of heat from the microwave and watch the chocolate change from opaque to a glossy stream as you stir. The rhythmic stirring distributes heat and encourages a smooth emulsion. If it appears grainy, stop microwaving and stir vigorously to see if it smooths out; if not, a fresh bowl of melted chocolate is sometimes easier than trying to salvage seized chocolate.
- Place the cookie onto the parchment paper. While the chocolate is still wet, sprinkle the chocolate cookie crumbs on top, then add the pumpkin candy in the middle.: Overheating creates a dull, dry finish and the aroma can turn slightly burnt which undermines the sweet profile. Keep the temperature low and intermittent, and when most of the chocolate is melted remove it and stir until completely smooth. A thermometer is helpful, but visually you want creaminess, not lumps. If you detect any burnt smell, discard and start over for best results.
- Place cookies in the refrigerator for 10-15 minutes or until the chocolate has hardened and serve.: The color disperses in waves as you stir, and you will see the white base slowly take on a warm, autumnal hue. Add dye a few drops at a time until the shade suits you, stirring to avoid streaks. Using too much liquid coloring can thin the chocolate and delay setting, so opt for gel coloring to preserve texture. If the chocolate becomes too runny, chill briefly while stirring to thicken.
- Add a few drops at a time and stir until the desired color is reached: This step is about control and patience, because the final look matters. The stirring motion should be smooth and steady so the color distributes evenly, and the bowl will reflect a glossy, uniform orange when ready. Rushing can result in patchy streaks which show after setting, so take your time and adjust slowly for the perfect shade.
- Take one chocolate or vanilla cookie at a time and submerge it into the orange colored chocolate: Submerging creates a satisfying sound as the cookie breaks the surface tension of the melted coating. If full submersion is difficult, cover one side then flip to ensure even coverage. Use a fork to lower and lift the cookie, letting excess chocolate drip back into the bowl. The chocolate should form a thin, even coat; if it clumps, let excess drip longer to avoid heavy drips on the parchment.
- If it is not deep enough to submerge place one side of the cookie in the chocolate then flip it over so that both sides are covered: This two stage dip helps maintain a consistent thickness and avoids overloading the cookie with chocolate. When flipping, listen for a delicate slap as the cookie hits the surface, and watch the chocolate envelope the edges. A common mistake is moving too quickly and creating air pockets beneath the coating, which can cause cracking as it sets, so be gentle and deliberate.
- Remove the chocolate covered cookie by scooping it up with a fork: Scooping with a fork gives you control and lets excess chocolate fall through the tines, leaving a smooth finish. Gently tap the fork on the bowl edge to shed drips, then hold the cookie steady while shaking slightly to level the surface. If chocolate pools at the base, tilt the fork so it runs off; pooled chocolate can create uneven bases that make the candy pumpkin wobble when placed.
- Gently shake the cookie back and forth to remove excess chocolate and to get a smooth surface: This motion evens the coat and encourages a glossy finish, and you will see ripples calm into a glassy surface as excess sloughs off. The shaking also helps crumbs adhere when you sprinkle them, so time it right. Avoid vigorous shaking that might fling crumbs off or disturb the shape of the cookie.
- Place the cookie onto the parchment paper: As the cookie lands, there is a soft tap and the chocolate begins to set at the point of contact. Arrange cookies with space between them so air can circulate while they harden without touching. If cookies sit too close they can fuse at the edges, which spoils the neat round shape, so keep a little breathing room on the tray.
- While the chocolate is still wet sprinkle the chocolate cookie crumbs on top then add the pumpkin candy in the middle: The crumbs stick instantly, creating texture that contrasts with the smooth coat, and the single pumpkin becomes the centerpiece. Press the candy gently so it nests into the coating without sinking. If the chocolate starts to firm too quickly, work in shorter batches to maintain adhesion, because placing decorations on tacky, not set, chocolate yields the best results.
- Place cookies in the refrigerator for 10 to 15 minutes or until the chocolate has hardened and serve: The cool air firms the coating and sets the shine, and you will notice a faint snap when the chocolate is properly set. Ten to fifteen minutes is typically enough, but larger pools may need a bit longer. Avoid sudden temperature changes when removing from the fridge to prevent sweating, which can dull the finish, so let them sit at room temperature a couple of minutes before serving if you want the best sheen.
Notes
- Switch the cookie base: Try either golden or chocolate Oreo Cookies to change the flavor profile while keeping the same construction steps, each offering a distinct contrast to the orange coating.
- Adjust the color intensity: Add coloring gradually to find your perfect shade, which helps the cookies match a party theme or school colors without compromising texture.
- Alternate candy toppers: Use similar sized seasonal candies instead of the mellowcreme pumpkins for different holidays, keeping the same placement technique so the decoration adheres cleanly.
- Make them bite sized: Break cookies into halves for smaller portions that are easier for children to eat and perfect for high turnout events.
- Prep an assembly line: Lay out dipping, crumb sprinkling, and pumpkin placing stations so helpers can work together efficiently and the chocolate does not set before decorations are added.
- Control sheen with cool time: Chill just until firm to preserve gloss, then return to room temperature briefly before serving to prevent condensation from forming.