Pumpkin Cake
Pumpkin Cake is a tender, spiced dessert with creamy frosting and warm autumn notes. With moist pumpkin, gentle spices, and a tangy cream cheese frosting, it makes an easy weeknight dessert or a showstopping holiday centerpiece. It’s simple to assemble and forgiving to bake, making it a perfect pick when you want something cozy and crowd pleasing.
Equipment
- Oven
- 9 inch cake pan
- Mixing Bowl
- Whisk
- Serrated Knife
Ingredients
- 1 cup + 2 tablespoons all purpose flour gluten free, if needed Provides structure and bulk to the cake while forming the crumb; use all purpose flour for a tender texture and substitute a gluten-free blend if needed to maintain consistency. Sift or whisk to remove lumps and ensure even distribution with leaveners for uniform rise. Measure spooned and leveled to avoid dense results.
- 2 teaspoon baking powder Leavens the batter by producing carbon dioxide when activated, contributing to a light and fluffy cake crumb; combine evenly with the flour to prevent uneven pockets. Use fresh baking powder for reliable lift and avoid overmixing after adding wet ingredients to preserve aeration.
- 1/2 teaspoons salt Enhances overall flavor balance by bringing mild savory contrast that amplifies sweetness and spices; also supports gluten strength and controls yeast activity in other recipes. Dissolve evenly into dry ingredients to ensure consistent seasoning throughout the cake.
- 1 tablespoon pumpkin pie spice Adds warm, aromatic notes essential to pumpkin desserts; pumpkin pie spice blends cinnamon, nutmeg, ginger, cloves, and sometimes allspice for classic autumn flavor. Measure carefully to avoid overpowering the batter and mix thoroughly with dry ingredients so flavor distributes evenly.
- 1 teaspoon cinnamon Contributes bright, sweet-spicy warmth and complements the pumpkin flavor while enhancing perceived sweetness; cinnamon also adds aroma and depth to the cake. Use ground cinnamon mixed with other spices to create a balanced spice profile and stir well into the dry mix.
- 1 cup sugar* See notes Sweetens the batter and supports moisture and tenderness by interacting with fats and liquids; sugar also helps with browning and caramelization during baking for appealing color and flavor. Adjust slightly for personal sweetness preference and ensure it is fully dissolved into the wet ingredients.
- 1/3 cup oil canola, vegetable, or refined coconut oil Provides fat for moistness and tender crumb while carrying flavors and aiding mouthfeel; neutral oils like canola or vegetable are reliable, and refined coconut oil adds subtle richness without coconut taste. Mix oil thoroughly with wet ingredients to form a homogeneous batter and prevent greasy pockets.
- 3/4 cup pumpkin puree not pumpkin pie filling Delivers pumpkin flavor, moisture, and density to the cake while contributing to structure through its water content; use pure pumpkin puree, not pie filling, to avoid added sugars and spices. Stir puree into the wet mixture until smooth to ensure even flavor and texture throughout the cake.
- 2 tablespoons maple syrup Adds natural sweetness and a hint of maple complexity while contributing moisture; maple syrup can also enhance the caramelized notes in the finished cake. Whisk into the wet ingredients so it blends evenly and complements the sugar without causing separation.
- 1 teaspoon vanilla extract Imparts fragrant vanilla aroma and rounds out flavor by enhancing sweet and spice notes; pure vanilla extract offers the best depth though imitation can be used as needed. Add with other liquids to distribute its flavor uniformly throughout the batter.
- 1/4 cup water Adjusts batter consistency for proper hydration and helps dissolve dry ingredients for even texture; water is a neutral liquid that can be used to reach desired batter thickness without altering flavor. Add gradually and combine until just smooth to avoid thinning the batter excessively.
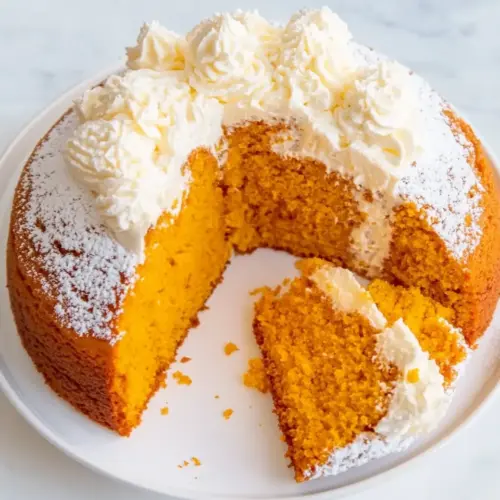
- 1 cup cream cheese frosting Provides a creamy, tangy finish and sweet topping that complements the pumpkin cake with richness and moisture; cream cheese frosting adds both flavor contrast and visual appeal when spread or piped. Chill briefly if too soft, and apply once the cake has cooled to prevent melting.
Instructions
- Preheat the oven to 180 C/350 F. Grease a 9-inch cake pan and set aside.: As the oven warms, you will notice a faint metallic hum and the interior light glows steady, signaling it's ready to cradle your batter. Preparing the pan is more than routine, it ensures the cake releases cleanly; grease every crevice with a thin layer of oil or butter and consider a parchment round for sure success. Smell cues change from cold air to warm, slightly dry heat, and that's your cue that the oven is stable. Why this matters, the even heat promotes uniform rise and a tender crumb. A common mistake is skipping the greasing step, which can make the cake stick and tear when you remove it, so take the extra minute here.
- In a mixing bowl, mix together your flour, baking powder, salt, pumpkin spice, and cinnamon. Add the sugar, oil, pumpkin puree, maple syrup, vanilla, and water, and mix until combined.: As you sift or whisk these dry components, the aroma of the spices will lift, and the mixture should look uniformly pale with tiny specks of brown from the cinnamon and pumpkin spice. This dry blending distributes the leavening and seasoning evenly so each bite carries balanced flavor and consistent texture. Use a whisk to incorporate air and break up any clumps, which helps the batter remain light. A mistake I often see is uneven mixing, leaving pockets of baking powder or spice that create bitter or overly salty bites, so whisk thoroughly until the mixture looks homogeneous.
- Transfer to the greased cake pan. Bake for 30 minutes, or until a skewer comes out just clean.: Once the wet ingredients join the dry, the batter will darken, and a sweet, autumnal scent will deepen. Mix gently until no streaks remain; overmixing can develop gluten and make the cake dense, while undermixing leaves flour pockets. The batter should be thick but pourable, the surface smooth with a few air bubbles indicating it's aerated. You will notice a glossy sheen from the oil and maple syrup. If the batter seems too thick, a splash more water can rescue texture, but be cautious with additions. A common misstep is vigorous mixing, which tightens the crumb and reduces tenderness, so fold with care until combined.
- Remove from the oven and let cool completely. Once cool, slice lengthways into three thin cakes or two larger ones.: Pouring the batter into the pan creates a quiet sound as it settles, and the surface evens itself. Slide it into the oven and the aroma will grow over time, filling your kitchen with spice and warmth. The edges will set first and slowly pull away from the pan, while the center rises and springs back when lightly touched. The skewer test is your most reliable check; insert near the center and if it emerges with just a few moist crumbs, it is done. Avoid opening the oven repeatedly, which drops the temperature and can cause uneven cooking. The most common error here is overbaking, resulting in a dry cake, so err on the side of checking a little early.
- Spread frosting on the base layer, add the next layer, add frosting, then top with the final layer. Spread cream cheese on top and on all the sides.: Cooling transforms the cake from fragile to manageable. As it rests, steam escapes and the crumb firms, so patience pays off. You will notice the aroma mellow and the exterior slightly drier to the touch, signaling readiness for slicing. Use a serrated knife for clean cuts; a bread knife saws gently without compressing the layers. When slicing into layers, steady hands and a slow back and forth motion prevent crumbs and jagged edges. A common pitfall is trying to frost while the cake is warm, which melts the frosting and leads to a sloppy finish, so resist the urge and wait until fully cool.
- Spread frosting on the base layer, add the next layer, add frosting, then top with the final layer. Spread cream cheese on top and on all the sides.: The act of frosting is tactile and satisfying, the cream cheese frosting should feel smooth and slightly tangy, providing a lovely contrast to the spiced crumb. Apply a thin crumb coat first to lock in stray crumbs, chill briefly if needed, then finish with a thicker, even layer that covers the top and sides. Visual cues are important the frosting should be smooth and hold ridges from your spatula if you like texture. Taste as you go, as the balance of tang and sweet is personal. Watch for too thin a layer, which can make the cake taste dry, and avoid overworking the frosting which can warm it and cause slipping.
Notes
- Swap sugars thoughtfully Use white, brown, or coconut sugar as noted in the recipe notes, and expect slight color and flavor differences; brown sugar adds molasses depth, while coconut sugar lends a caramel tone.
- Single layer option If you prefer simplicity, bake as a single layer in the same pan; the cake will cook similarly and is easier to transport.
- Make it gluten free Substitute with a reliable cup for cup gluten free flour blend and monitor texture, since absorption can vary across brands.
- Adjust spice levels Increase or decrease the pumpkin pie spice and cinnamon to suit your family preferences, keeping in mind that spices bloom as the cake rests.
- Frosting variations If you want less sweetness, thin the cream cheese frosting with a touch of lemon juice to brighten and balance the sugar.