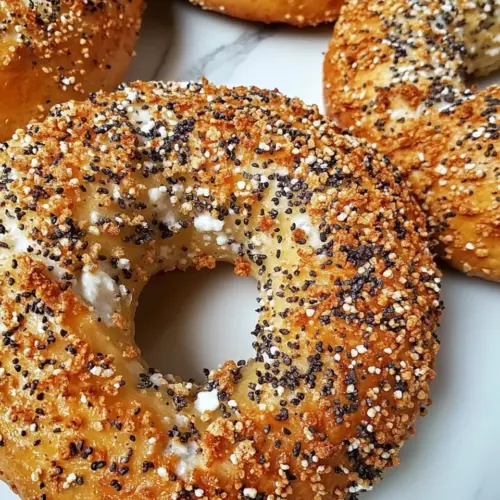
Protein Bagels with Cottage Cheese
Protein Bagels with Cottage Cheese are tender, slightly chewy rings made with strained cottage cheese for a creamy, high protein interior and a golden crust. They bake or air fry beautifully, making them an easy breakfast or meal prep staple for busy weeks. Try them topped with everything seasoning for crunchy, savory bites that keep you satisfied, perfect for a quick, healthy morning.
Equipment
- Air Fryer
- Sheet Pan
Ingredients
- 1 cup unbleached all purpose flour, or whole wheat or gluten-free mix like cup4cup, (5 oz total in weight) Provide structure and bulk to the dough, contributing gluten for chewiness; measure by weight when possible for consistent texture and sub whole wheat or a gluten-free mix if needed.
- 2 teaspoons baking powder, make sure it’s not expired or it won’t rise Leaven the bagels by releasing gas and creating lift; ensure freshness for proper rise and accurate measurement for even crumb and oven spring.
- 3/4 teaspoon kosher salt, use less if using table salt Season the dough by controlling overall saltiness and strengthening gluten; adjust quantity down if using finer table salt to avoid over-salting.
- 1 cup 2% cottage cheese, excess liquid strained well (I like Good Culture) Add moisture and protein while tenderizing the crumb; drain thoroughly to avoid excess liquid that would make the dough too wet and alter consistency.
- 1 egg white, or 1 large egg, beaten Bind ingredients and add richness while improving crust color when beaten; use just the white for a leaner option or the whole beaten egg for more color and flavor.
- optional: everything bagel seasoning, sesame seeds, poppy seeds, dried garlic flakes, dried onion flakes Enhance surface flavor and crunch when sprinkled on top before baking; apply sparingly as a finishing touch to complement the bagel's roasted notes.
Instructions
- In a large bowl combine the flour, baking powder and salt and whisk well. Add the strained cottage cheese and mix with a fork or spatula until well combined, it will look like small crumbles.: The moment you bring the dry flour , baking powder , and salt together, inhale deeply, you ll notice a faint mineral, earthy scent from the flour . As you whisk, the mixture should look uniformly pale and powdery. When you add the strained cottage cheese , the texture changes immediately to little curds dispersed through the dry base, a tactile clue that moisture is integrating. Use a fork or a stiff spatula to press the curds into the dry base, and you ll feel resistance turning into small, cohesive crumbles. This step matters because uneven mixing creates pockets of dry flour or large wet clumps, which lead to inconsistent texture after baking. If you notice large wet patches, stir more deliberately and press the curds into the dry mixture until the distribution looks even. A common mistake is rushing and leaving large bits of unincorporated cottage cheese , which makes some bagels overly wet inside.
- Using your clean hands, working in the bowl, knead the dough until it comes together and is smooth, tacky, but not sticky, about 2 minutes (it should not leave dough on your hand when you pull away).: Right away you ll feel the dough warming as your hands coax it, and the texture will shift from crumbly to cohesive. Aim for a surface that is slightly tacky rather than wet, because excess moisture will prevent a proper crust. Press and fold, turning the dough as you go, and you ll notice the strands of gluten aligning creating a smoother surface. This short knead is critical for structure, since overworking will make the bagels tough, while underworking leaves them crumbly. Listen for a quiet, soft thud as you press the dough; that means it s firming up. If the dough begins to feel gummy, sprinkle a teaspoon of flour at a time to rescue it. Avoid adding too much flour , as that can dry the crumb.
- Divide into 4 equal balls. Roll each ball into 3/4-inch thick ropes and join the ends to form bagels. (or you can make a ball and poke a hole in the center then stretch it slightly): When you portion the dough into four, you ll feel the weight distribution and a smooth outer skin develop on each ball. Rolling into ropes lets you even out thickness, and when you join the ends, you should see a neat seam that seals under slight pressure. The alternative method of poking a hole creates a rustic center that can vary in size, which some people prefer for a softer ring. Visual cues to watch for include an even rope thickness and a sealed seam, otherwise the bagel might open while cooking. A frequent error is uneven ropes that produce lopsided rings, so take an extra moment to measure by eye so each bagel bakes uniformly.
- Top with egg wash and sprinkle both sides with seasoning of your choice.: The egg wash gives a warm, golden gloss and helps the seeds or seasoning adhere. Brush lightly using the beaten egg or egg white, and then gently press the seasoning onto the surface so it stays put. You ll notice a subtle sheen before baking that becomes an appetizing brown afterwards. If you use too much wash, the toppings can clump or slide; if you use too little, they won t stick. Avoid overloading the surface with heavy flakes, which can burn in the oven or air fryer .
- Spray air fryer basket with oil. Transfer the bagels to the air fryer basket in batches without overcrowding and air fry 280 F 15 to 16 minutes, or until golden. No need to turn.: In the air fryer , a light spray prevents sticking and encourages an even crisp exterior. At 280 F you ll hear a faint sizzle and smell toasted notes as the surface browns. The bagels will develop a steady golden color, and they should feel firm at the edges while the center remains slightly springy. Crowding reduces air flow, leading to uneven browning, so work in single layers. A common pitfall is removing them too early; underbaked centers collapse when cut. If your air fryer runs hot, reduce time slightly and check for color, not just clock time.
- Let cool at least 15 minutes before cutting, this step is a must.: Cooling is a critical rest where steam redistributes and the crumb sets, giving you clean slices instead of a gummy interior. As they cool you ll sense a faint sweet aroma and the exterior will firm slightly. Cutting too soon crushes the structure and releases steam that should stay inside, producing a denser mouthfeel. Be patient, and when you touch the surface it should feel cool to warm rather than hot. A typical mistake is slicing immediately, which causes shredding and a gummy texture.
- Preheat oven to 375 F. Place parchment paper or a silpat on a baking sheet. If using parchment paper, spray with oil to avoid sticking.: Preheating the oven ensures the bagels start baking immediately and develop proper crust. The moment you slide them in, moisture at the surface turns to steam and then to heat that sets the crumb and browns the exterior. Using parchment or a silpat prevents sticking and promotes even browning on the bottom. If your sheet is cold or the oven is not fully heated, the bagels can spread and lose a crisp edge. Avoid placing them too close together on the sheet.
- Bake on the top rack of the oven for 25 minutes. Let cool at least 15 minutes before cutting, this step is a must.: Baking on the top rack encourages a brighter, more golden top while the overall oven heat cooks through. During the 25 minute bake you ll notice a toasty aroma and a gentle rise as the baking powder does its work. The crust should be even and slightly firm to the touch when done. Again, allow the same cooling time to let the interior set so slices are clean and the crumb is tender. Opening the oven early or cutting too soon are common errors that compromise texture.
Notes
- Strain the cottage cheese: Properly straining the cottage cheese is the single best way to prevent a sticky dough. I place the cottage cheese in a fine mesh sieve lined with cheesecloth for 15 to 30 minutes and press gently. If you skimp on straining you may need to add more flour, which changes texture and tenderness.
- Adjust flour type mindfully: Switching to whole wheat or a gluten free mix affects hydration and crumb. Whole wheat absorbs more liquid and gives nuttier flavor, while a 1 to 1 gluten free mix like cup4cup aims to mimic all purpose; weigh ingredients for best consistency when experimenting.
- Freezing and reheating: Cool the cooked bagels completely, then wrap each tightly in plastic and foil before freezing. Reheat in a 350 F oven wrapped in foil until warmed through, this restores softness while protecting the crust from burning. Avoid microwaving, which can make them gummy.
- Air fryer tips: Lightly spray the air fryer basket to prevent sticking and air fry in a single layer without overcrowding. If your air fryer has hot spots, rotate the basket once midway through the time to ensure even color.
- Egg wash alternatives: Use an egg white for a subtle gloss or whole egg for deeper color. Brushing sparingly keeps seeds from sliding off and promotes an even golden finish without over browning.