Pizzeria Pizza Dough
Pizzeria Pizza Dough yields a chewy, blistered crust with a tender interior and crisp exterior, perfect for an easy weeknight dinner or a weekend pizza night. This simple dough uses pantry staples like all purpose flour and yeast to deliver authentic pizzeria texture, with flexible proofing and freezing options to suit busy schedules. Make it to enjoy customizable pies that bake up beautifully in a hot oven.
Equipment
- Mixing Bowl
- Stand mixer
- Dough Hook
- Baking sheet or pizza stone
Ingredients
- 1 (1/4 ounce) package active dry yeast Activate yeast by dissolving it in lukewarm water to help the dough rise; allows fermentation that produces carbon dioxide and flavor. Ensure water temperature is warm but not hot to avoid killing the yeast and wait until foamy before mixing into dough.
- 1 – 1 1/3 cups lukewarm water Provide lukewarm water to hydrate yeast and flour, creating the dough's structure and enabling gluten development. Measure temperature and volume carefully because too much or too little water alters dough consistency and handling.
- 3 -4 cups all purpose flour Give bulk and structure to the dough while forming gluten networks that trap gas for a chewy crust; adjust amount within the range to achieve proper dough hydration. Use all-purpose flour as a versatile option that balances protein for chewiness without being overly strong like bread flour.
- 1 tablespoon olive oil, plus extra for greasing bowl and brushing on pizza crust Add olive oil to tenderize the dough and contribute subtle flavor while improving crust texture and browning; also used for greasing and brushing to prevent sticking. Incorporate during mixing for even distribution and reserve a bit for coating the bowl and finished crust.
- 1 tablespoon sugar Provide a touch of sweetness to feed the yeast and enhance browning and flavor development in the crust; helps kickstart fermentation and balances savory notes. Dissolve sugar into the water or sprinkle on yeast to speed activation.
- 1 1/2 teaspoons kosher salt Season the dough to enhance overall flavor while helping regulate yeast activity and strengthen gluten formation slightly. Use kosher salt measured accurately and avoid direct contact with yeast before dilution to prevent inhibition.
Instructions
- Combine the yeast and water in a bowl and allow to stand until foamy, about 5 minutes. (Make sure to check the expiration date on the yeast. If it doesn’t foam, your yeast may be old and you will need to buy fresh yeast.): When you first mix the yeast into lukewarm water , inhale the faint yeasty aroma as it wakes up, a clean, slightly sweet scent that says activity is beginning. Bubbling foam at the surface is the visual cue you want, like tiny islands breaking across the bowl, and it usually happens within about 5 minutes when the temperature is right. The reason this matters is that foaming proves the yeast is alive and capable of producing the carbon dioxide that will lighten the dough, and skipping this check risks a flat crust. A common mistake is using water that is too hot, which will kill the yeast and prevent foaming, so always test the liquid on your wrist to ensure it is comfortably warm not hot.
- Stir 3 cups of the flour and salt into a bowl (or the bowl of a standing mixer, using a dough hook attachment).: As you add the all purpose flour and kosher salt , feel the dry mixture release a faint, wheaty scent and watch the texture change from powder to a coarse sand. Mixing them first distributes the salt evenly so it does not prematurely stun the yeast . This step matters because even distribution yields consistent gluten development during kneading. A mistake people make here is adding all the flour at once; since absorption varies, start with 3 cups and keep the extra on hand to adjust the dough consistency.
- Add the olive oil and honey to the yeast mixture and stir to combine.: When you incorporate the olive oil and sugar into the foamy yeast mixture, you will see the liquid glisten and smell the oil's fruity note. The oil contributes to tenderness in the crust and helps with handling, while the sugar gives the yeast an initial boost. This matters because fat interrupts some gluten strands, creating a softer bite in the final crust. Avoid adding cold oil straight from the fridge because it slows fermentation; room temperature is best.
- Add the liquid mixture to the dry ingredient mixture on the low setting for 3 minutes or until smooth and elastic (you can also combine the liquid with the flours in a bowl and knead the dough by hand on a clean surface for 10 minutes until smooth and elastic). You want the dough to be smooth and bounce back when you press it. If your dough is too wet and sticky, add more flour, 1/4 cup at a time, until you reach a soft and elastic consistency.: As the machine mixes or your hands fold the dough, you will notice the sticky mass come together into a cohesive ball, and the sound will shift from clumping to a gentle, consistent thump against the bowl. The dough should become smooth and spring back when pressed, a tactile sign that gluten is developing properly. This step is essential for creating the structure that traps air while baking, and if you skip the full knead you may end with dense spots. A common error is overflouring during kneading to make the surface feel dry; instead, use small amounts of flour sparingly to retain hydration and chew.
- Transfer ball of dough to an oiled bowl, cover the top of the bowl with a dish towel and let rise for 1 hour. The dough will double in size.: When you place the dough into an oiled bowl, the surface becomes glossy and the dough slides easily as it relaxes. Covering it keeps humidity consistent so the outer skin does not dry out, and after about 1 hour you should see the dough double in size and feel airy to the touch. This rise forms flavor and texture through gentle fermentation, which is why patience here pays off with better tasting crust. A frequent misstep is proofing in a cold spot, which prolongs the rise, so pick a warm, draft free area for consistent results.
- Preheat oven to 500° F.: Cranking the oven to a high temperature creates the rapid heat needed for crisping the exterior and producing the characteristic pizzeria blistering. You will hear an oven hum as it approaches temperature and smell a faint dry heat. Preheating thoroughly matters because slipping a cold pizza into a not fully heated oven leads to a pale, rubbery crust. Avoid opening the oven repeatedly while it preheats because heat loss makes it harder to reach the target temperature.
- Turn dough out onto a lightly floured surface and knead for 15 seconds. Cut into 4 equal balls, form each into rounds and flatten with your hands into a disk. Let the disks rest for 5 minutes.: The brief knead helps redistribute gases and smooth the surface, and when you divide and form rounds you can feel the tension building in the skin of each ball. Flattening into disks and letting them rest allows the gluten to relax which makes stretching easier without springing back. The rest period also yields a quieter workspace as the dough becomes more pliable. A common mistake is skipping the rest which leads to persistent resistance when stretching, increasing the risk of tearing.
- Take a disk and, holding the dough at the edges, pinch and pull the dough to 9 inches across. Periodically switch from pulling and pinching the dough to stretching it out using your knuckles. If you’re feeling adventurous, form your hands into fists, rest the dough on top of them and stretch outwards. Don’t be scared to throw the dough up in the air! It actually helps form an even circle. (This last bit was recommended to me by my friend who used to work in a famous pizza kitchen!): As you pinch and pull, concentrate on alternating between pulling with your fingertips and stretching with your knuckles, listening for a soft tearing sound at first that soon subsides as the gluten relaxes. The dough will develop a thin center and a slightly thicker rim, which is ideal for a balanced crust. If you choose to toss the dough, you may hear the air move inside like soft pops, and this theatrical method also helps form an even circle. Avoid forcing the dough if you feel thin spots forming, instead let gravity and gentle tension do the work to prevent holes.
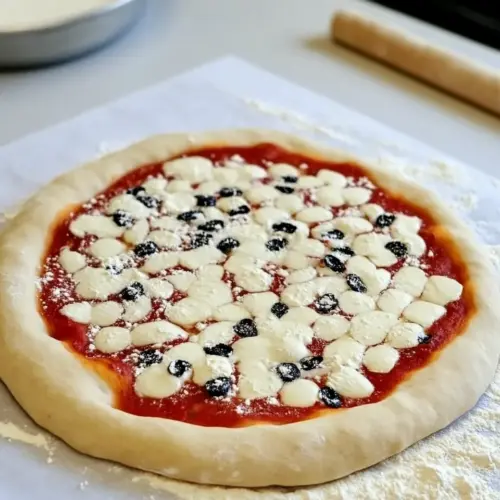
- Spread sauce on your dough and top with desired toppings. Bake 10-15 minutes, or until crust is golden brown.: Once the pizza is dressed, the oven work begins and you will notice the aroma of baking all purpose flour and the sauce intensifying, with edges becoming golden and slightly blistered. A visual cue is a deep golden rim and bubbling center; if cheese is used, it should brown lightly. Baking at high heat creates steam that puffs the crust quickly, giving you a crisp exterior and tender interior. Do not overload with toppings which can impede browning and leave the center soggy, and keep an eye in the final minutes to prevent burning.
- To Freeze: After step 7, place one round disk on a parchment lined plate or cookie sheet and layer the rest of the disks on top, laying parchment in between each disk. Freeze for one hour and then transfer the stack of frozen pizza disks to a freezer bag. Disks can be stored in the freezer for up to 3 months. When ready to use: remove the disk(s) from the freezer and let them defrost in the refrigerator for 24 hours. Then, let them come to room temperature and continue following steps 8 and 9.: After step 7, place one round disk on a parchment lined plate or cookie sheet and layer the rest of the disks on top, laying parchment in between each disk. Freeze for one hour and then transfer the stack of frozen pizza disks to a freezer bag : Freezing at this stage locks in the shaped dough, and the quick one hour freeze prevents the disks from sticking together. When you transfer to a freezer bag, remove excess air to minimize freezer burn and label with the date, since they will keep up to 3 months. This method gives you ready made dough that defrosts predictably and bakes into a fresh tasting crust. A slip people make is freezing unseparated disks which then tear when pried apart, so always use parchment between layers.
- Disks can be stored in the freezer for up to 3 months. When ready to use: remove the disk(s) from the freezer and let them defrost in the refrigerator for 24 hours. Then, let them come to room temperature and continue following steps 8 and 9 : During thawing the dough will slowly regain elasticity and the chilled surface will warm evenly, which prevents overproofing at room temperature. Bringing them to room temperature before shaping ensures the dough becomes supple and easier to stretch, and you will notice the surface shine return as the gluten relaxes. A common error is baking straight from frozen which results in an undercooked center, so plan ahead and allow adequate defrost time for best texture.
Notes
- Adjust hydration carefully - If your dough feels too sticky, add up to 1/4 cup extra all purpose flour at a time until it is manageable; if it seems dry, increase the lukewarm water slightly. These changes affect the final crumb and bite, so make small increments and record what works for your flour brand.
- Control proofing temperature - For a slower, more flavorful rise, proof in a cooler spot for longer; for a quick rise, pick a warmer area. Temperature influences fermentation speed and flavor development, so use room variations to your advantage.
- Oil the bowl generously - A thin coat of olive oil prevents sticking and creates a smoother outer surface to the dough which helps when you turn it out for shaping. It also adds subtle flavor through the crust edges.
- Scale the recipe easily - If you need fewer or more pizzas, divide or multiply the ingredient amounts proportionally, keeping the ratios the same so texture remains consistent. Remember proofing times may shift slightly with volume.
- Preheat thoroughly - Make sure the oven reaches 500° F before baking to get that quick oven spring and blistering. A pizza stone or steel, if available, will concentrate heat and improve crust development.