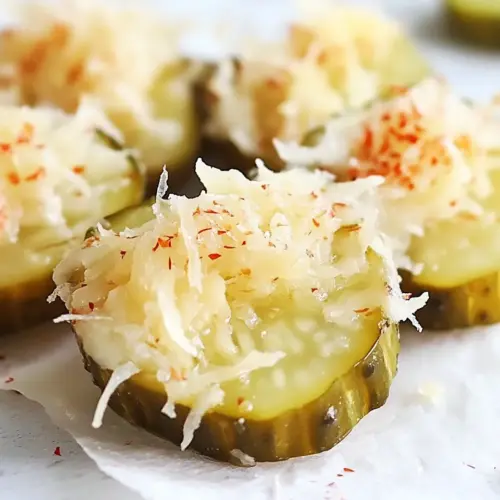
Pickles and Cheese
Pickles and Cheese is a quick, crunchy snack combining tangy dill pickles with warm, melty shredded mozzarella cheese for a creamy yet crispy bite. Perfect for easy weeknight snacking or last minute entertaining, this simple pairing delivers bright acidity and toasty edges that keep people coming back. Make it for its playful texture contrast and effortless preparation.
Equipment
- nonstick skillet
- Spatula
- Paper towels
Ingredients
- Shredded mozzarella cheese Melts smoothly to create a creamy, stretchy texture that binds other components and adds mild, milky flavor; sprinkle or layer for gooey richness in hot preparations. Enhances mouthfeel and balances tangy or acidic elements while offering familiar comfort-food appeal.
- Paprika Adds warm, smoky complexity and vibrant color when dusted over dishes; use sparingly to prevent overpowering delicate flavors. Complements roasted or fried notes and enhances visual appeal with a subtle depth.
- Garlic powder Provides a concentrated savory punch that heightens overall flavor without adding moisture; great for seasoning blends and dry rubs. Offers garlicky aroma and umami support while blending seamlessly into dairy or breaded preparations.
- Dill pickles petite, sliced, wedges, etc., drained Contributes bright acidity and crunchy texture that contrasts creamy and fatty elements; drain well to avoid diluting preparations. Brings tangy, vinegary notes and a refreshing bite that cuts through richness and refreshes the palate.
Instructions
- Prepare the Cheese: In a small skillet, sprinkle a handful of shredded mozzarella cheese, forming a circle about the size of your pickle. This will be the cheesy wrap for your pickle.: The skillet warms the cheese and releases a nutty aroma as it begins to melt, with soft bubbling at the center and glossy edges forming around the circle. You'll notice a gentle sizzle as the shredded mozzarella cheese hits the pan, and the scent should be mildly dairy rich not burnt. This stage matters because starting with an even cheese circle ensures a uniform wrap around the pickle later. Watch for fast browning, that indicates the heat is too high. A common mistake is using too large a pile, which slows melting and prevents crisp edges.
- Season the Cheese: Lightly sprinkle paprika and garlic powder over the cheese. You can add as little or as much as you want.: As the cheese loosens and becomes pliable, sprinkle the paprika and garlic powder , which will bloom in the residual heat and add aromatic lift. You may smell a warm, slightly smoky note from the paprika and a savory undertone from the garlic powder. Seasoning now allows the spices to integrate into the molten cheese rather than sitting on top. Over seasoning can mask the pickle's brightness, so go light until you find the balance you like.
- Melt and Crisp the Cheese: Heat the skillet over medium-high heat. Allow the cheese to melt and cook until the skillet side becomes crispy and golden brown. This should take just a few minutes.: Keep the skillet over medium high heat so the bottom of the cheese forms a thin, golden crust while the top stays soft and supple, creating contrast in texture. You'll hear a sustained, low sizzle that turns into a quieter patter as moisture evaporates. Visual cues include a bubbling center and lacy edges that turn golden brown; when you see these, the cheese has developed that desirable crispness. If you rush this on too high heat, it will char rather than crisp properly, leaving a bitter flavor. Patience here yields a crunchy, toasty edge that elevates the whole snack.
- Wrap the Pickle: Place a pickle at the edge of the melted cheese. Using a spatula, carefully roll the cheese around the pickle, creating a cheesy wrap.: Place the dill pickles at the circle's edge and, using a spatula , gently roll the cheese around the pickle so it adheres and forms a neat wrap. You'll feel a slight resistance as the cheese cools and tightens around the pickle, and the sound is a soft sliding as the spatula moves. This technique seals the pickle in a warm, cheesy envelope which allows the flavors to mingle. If the cheese has cooled too much, it becomes rigid and cracks instead of wrapping smoothly; work promptly when the cheese is pliable but not overly runny.
- Drain and Serve: Remove the cheese-wrapped pickle from the skillet and place it on a paper towel to drain any excess oil. Serve hot and enjoy!: Transfer the cheese wrapped pickle to paper towels to absorb any excess oil and let it sit for a moment so the cheese firms slightly for easier handling. The aroma should be a mix of toasted cheese and tangy pickle, and the surface will glisten from the residual oil. Letting them rest briefly prevents them from falling apart and helps avoid burning your fingers. A common error is serving immediately without draining, which can make the snack greasy and less pleasant to hold.
Notes
- Adjust the cheese amount: Match the amount of shredded mozzarella cheese to the pickle size; larger pickles need a larger cheese circle to wrap fully and achieve a balanced cheese to pickle ratio.
- Try different pickle cuts: Petite whole pickles provide a sturdy center while sandwich slices give you more surface area for cheese, affecting the snack's bite and assembly technique.
- Control your heat: Keep the skillet at medium high to develop golden edges without burning; if you see smoke, lower the heat immediately to prevent a bitter taste.
- Season lightly: Start with a small pinch of paprika and garlic powder and taste, because the pickle brine already adds a salty tang that can amplify other seasonings.
- Use the right tools: A flexible spatula and a nonstick skillet make wrapping easier and reduce breakage when lifting the cheese.
- Drain briefly: Place finished pieces on paper towels to remove excess oil, which improves texture and serving presentation.